# Accepting Payments
## Checkout and In-Person
- [Hosted Payment Page options](https://docs.payme.io/accepting-payments/checkout-and-in-person/hosted-payment-page-options): Pre-fill PayMe's hosted payment page with the buyer's details, read the parameters of the success redirect to sale_return_url, and show sale_url in an iframe.
# Hosted Payment Page options
## Pre-fill the payment page
You can pre-fill the buyer's details on the payment page in two ways:
- send `sale_name`, `sale_email` and `sale_mobile` in [`generate-sale`](https://docs.payme.io/payments/hosted-payment-page/post-generate-sale) to pre-fill the name, email and phone;
- append query parameters to the `sale_url` you received. Query parameters override the values from `generate-sale`.
| Parameter | Description |
|---|---|
| `first_name` | Cardholder's first name |
| `last_name` | Cardholder's last name |
| `phone` | Cardholder's phone number |
| `email` | Cardholder's email address |
| `social_id` | Cardholder's social ID, used for cards issued in Israel |
| `zip_code` | Cardholder's ZIP code, used for cards issued in the USA, Canada and the United Kingdom |
Example: `sale_url + "?first_name=First&last_name=Last&phone=0500000002&email=test@example.com"`
Notes:
- Card fields can't be pre-filled, for security reasons.
- A value that fails validation isn't shown on the form.
## Success redirect
After a successful payment, PayMe redirects the buyer (inside the iframe, or the full page) to the `sale_return_url` you sent, with the sale details as query parameters.
Example redirect URL: `https://www.example.com/payment/success?payme_status=success&payme_signature=75e99dbcb25cdfbe1c62f0b9376f4144&payme_sale_id=XXXXXXXX-XXXXXXXX-XXXXXXXX-XXXXXXXX&payme_transaction_id=XXXXXXXX-XXXXXXXX-XXXXXXXX-XXXXXXXX&price=10000¤cy=USD&transaction_id=12345&is_token_sale=0&is_foreign_card=0`
| Parameter | Example | Description |
|---|---|---|
| `payme_status` | `success` | `success`, or `error` after a failed attempt |
| `payme_signature` | `75e99dbcb25cdfbe1c62f0b9376f4144` | MD5 signature. How to verify it is on [Callbacks](https://docs.payme.io/payments/getting-started/callbacks) ("Verifying a callback") |
| `payme_sale_id` | `XXXXXXXX-XXXXXXXX-XXXXXXXX-XXXXXXXX` | PayMe's sale ID |
| `payme_transaction_id` | `XXXXXXXX-XXXXXXXX-XXXXXXXX-XXXXXXXX` | PayMe's transaction ID |
| `price` | `10000` | Sale amount in minor units (50.75 is `5075`) |
| `currency` | `USD` | Sale currency, a 3-letter ISO 4217 code |
| `transaction_id` | `12345` | Your order reference |
| `is_token_sale` | `0` | `1` for a token sale |
| `is_foreign_card` | `0` | `1` when the card was issued outside Israel |
| `status_error_code` | | Only when `payme_status` is `error`: PayMe's error code |
| `status_error_details` | | Only when `payme_status` is `error`: the error message |
Use the redirect only to show the buyer a result page. Update your order from the [callback](https://docs.payme.io/payments/getting-started/callbacks).
## Showing `sale_url` in an iframe
`sale_url` works inside an iframe, 3D Secure included. Some issuing banks block their own 3D Secure screen inside an iframe, so keep a fallback that opens the page in a full window. The page reports completion with a `postMessage` to the parent window and by the redirect to `sale_return_url`.
- [Hosted Fields JSAPI guide](https://docs.payme.io/accepting-payments/checkout-and-in-person/hosted-fields-jsapi-guide): Add PayMe Hosted Fields to your own checkout: how the flow works, a complete minimal page, five working examples, charging the token from your server, and the full JavaScript API reference with every error shape.
# Hosted Fields JSAPI guide
Hosted Fields put PayMe's card inputs inside your own checkout form. Each card input is a PayMe iframe, so the card goes straight from the buyer's browser to PayMe, and your page and server only ever see a token. You style the form; you charge the token from your server.
Use Hosted Fields when the checkout must look native to your site. Otherwise the [Hosted Payment Page](https://docs.payme.io/payments/hosted-payment-page) needs less code: see [Integration Options](https://docs.payme.io/payments/getting-started/integration-options).
## How it works
| Step | Where | What happens |
|---|---|---|
| 1 | Browser | Load PayMe's script, then `PayMe.create(publicKey)` |
| 2 | Browser | Create and mount the card fields in your form |
| 3 | Browser | `instance.tokenize(saleData)` returns a token |
| 4 | Your server | Charge the token with [generate-sale](https://docs.payme.io/payments/hosted-fields-jsapi/post-generate-sale-hosted-fields-jsapi) |
| 5 | Your server | Confirm the result before you fulfil the order |
## Before you start
- **The seller's public key.** `PayMe.create` takes this key, a uuid, and never an MPL or a partner key. A direct seller finds it in the dashboard, under Admin → API & Integration → Hosted Fields JSAPI Credentials. A partner gets it from `create-seller` or `GET /sellers/{mpl}/public-keys`.
- **The environment.** Use `testMode: true` with a sandbox key and `false` in production. A sandbox token can't pay a live sale.
- **Test cards.** In the sandbox, use the [test cards](https://docs.payme.io/payments/getting-started/test-cards-and-payment-methods).
- **Your Content Security Policy.** If your site sets one, allow PayMe:
```
script-src https://cdn.payme.io;
frame-src https://hf.payme.io;
connect-src https://hf.payme.io;
```
`connect-src` is needed only for `PayMe.clientData()`, which [3DS with Hosted Fields](https://docs.payme.io/accepting-payments/3d-secure/3ds-with-hosted-fields) uses. Apple Pay and Google Pay need more: see [Apple Pay](https://docs.payme.io/accepting-payments/payment-methods/apple-pay) and [Google Pay](https://docs.payme.io/accepting-payments/payment-methods/google-pay).
## Minimal integration
This page is complete. Put in your public key, open it and pay with a test card. Tested with a sandbox key and a test card.
```html
Checkout
```
Then [charge the token](#charge-the-token) from your server.
## Charge the token
Send the token to your server and make the call there, with your MPL. Never call PayMe's server API from the browser.
Build the request on your server:
| `generate-sale` field | Where it comes from |
|---|---|
| `buyer_key` | `token` from the tokenize result |
| `sale_price` | Your own order, as an integer in minor units: `55.00` becomes `5500` |
| `currency` | Your own order |
| `product_name` | Your own order |
The browser's amount is display only, so never take the charge amount from it. Show the buyer the same amount your server will charge.
```json
{
"seller_payme_id": "MPLDEMO-MPLDEMO-MPLDEMO-1234567",
"sale_price": 5500,
"currency": "ILS",
"product_name": "Order 1234",
"transaction_id": "order-1234",
"buyer_key": "BUYERDEMO-BUYERDEMO-BUYERDEMO-1234567"
}
```
`POST` it to `https://sandbox.payme.io/api/generate-sale`, or `https://live.payme.io/api/generate-sale` in production. With a `buyer_key`, the call charges straight away and answers with the result:
```json
{
"status_code": 0,
"payme_sale_id": "SALE1655-3843870J-NTPYLJNW-SOWRLK9X",
"sale_status": "completed"
}
```
The response has other fields as well. See [generate-sale with a token](https://docs.payme.io/payments/hosted-fields-jsapi/post-generate-sale-hosted-fields-jsapi) for every field.
### Which token you get
| `tokenIsPermanent` | Charging the token | In the sandbox |
|---|---|---|
| `true` (default) | Can be charged again later, so store it as you would a saved card | A second charge completed |
| `false` | Charges once | A second charge failed with error `604`, "Buyer inactive" |
### When you need `pay-sale`
If you need the sale to exist first, call `generate-sale` without a `buyer_key`, keep its `payme_sale_id`, tokenize, then call [pay-sale](https://docs.payme.io/payments/direct-api/post-pay-sale) with `payme_sale_id` and `buyer_key`. It completes the same way in the sandbox. [3DS with Hosted Fields](https://docs.payme.io/accepting-payments/3d-secure/3ds-with-hosted-fields) uses this order.
## Rules that cost people time
- **One token per instance.** After a successful `tokenize()` the instance is spent, and a second call rejects. After a failed call you can call `tokenize()` again on the same instance, or start from a new instance.
- **Create only the fields you mount.** `tokenize()` waits for a value from every field you created, so a field that is created but never mounted makes it wait forever.
- **Clear the container before you remount.** `mount()` adds its iframe to the container rather than replacing what's there, so a new instance mounted into an old container shows two card fields. Mounting the same field twice fails with `already mounted`.
- **Give each container a height.** A PayMe field has no height of its own and collapses to nothing without one.
- **Mount failures can be silent.** In a sandboxed iframe without `allow-same-origin`, `create` and `mount` still succeed while the fields stay blank and `tokenize` never answers. Check your page's iframe attributes if that happens.
- **Use the public key.** `PayMe.create` takes the seller's public key, never an MPL or a partner key.
- **The browser's amount isn't the charge.** `total.amount.value` is a decimal string for display. Set `sale_price`, in minor units, on your server.
## Examples
Five working designs, each with its full code. Each runs in the sandbox with a test card and stops at the token: nothing is charged. Copy the files of the one closest to your design and put in your public key. `checkout-form.js` and `hosted-fields.js` are the same in all five.
**Compact form**
Buyer details and card fields in one panel.
The page shows first name, last name, email, phone and social ID as ordinary inputs in one teal panel, and card number, expiry and CVV in a second panel, each of those three inside a PayMe frame. Pressing Pay asks PayMe for a token and shows it with the name, email and card mask, and a Try again button that mounts the form anew. Nothing is charged, and the token goes nowhere: a real checkout sends it to your server, which pays the sale with it. Invalid or empty fields are marked before any request is made; a request that fails shows PayMe's message under the button and starts again with a new instance. Use test cards only.
`index.html`
```html
Compact form
Token received
Name
Email
Card
Token
```
`checkout.js`
```javascript
import { mountCheckout } from './checkout-form.js';
// This one script runs both the English and the Hebrew page: the page's lang picks.
const { lang } = document.documentElement;
mountCheckout({
// The seller's PUBLIC key, from the dashboard or from create-seller.
sellerPublicKey: 'YOUR_SELLER_PUBLIC_KEY',
language: lang,
// Display only: the amount charged is the one on the server-side sale.
total: { label: 'Example order', currency: lang === 'he' ? 'ILS' : 'USD', amountMinor: 5500 },
// Only these properties are honoured, under base, invalid and valid.
styles: {
base: { color: '#ffffff', 'font-size': '13.5px', '::placeholder': { color: '#acd7e4' } },
invalid: { color: '#ff0000' },
valid: { color: '#ffffff' },
},
});
```
`styles.css`
```css
* {
box-sizing: border-box;
}
[hidden] {
display: none !important;
}
html {
background: #d7e6ec;
}
body {
display: flex;
align-items: center;
justify-content: center;
min-height: 100vh;
margin: 0;
padding: 28px 20px;
color: #fff;
font: 13.5px/1.4 Arial, sans-serif;
}
form,
#success {
position: relative;
width: 100%;
max-width: 320px;
}
.panel {
margin-bottom: 14px;
border-radius: 4px;
background: #619d9e;
box-shadow: 0 2px 10px rgba(0, 0, 0, 0.18);
}
.row {
display: flex;
align-items: center;
gap: 10px;
height: 38px;
padding: 0 12px;
border-bottom: 1px solid #158a89;
}
.row:last-child {
border-bottom: 0;
}
.row span,
.row dt {
flex: 0 0 70px;
font-weight: 500;
}
[dir='rtl'] .row span {
flex-basis: 104px;
white-space: nowrap;
}
.row input {
flex: 1;
min-width: 0;
padding: 0;
border: 0;
outline: 0;
background: none;
color: #fff;
font: inherit;
}
.row input::placeholder {
color: #acd7e4;
opacity: 1;
}
.row.is-invalid input {
color: #ff0000;
}
.row.is-invalid,
[dir='rtl'] .row.is-invalid {
box-shadow: inset 0 -2px 0 #ff0000;
}
.row.is-focused {
box-shadow: inset 2px 0 0 #fff;
}
[dir='rtl'] .row.is-focused {
box-shadow: inset -2px 0 0 #fff;
}
.card-row {
display: flex;
align-items: center;
gap: 10px;
height: 40px;
padding: 0 12px;
}
/* A cross-origin frame has no height of its own, so its container needs one. */
.card-row .field {
height: 22px;
}
#card-number {
flex: 1;
min-width: 0;
}
#card-expiry {
flex: 0 0 52px;
}
#card-cvv {
flex: 0 0 34px;
}
.card-row .is-invalid {
box-shadow: 0 2px 0 #ff0000;
}
button {
width: 100%;
height: 42px;
margin-top: 8px;
border: 0;
border-radius: 4px;
background: #158a89;
color: #fff;
font: 500 15px 'Segoe UI', system-ui, sans-serif;
cursor: pointer;
}
[dir='rtl'] button {
font-family: Arial, sans-serif;
}
button:hover:enabled {
box-shadow: 0 0 12px rgba(0, 0, 0, 0.35);
}
button:disabled {
opacity: 0.65;
cursor: default;
}
/* Below the button, so a message doesn't move the centred form. */
#error {
position: absolute;
top: 100%;
right: 0;
left: 0;
margin: 10px 0 0;
color: #000;
text-align: center;
}
#success {
padding-bottom: 12px;
}
#success h1 {
margin: 0;
padding: 12px;
border-bottom: 1px solid #158a89;
font-size: 15px;
font-weight: 600;
}
#success dl {
margin: 0;
}
#success dd {
flex: 1;
min-width: 0;
margin: 0;
overflow: hidden;
text-overflow: ellipsis;
white-space: nowrap;
}
#again {
display: block;
width: calc(100% - 24px);
margin: 12px 12px 0;
}
```
`checkout-form.js`
```javascript
/**
* A checkout form around PayMe's card fields, shared by the live examples.
* The page brings the markup and the look; this file brings the behaviour.
*
* What it expects on the page:
* #checkout the form, with #submit and an #error line inside it
* #card-number, #card-expiry, #card-cvv empty containers with a height
* input[name] the payer fields
* #success hidden until a token arrives, with [data-result] slots to fill
* (name, email, card, token) and an #again button
*
* Words live in the page: a container's data-placeholder, and data-required
* and data-invalid on a container or an input, replace PayMe's English.
*
* What it sets, for the page's CSS, on the closest .field:
* is-focused, is-filled, is-invalid
*/
import { mountHostedFields } from './hosted-fields.js';
const CONTAINERS = { number: '#card-number', expiry: '#card-expiry', cvv: '#card-cvv' };
const CONTAINER_OF_FIELD = { cardNumber: CONTAINERS.number, cardExpiration: CONTAINERS.expiry, cvc: CONTAINERS.cvv };
const $ = (selector) => document.querySelector(selector);
const fieldOf = (element) => element.closest('.field') ?? element;
/** A failure's words: PayMe's tokenize errors are a map of field to message. */
function failureMessage(failure) {
const [first] = Object.values(failure?.errors ?? {});
return first ?? failure?.message ?? $('#error').dataset.fallback;
}
/** A container's words, as the options PayMe's field takes. */
function fieldWords(selector) {
const { placeholder, required, invalid } = $(selector).dataset;
return { placeholder, messages: { required, invalid } };
}
/**
* Mount the card fields, wire the form, and mount again after each attempt.
*
* @param {object} opts
* @param {string} opts.sellerPublicKey the seller's PUBLIC key (uuid), never an MPL
* @param {string} opts.language 'en' | 'he'
* @param {object} opts.styles the card fields' look (see hosted-fields.js)
* @param {{label: string, currency: string, amountMinor: number}} opts.total
* @param {(values: object) => object} [opts.payer] turns the form's inputs into the payer
* fields, when a page doesn't name its inputs after them or leaves some out
*/
export function mountCheckout({ sellerPublicKey, language, styles, total, payer = (values) => values }) {
const form = $('#checkout');
const submit = $('#submit');
const error = $('#error');
const success = $('#success');
const inputs = [...form.querySelectorAll('input[name]')];
const cards = Object.values(CONTAINERS).map($);
let session = null;
/** Each card field's latest state from PayMe, by container id. */
let cardStates = {};
/** An input's problem in words, or null: PayMe's own rule for a payer field, else the input's. */
function inputProblem(input) {
const rule = window.PayMe?.validators?.[input.name];
const problems = rule ? rule.test(input.value) : null;
if (rule ? !problems : input.checkValidity()) return null;
return input.value.trim() ? input.dataset.invalid : input.dataset.required;
}
/** A card field's problem in words, or null. A field never touched has no state yet: it's empty. */
function cardProblem(container) {
const state = cardStates[container.id];
if (state?.isValid) return null;
return !state || state.isEmpty ? container.dataset.required : container.dataset.invalid;
}
const problemOf = (element) => (element.matches('input') ? inputProblem(element) : cardProblem(element));
/** A problem put right; the words go with the last one. A failed request's words stay until the next attempt. */
function markFixed(field) {
if (!field.classList.contains('is-invalid')) return;
field.classList.remove('is-invalid');
if (!form.querySelector('.is-invalid')) error.textContent = '';
}
function onCardEvent(state) {
const container = $(CONTAINER_OF_FIELD[state.field]);
cardStates[container.id] = state;
const field = fieldOf(container);
if (state.event === 'focus') field.classList.add('is-focused');
if (state.event === 'blur') field.classList.remove('is-focused');
field.classList.toggle('is-filled', !state.isEmpty);
// While typing, only clear a problem; a new one shows when the buyer leaves the field.
if (state.isValid) markFixed(field);
else if (state.event === 'blur' && !state.isEmpty) field.classList.add('is-invalid');
}
function setBusy(busy) {
submit.disabled = busy;
submit.setAttribute('aria-busy', String(busy));
}
// One instance, one tokenize(): every attempt starts from a new one.
async function mount() {
setBusy(true);
session?.teardown();
session = null;
cardStates = {};
for (const container of cards) fieldOf(container).classList.remove('is-focused', 'is-filled', 'is-invalid');
try {
session = await mountHostedFields({
sellerPublicKey,
testMode: true,
containers: CONTAINERS,
language,
styles,
tokenIsPermanent: false,
fieldOptions: {
number: fieldWords(CONTAINERS.number),
expiry: fieldWords(CONTAINERS.expiry),
cvv: fieldWords(CONTAINERS.cvv),
},
listeners: { focus: onCardEvent, blur: onCardEvent, keyup: onCardEvent, 'validity-changed': onCardEvent },
});
setBusy(false);
} catch (failure) {
error.textContent = failureMessage(failure);
submit.setAttribute('aria-busy', 'false');
}
}
for (const input of inputs) {
const field = fieldOf(input);
input.addEventListener('focus', () => field.classList.add('is-focused'));
input.addEventListener('blur', () => {
field.classList.remove('is-focused');
field.classList.toggle('is-invalid', Boolean(input.value && inputProblem(input)));
});
input.addEventListener('input', () => {
field.classList.toggle('is-filled', Boolean(input.value));
if (!inputProblem(input)) markFixed(field);
});
}
form.addEventListener('submit', async (event) => {
event.preventDefault();
if (!session) return;
const elements = [...form.querySelectorAll('input[name], #card-number, #card-expiry, #card-cvv')];
for (const element of elements) fieldOf(element).classList.toggle('is-invalid', Boolean(problemOf(element)));
const invalid = elements.find(problemOf);
if (invalid) {
error.textContent = problemOf(invalid);
return;
}
setBusy(true);
error.textContent = '';
const details = payer(Object.fromEntries(new FormData(form)));
try {
// A real checkout sends this token to your server, which pays the sale with it.
const { token, cardMask } = await session.tokenize(details, total);
const results = {
name: `${details.payerFirstName} ${details.payerLastName}`,
email: details.payerEmail,
card: cardMask,
token,
};
for (const slot of success.querySelectorAll('[data-result]')) slot.textContent = results[slot.dataset.result];
form.hidden = true;
success.hidden = false;
$('#again').focus();
} catch (failure) {
error.textContent = failureMessage(failure);
await mount();
}
});
$('#again').addEventListener('click', () => {
form.reset();
for (const input of inputs) fieldOf(input).classList.remove('is-filled', 'is-invalid');
success.hidden = true;
form.hidden = false;
mount();
});
return mount();
}
```
`hosted-fields.js`
```javascript
/**
* PayMe Hosted Fields (JSAPI) — the browser half of tokenization. Vanilla ES
* module, no framework. Port the calls into your own frontend; keep the rules.
*
* 1. browser: PayMe.create(sellerPublicKey) -> instance
* instance.hostedFields() -> create + mount
* instance.tokenize(saleData) -> { token, card, ... }
* 2. server: generate-sale with buyer_key = token -> charge
*
* Card data goes browser -> PayMe's vault inside cross-origin iframes. It never
* touches your server, which keeps you out of PCI DSS scope.
*
* Guide: https://docs.payme.io/accepting-payments/checkout-and-in-person/hosted-fields-jsapi-guide
*
* RULES (each one has cost someone an afternoon):
* - PayMe.create takes the seller's PUBLIC key (a uuid). Never a partner key
* and never an MPL: both are server-side credentials. A partner gets the key
* from create-seller or GET /sellers/{mpl}/public-keys, which is partner-only.
* A direct seller takes it from the dashboard: Admin -> API & Integration,
* section Hosted Fields JSAPI Credentials.
* - testMode must match the environment you charge in: true for sandbox,
* false for production. A sandbox token cannot pay a live sale.
* - One instance, one tokenize(). A second call fails with "Bad session —
* Session expired or deleted". After any failure, clear the containers and
* start again from a NEW instance.
* - mount() appends; it does not replace. Empty the containers before
* remounting or the buyer sees two card fields.
* - Containers need an explicit height (e.g. 44px). A cross-origin iframe
* has no intrinsic height and collapses to nothing.
* - total.amount.value is a DECIMAL STRING ("50.75"), not minor units. It is
* display-only; the amount charged is the one on the server-side sale, so
* keep them equal.
* - Any payer field you do not mount must be passed as a value in tokenize().
* Card number, expiry and CVV must always be mounted, never passed.
* - Styles: only `base`, `invalid`, `valid` groups, with `::placeholder`
* nested inside `base`. Only color, font-size, text-align, letter-spacing,
* text-decoration, text-shadow, text-transform are honoured. Anything else
* is dropped silently.
* - CSP: script-src https://cdn.payme.io, frame-src https://hf.payme.io.
*/
const SCRIPT_URL = 'https://cdn.payme.io/hf/v1/hostedfields.js';
const DEFAULT_STYLES = {
base: { color: '#1a1a1a', 'font-size': '15px', '::placeholder': { color: '#8a8a8a' } },
invalid: { color: '#b00020' },
valid: { color: '#1a1a1a' },
};
let loader = null;
/** Load hostedfields.js once. */
export function loadPayMeSdk() {
if (window.PayMe) return Promise.resolve(window.PayMe);
if (loader) return loader;
loader = new Promise((resolve, reject) => {
const script = document.createElement('script');
script.src = SCRIPT_URL;
script.async = true;
script.onload = () =>
window.PayMe
? resolve(window.PayMe)
: reject(new Error('hostedfields.js loaded but window.PayMe is undefined'));
script.onerror = () =>
reject(
new Error(
`Could not load ${SCRIPT_URL}. An ad blocker or a CSP without cdn.payme.io in script-src will block it.`,
),
);
document.head.appendChild(script);
}).catch((error) => {
loader = null; // allow a retry
throw error;
});
return loader;
}
/**
* Mount card fields into three empty containers and return a one-shot
* `pay()` function.
*
* @param {object} opts
* @param {string} opts.sellerPublicKey the seller's PUBLIC key (uuid), never an MPL
* @param {boolean} opts.testMode true in sandbox, false in production
* @param {{number: string, expiry: string, cvv: string}} opts.containers CSS selectors
* @param {(event: object) => void} [opts.onValidity] per-field validity updates
* @param {string} [opts.language] 'en' | 'he'
* @param {object} [opts.styles] the card fields' look, under the rules above
* @param {boolean} [opts.tokenIsPermanent] false for a single-use token
* @param {{number?: object, expiry?: object, cvv?: object}} [opts.fieldOptions]
* each field's own `placeholder` and `messages: { required, invalid }`
* @param {Record void>} [opts.listeners]
* field events by name, such as focus, blur and keyup, on all three fields
*/
export async function mountHostedFields({
sellerPublicKey,
testMode,
containers,
onValidity,
language = 'en',
styles = DEFAULT_STYLES,
tokenIsPermanent = true,
fieldOptions = {},
listeners = {},
}) {
const PayMe = await loadPayMeSdk();
const instance = await PayMe.create(sellerPublicKey, {
testMode,
language,
tokenIsPermanent,
});
const fields = instance.hostedFields();
const number = fields.create('cardNumber', { styles, placeholder: 'Card number', ...fieldOptions.number });
const expiry = fields.create('cardExpiration', { styles, placeholder: 'MM/YY', ...fieldOptions.expiry });
const cvv = fields.create('cvc', { styles, placeholder: 'CVV', ...fieldOptions.cvv });
for (const field of [number, expiry, cvv]) {
if (onValidity) field.on('validity-changed', onValidity);
for (const [event, listener] of Object.entries(listeners)) field.on(event, listener);
}
// mount() appends — clear first so a remount does not duplicate fields.
for (const selector of Object.values(containers)) {
document.querySelector(selector).replaceChildren();
}
await Promise.all([
number.mount(containers.number),
expiry.mount(containers.expiry),
cvv.mount(containers.cvv),
]);
let used = false;
/**
* Tokenize once. Resolves with the token to send to YOUR server, which then
* calls generate-sale with buyer_key = token. Never call PayMe's server API from
* the browser.
*
* @param {object} payer payerFirstName, payerLastName, payerEmail, payerPhone, payerSocialId
* @param {{label: string, currency: string, amountMinor: number}} total
*/
async function tokenize(payer, total) {
if (used) {
throw new Error('This Hosted Fields session was already used. Remount to start again.');
}
used = true;
const result = await instance.tokenize({
...payer,
total: {
label: total.label,
// Decimal string for display only; must equal the server-side sale price.
amount: { currency: total.currency, value: (total.amountMinor / 100).toFixed(2) },
},
});
return { token: result.token, cardMask: result.card?.cardMask };
}
/** Remove the fields and end this instance, before mounting a new one. */
function teardown() {
instance.teardown();
}
return { tokenize, teardown };
}
```
[Run this example](https://docs.payme.io/run/compact/index.html). [Test cards](https://docs.payme.io/payments/getting-started/test-cards-and-payment-methods).
**Hebrew, right to left**
The same form with Hebrew labels, right-to-left layout and shekel pricing.
The same script and styles as the compact form, with the page in Hebrew (lang="he", dir="rtl"), PayMe's fields set to language he, Hebrew placeholders and messages, and a total in shekels (₪). Pressing Pay asks PayMe for a token and shows it with the name, email and card mask, and a Try again button that mounts the form anew. Nothing is charged, and the token goes nowhere: a real checkout sends it to your server, which pays the sale with it. Invalid or empty fields are marked before any request is made; a request that fails shows PayMe's message under the button and starts again with a new instance. Use test cards only.
`index.html`
```html
טופס קומפקטי
התקבל טוקן
שם
דוא״ל
כרטיס
טוקן
```
`checkout.js` is the same file as under **Compact form** above.
`styles.css` is the same file as under **Compact form** above.
`checkout-form.js` is the same file as under **Compact form** above.
`hosted-fields.js` is the same file as under **Compact form** above.
[Run this example](https://docs.payme.io/run/compact-hebrew/index.html). [Test cards](https://docs.payme.io/payments/getting-started/test-cards-and-payment-methods).
**Rounded, dark theme**
Fields styled to match a dark brand.
The page shows rounded fields on a dark indigo background, the payer inputs and PayMe's three card frames in the same shape. A focused or filled field turns white and an invalid one coral. Pressing Pay asks PayMe for a token and shows it with the name, email and card mask, and a Try again button that mounts the form anew. Nothing is charged, and the token goes nowhere: a real checkout sends it to your server, which pays the sale with it. Invalid or empty fields are marked before any request is made; a request that fails shows PayMe's message under the button and starts again with a new instance. Use test cards only.
`index.html`
```html
Rounded, dark theme
Token received
Name
Email
Card
Token
```
`checkout.js`
```javascript
import { mountCheckout } from './checkout-form.js';
mountCheckout({
// The seller's PUBLIC key, from the dashboard or from create-seller.
sellerPublicKey: 'YOUR_SELLER_PUBLIC_KEY',
language: 'en',
// Display only: the amount charged is the one on the server-side sale.
total: { label: 'Example order', currency: 'USD', amountMinor: 2500 },
// Only these properties are honoured, under base, invalid and valid.
// The text is dark because a focused or filled field turns white (styles.css).
styles: {
base: { color: '#565b7d', 'font-size': '13.5px', '::placeholder': { color: '#c6cfe4' } },
invalid: { color: '#ffffff' },
valid: { color: '#565b7d' },
},
});
```
`styles.css`
```css
* {
box-sizing: border-box;
}
[hidden] {
display: none !important;
}
html {
background: #555a7f;
}
body {
display: flex;
align-items: center;
justify-content: center;
min-height: 100vh;
margin: 0;
padding: 28px 20px;
color: #fff;
font: 13.5px/1.4 Arial, sans-serif;
}
form,
#success {
position: relative;
width: 100%;
max-width: 320px;
}
.pill {
display: flex;
align-items: center;
height: 38px;
margin-bottom: 7px;
padding: 0 16px;
border-radius: 40px;
background: #7482aa;
transition: background 0.3s;
}
.pill input {
width: 100%;
min-width: 0;
padding: 0;
border: 0;
outline: 0;
background: none;
color: #565b7d;
font: inherit;
}
.pill input::placeholder {
color: #c6cfe4;
opacity: 1;
}
/* A cross-origin frame has no height of its own, so its container needs one. */
.pill > div {
position: relative;
top: -2px;
width: 100%;
height: 22px;
}
.pill.is-focused,
.pill.is-filled {
background: #fff;
}
.pill.is-invalid {
background: #f8735e;
}
.pill.is-invalid input {
color: #fff;
}
.two {
display: grid;
grid-template-columns: 1fr 1fr;
gap: 7px;
}
.three {
display: grid;
grid-template-columns: 1fr 1fr 1fr;
gap: 7px;
}
.gap {
height: 12px;
}
button {
width: 100%;
height: 40px;
margin-top: 12px;
border: 0;
border-radius: 50px;
background: #fcdd60;
color: #3b3b4f;
font: 600 14px 'Segoe UI', system-ui, sans-serif;
letter-spacing: 0.02em;
text-transform: uppercase;
cursor: pointer;
}
button:hover:enabled {
box-shadow: 0 0 14px rgba(0, 0, 0, 0.4);
}
button:disabled {
opacity: 0.65;
cursor: default;
}
/* Below the button, so a message doesn't move the centred form. */
#error {
position: absolute;
top: 100%;
right: 0;
left: 0;
margin: 10px 0 0;
text-align: center;
}
#success {
padding: 18px;
border-radius: 18px;
background: #7482a7;
box-shadow: 0 2px 10px rgba(0, 0, 0, 0.2);
}
#success h1 {
margin: 0 0 8px;
font-size: 15px;
font-weight: 600;
}
#success dl {
margin: 0;
}
#success dl div {
display: flex;
align-items: center;
height: 34px;
}
#success dt {
flex: 0 0 56px;
font-weight: 600;
}
#success dd {
flex: 1;
min-width: 0;
margin: 0;
overflow: hidden;
text-overflow: ellipsis;
white-space: nowrap;
}
```
`checkout-form.js` is the same file as under **Compact form** above.
`hosted-fields.js` is the same file as under **Compact form** above.
[Run this example](https://docs.payme.io/run/rounded-dark/index.html). [Test cards](https://docs.payme.io/payments/getting-started/test-cards-and-payment-methods).
**Minimal lines**
A light form with underlined fields.
The page shows underlined fields on white, the payer inputs and PayMe's three card frames alike. The underline turns green on focus and red when invalid. Pressing Pay asks PayMe for a token and shows it with the name, email and card mask, and a Try again button that mounts the form anew. Nothing is charged, and the token goes nowhere: a real checkout sends it to your server, which pays the sale with it. Invalid or empty fields are marked before any request is made; a request that fails shows PayMe's message under the button and starts again with a new instance. Use test cards only.
`index.html`
```html
Minimal lines
Token received
Name
Email
Card
Token
```
`checkout.js`
```javascript
import { mountCheckout } from './checkout-form.js';
mountCheckout({
// The seller's PUBLIC key, from the dashboard or from create-seller.
sellerPublicKey: 'YOUR_SELLER_PUBLIC_KEY',
language: 'en',
// Display only: the amount charged is the one on the server-side sale.
total: { label: 'Example order', currency: 'USD', amountMinor: 2500 },
// Only these properties are honoured, under base, invalid and valid.
styles: {
base: { color: '#000000', 'font-size': '14px', '::placeholder': { color: '#aeb8c4' } },
invalid: { color: '#ff0000' },
valid: { color: '#000000' },
},
});
```
`styles.css`
```css
* {
box-sizing: border-box;
}
[hidden] {
display: none !important;
}
html {
background: #fff;
}
body {
display: flex;
align-items: center;
justify-content: center;
min-height: 100vh;
margin: 0;
padding: 28px 20px;
color: #000;
font: 14px/1.4 Arial, sans-serif;
}
form,
#success {
position: relative;
width: 100%;
max-width: 320px;
}
.line {
display: flex;
align-items: flex-end;
height: 42px;
padding-bottom: 7px;
border-bottom: 2px solid #e6eaef;
transition: border-color 0.3s;
}
.line input {
width: 100%;
min-width: 0;
padding: 0;
border: 0;
outline: 0;
background: none;
color: #000;
font: inherit;
}
.line input::placeholder {
color: #aeb8c4;
opacity: 1;
}
/* A cross-origin frame has no height of its own, so its container needs one. */
.line > div {
width: 100%;
height: 22px;
}
.line.is-focused {
border-bottom-color: #30b280;
}
.line.is-invalid {
border-bottom-color: #ff0000;
}
.line.is-invalid input {
color: #ff0000;
}
.two {
display: grid;
grid-template-columns: 1fr 1fr;
gap: 14px;
}
button {
width: 100%;
height: 42px;
margin-top: 26px;
border: 0;
border-radius: 4px;
background: #00c07d;
color: #fff;
font: 600 14px 'Segoe UI', system-ui, sans-serif;
letter-spacing: 0.02em;
text-transform: uppercase;
cursor: pointer;
}
button:hover:enabled {
box-shadow: 0 0 10px rgba(0, 0, 0, 0.4);
}
button:disabled {
opacity: 0.65;
cursor: default;
}
/* Below the button, so a message doesn't move the centred form. */
#error {
position: absolute;
top: 100%;
right: 0;
left: 0;
margin: 10px 0 0;
color: #ff0000;
text-align: center;
}
#success {
padding: 18px;
border-radius: 4px;
background: #30b280;
color: #fff;
box-shadow: 0 2px 10px rgba(0, 0, 0, 0.2);
}
#success h1 {
margin: 0 0 8px;
font-size: 15px;
font-weight: 600;
}
#success dl {
margin: 0;
}
#success dl div {
display: flex;
align-items: center;
height: 36px;
border-bottom: 1px solid #fff;
}
#success dt {
flex: 0 0 56px;
font-weight: 600;
}
#success dd {
flex: 1;
min-width: 0;
margin: 0;
overflow: hidden;
text-overflow: ellipsis;
white-space: nowrap;
}
#again {
margin-top: 16px;
background: #fff;
color: #30b280;
}
```
`checkout-form.js` is the same file as under **Compact form** above.
`hosted-fields.js` is the same file as under **Compact form** above.
[Run this example](https://docs.payme.io/run/minimal-lines/index.html). [Test cards](https://docs.payme.io/payments/getting-started/test-cards-and-payment-methods).
**Pay in a dialog**
A "Pay with card" button that opens the form in a dialog.
The page shows one Pay with card button, which opens a native dialog with full name, email and PayMe's three card frames; the close button or Escape closes it. The fields mount once when the page loads, so the dialog opens ready. The payer fields the dialog doesn't ask for go to PayMe as fixed fake values. Pressing Pay asks PayMe for a token and shows it with the name, email and card mask, and a Try again button that mounts the form anew. Nothing is charged, and the token goes nowhere: a real checkout sends it to your server, which pays the sale with it. Invalid or empty fields are marked before any request is made; a request that fails shows PayMe's message under the button and starts again with a new instance. Use test cards only.
`index.html`
```html
Pay in a dialog
```
`checkout.js`
```javascript
import { mountCheckout } from './checkout-form.js';
const dialog = document.querySelector('#payment');
// The button starts disabled, so an early click isn't lost before this script runs.
const open = document.querySelector('#open-payment');
open.addEventListener('click', () => dialog.showModal());
open.disabled = false;
document.querySelector('#close-payment').addEventListener('click', () => dialog.close());
mountCheckout({
// The seller's PUBLIC key, from the dashboard or from create-seller.
sellerPublicKey: 'YOUR_SELLER_PUBLIC_KEY',
language: 'en',
// Display only: the amount charged is the one on the server-side sale.
total: { label: 'Example order', currency: 'USD', amountMinor: 2500 },
// Only these properties are honoured, under base, invalid and valid.
styles: {
base: { color: '#000000', 'font-size': '13.5px', '::placeholder': { color: '#9aa3ae' } },
invalid: { color: '#ff0000' },
valid: { color: '#000000' },
},
// The dialog asks for less: PayMe needs two names, and the fields not shown go as values. These are fake.
payer: ({ fullName, payerEmail }) => {
const [payerFirstName, ...rest] = fullName.trim().split(/\s+/);
return {
payerFirstName,
payerLastName: rest.join(' '),
payerEmail,
payerPhone: '0500000000',
payerSocialId: '123456782',
};
},
});
```
`styles.css`
```css
* {
box-sizing: border-box;
}
[hidden] {
display: none !important;
}
html {
background: #f5f5f7;
}
body {
display: flex;
align-items: center;
justify-content: center;
min-height: 100vh;
margin: 0;
padding: 28px 20px;
color: #0f172a;
font: 13.5px/1.4 Arial, sans-serif;
}
.primary {
height: 40px;
border: 0;
border-radius: 5px;
background: #00c07d;
color: #fff;
font: 600 13.5px 'Segoe UI', system-ui, sans-serif;
letter-spacing: 0.03em;
text-transform: uppercase;
cursor: pointer;
}
.primary:hover:enabled {
box-shadow: 0 0 10px rgba(0, 0, 0, 0.4);
}
.primary:disabled {
opacity: 0.65;
cursor: default;
}
#open-payment {
padding: 0 22px;
}
dialog {
width: calc(100% - 40px);
max-width: 310px;
padding: 18px 20px 20px;
border: 0;
border-radius: 10px;
background: #fff;
color: inherit;
box-shadow: 0 18px 44px -12px rgba(15, 23, 42, 0.35);
}
dialog::backdrop {
background: rgba(15, 23, 42, 0.35);
}
header {
display: flex;
align-items: center;
justify-content: space-between;
margin-bottom: 6px;
}
h1 {
margin: 0;
font: 600 15px 'Segoe UI', system-ui, sans-serif;
}
.close {
display: grid;
place-items: center;
width: 24px;
height: 24px;
margin-inline-end: -4px;
padding: 0;
border: 0;
border-radius: 5px;
background: none;
color: #94a3b8;
cursor: pointer;
}
.close:focus-visible {
outline: 2px solid #00c16e;
outline-offset: 2px;
}
.close:hover {
background: #f1f5f9;
color: #475569;
}
.line {
display: flex;
align-items: flex-end;
height: 38px;
padding-bottom: 6px;
border-bottom: 1px solid #c8c8c9;
}
.line input {
width: 100%;
min-width: 0;
padding: 0;
border: 0;
outline: 0;
background: none;
color: #000;
font: inherit;
}
.line input::placeholder {
color: #9aa3ae;
opacity: 1;
}
/* A cross-origin frame has no height of its own, so its container needs one. */
.line > div {
width: 100%;
height: 22px;
}
.line.is-focused {
border-bottom-color: #00c07d;
}
.line.is-invalid {
border-bottom-color: #ff0000;
}
.line.is-invalid input {
color: #ff0000;
}
.two {
display: grid;
grid-template-columns: 1fr 1fr;
gap: 14px;
}
form .primary,
#success .primary {
width: 100%;
margin-top: 18px;
}
#error:empty {
display: none;
}
#error {
margin: 8px 0 0;
color: #ff0000;
text-align: center;
}
#success h2 {
margin: 6px 0;
color: #00a56b;
font: 600 14px 'Segoe UI', system-ui, sans-serif;
}
#success dl {
margin: 0;
}
#success dl div {
display: flex;
align-items: center;
height: 34px;
border-bottom: 1px solid #e5e7eb;
}
#success dt {
flex: 0 0 56px;
color: #64748b;
}
#success dd {
flex: 1;
min-width: 0;
margin: 0;
overflow: hidden;
text-overflow: ellipsis;
white-space: nowrap;
}
```
`checkout-form.js` is the same file as under **Compact form** above.
`hosted-fields.js` is the same file as under **Compact form** above.
[Run this example](https://docs.payme.io/run/pay-dialog/index.html). [Test cards](https://docs.payme.io/payments/getting-started/test-cards-and-payment-methods).
## Reference
### PayMe.create options
`PayMe.create(publicKey, options)` resolves to an instance. `options` is optional. An unknown option, or a value of the wrong type, makes it reject.
| Option | Type | Default | What it does |
|---|---|---|---|
| `testMode` | boolean | `false` | `true` processes in the sandbox, `false` in production. It must match the key and the server that charges the token. |
| `language` | `'en'` \| `'he'` | `'en'` | `'he'` makes the fields right-to-left and returns PayMe's error messages in Hebrew. Field messages stay in English unless you pass `messages` (see the `compact-hebrew` example). |
| `tokenIsPermanent` | boolean | `true` | `true`: the token can be charged again. `false`: it charges once; a second charge fails with `604` "Buyer inactive". |
| `buyerIsPrivate` | boolean | `false` | `true`: only this seller can charge the token. `false`: any seller of the same partner can. |
| `buyerPerformValidation` | boolean | `true` | Validates the card when the token is created. |
| `domainName` | string | the page's host | Apple Pay only. The top-level domain, e.g. `shop.example.com`, when the SDK runs inside another site's iframe. A bare domain, without `https://`. |
`PayMe.version` holds the SDK's version, e.g. `1.21.0`.
### Fields
`instance.hostedFields()` returns a manager. `fields.create(name, options)` makes a field; calling it again for the same name returns the same field and ignores the new options. `field.mount(selector)` shows the field in the first element the selector finds. It returns a promise, rejects with ` already mounted` if the field is already mounted, and throws `Container for not found` at once if no element matches.
Create only the fields you mount: `tokenize()` waits for a value from every created field.
| `PayMe.fields` | Name | Required for `tokenize` |
|---|---|---|
| `NUMBER` | `cardNumber` | Yes, always a mounted field |
| `EXPIRATION` | `cardExpiration` | Yes, always a mounted field |
| `CVC` | `cvc` | Yes, always a mounted field |
| `NAME_FIRST` | `payerFirstName` | Yes: mount it or pass its value |
| `NAME_LAST` | `payerLastName` | Yes: mount it or pass its value |
| `EMAIL` | `payerEmail` | Yes: mount it or pass its value |
| `PHONE` | `payerPhone` | Yes: mount it or pass its value |
| `SOCIAL_ID` | `payerSocialId` | No |
| `ZIP_CODE` | `payerZipCode` | No |
The card number, expiry and CVV can't be passed as values, so those three fields are always mounted. A payer detail you don't mount goes in the `tokenize` data instead.
**Field methods:**
| Method | What it does |
|---|---|
| `field.on(event, handler)` | Listens to an event (see [Field events](#field-events)) |
| `field.once(event, handler)` | Listens to the next occurrence only |
| `field.removeListener(event, handler)` | Stops one listener |
| `field.removeAllListeners(event?)` | Stops every listener, or every listener of one event |
| `field.focus()` / `field.blur()` | Moves the focus into or out of the field |
| `field.getState()` | Returns `{ field, isValid, isEmpty, message }` |
`fields.set({ colorScheme: PayMe.colorScheme.Dark })` sets the color scheme of every field: `PayMe.colorScheme.Dark`, `Light` or `Normal`.
### Field options
```js
const cardNumber = fields.create(PayMe.fields.NUMBER, {
placeholder: 'Card number',
messages: { required: 'Enter your card number', invalid: 'Check your card number' },
styles: {
base: { color: '#000000', '::placeholder': { color: '#8a8a8a' } },
invalid: { color: 'red' },
valid: { color: 'green' },
},
});
```
`placeholder`, `messages` and `styles` are the only options. Any other key throws.
### Field styling
Because a PayMe field is protected, `styles` takes three groups, `base`, `invalid` and `valid`, with only these properties. Anything else, including `font-family`, is dropped.
- `color`
- `font-size`
- `text-align`
- `letter-spacing`
- `text-decoration`
- `text-shadow`
- `text-transform`
- `::placeholder`, nested inside a group
Everything around the field is yours: style its container for borders, backgrounds and focus. Your own inputs for payer details take any CSS.
### Field events
`field.on(event, handler)`:
| Event | Fields | When |
|---|---|---|
| `change` | All | Like the standard event |
| `blur` | All | Like the standard event |
| `focus` | All | Like the standard event |
| `keyup` | All | Like the standard event |
| `keydown` | All | Like the standard event |
| `keypress` | All | Like the standard event |
| `validity-changed` | All | The field's validity changed: use it to show messages |
| `card-type-changed` | `cardNumber` | The card's brand was detected: use it to show an icon |
The handler gets no card data:
```js
{
type: 'validity-changed',
event: 'validity-changed',
field: 'cardNumber',
isValid: false,
isEmpty: false,
message: 'Invalid credit card number', // when invalid
cardType: 'mastercard', // on card-type-changed
}
```
The field's messages are in English unless you pass your own `messages`, whatever the `language` option.
| `cardType` | Brand | Starts with |
|---|---|---|
| `visa` | Visa | 4 (except 4175, 4571) |
| `mastercard` | Mastercard | 51–55, 2221–2299, 23–27 |
| `amex` | American Express | 34, 37 |
| `diners` | Diners Club | 300–305, 309, 36, 38, 39 |
| `discover` | Discover | 6011, 644–649, 65 |
| `jcb` | JCB | 35 |
| `jcb15` | JCB (15 digits) | 2131, 1800 |
| `maestro` | Maestro | 50, 56–58, 6304, 67 |
| `unionPay` | UnionPay | 62, 81 |
| `mir` | Mir | 2200–2204 |
| `dankort` | Dankort | 5019, 4175, 4571 |
| `instapayment` | InstaPayment | 637–639 |
| `uatp` | UATP | 1 (except 1800) |
| `unknown` | Not detected | Anything else, including local Isracard cards (8–10 digits), which the number field accepts |
### Tokenize
`instance.tokenize(saleData)` returns a promise. `saleData` takes only these keys. Any other key, such as `fullName` or `installments`, makes it reject.
| Key | Required | Value |
|---|---|---|
| `payerFirstName` | Yes, unless mounted | Any text |
| `payerLastName` | Yes, unless mounted | Any text |
| `payerEmail` | Yes, unless mounted | An email address |
| `payerPhone` | Yes, unless mounted | Digits only, with an optional `+` and country code, e.g. `0501234567` or `+972501234567`. Spaces and dashes fail with "Invalid phone number". |
| `payerSocialId` | No | The buyer's ID number |
| `payerZipCode` | No | The buyer's zip code |
| `total` | Yes | `label`: non-empty text. `amount.currency`: non-empty, e.g. `ILS`. `amount.value`: a decimal string such as `'55.00'`, not minor units. Display only. |
```js
{
payerFirstName: 'Israel',
payerLastName: 'Israeli',
payerEmail: 'buyer@example.com',
payerPhone: '0500000000',
payerSocialId: '123456782',
payerZipCode: '123456',
total: {
label: 'Order 1234',
// A decimal string, not minor units. Display only.
amount: { currency: 'ILS', value: '55.00' },
},
}
```
On success:
```js
{
type: 'tokenize-success',
token: 'BUYERDEMO-BUYERDEMO-BUYERDEMO-1234567',
testMode: true,
card: { cardMask: '532610******5846', cardholderName: 'Israel Israeli', expiry: '1230' },
payerName: 'Israel Israeli',
payerEmail: 'buyer@example.com',
payerPhone: '0500000000',
payerSocialId: '123456782',
total: { label: 'Order 1234', amount: { currency: 'ILS', value: '55.00' } },
}
```
It rejects in one of four forms:
| Cause | What you get | What to show |
|---|---|---|
| **Your data is wrong**: a missing or invalid value you passed, a bad `total`, or an unknown key | A plain `Error` with no `type`, e.g. `Please provide "payerEmail" value`, `Invalid email address`, `Invalid phone number`, `currency should not be empty` | `error.message`, or fix your code |
| **A mounted field is empty** | `{ type: 'tokenize-error', validationError: true, errors: { payerEmail: 'Mandatory field' } }`. The text is the field's `messages.required`. | The message per field |
| **PayMe refused the card**: an invalid number, an expired card, a decline… | `{ type: 'tokenize-error', code: 'ERR-355', message: 'Invalid credit card number', statusCode: 500, commStatus: 500, payload: { … }, timestamp: '…' }`. `code` is `ERR-` plus PayMe's error code for errors a buyer can act on, otherwise `ERR-020` with a generic message. | `message`. Don't show `payload` fields to the buyer |
| **The instance already returned a token** | `{ type: 'tokenize-error', commStatus: 400, commStatusText: 'Bad Request' }` | Start from a new instance |
A filled but invalid mounted field (for example a wrong card number) isn't caught in the browser: it comes back from PayMe as the third form. After a failed `tokenize()` you can call it again on the same instance. After a successful one, the instance is spent.
```js
try {
const result = await instance.tokenize(saleData);
// send result.token to your server
} catch (failure) {
const text = Object.values(failure.errors ?? {})[0] ?? failure.message ?? 'Please try again.';
showError(text);
}
```
### Validators
For your own payer inputs, `PayMe.validators` holds the rules `tokenize` applies to `payerFirstName`, `payerLastName`, `payerEmail`, `payerPhone`, `payerSocialId` and `payerZipCode`.
```js
const problem = PayMe.validators[PayMe.fields.EMAIL].test('buyer@example.com');
// a falsy value when valid, { required: true } when empty, { invalid: true } when the format is wrong
```
Only the email and phone rules check the format. Names accept any non-empty value, and the social ID and zip code accept any value.
### Teardown
`instance.teardown()` removes the instance's fields. Call it before you mount a new instance in the same containers.
## Console errors
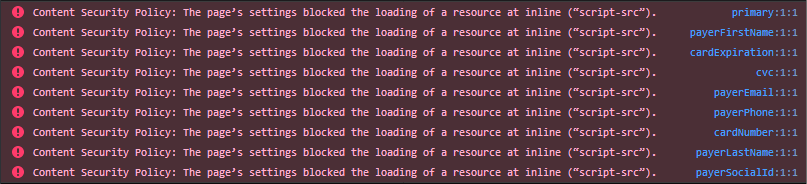
PayMe's fields have a strict Content Security Policy, which can put error messages in the browser console. They don't cause a malfunction or a security risk, and you can safely ignore them. Browser extensions that inject scripts cause most of them: to check, turn the extensions off or use a private window.
## Related
- [3DS with Hosted Fields](https://docs.payme.io/accepting-payments/3d-secure/3ds-with-hosted-fields)
- [generate-sale with a token](https://docs.payme.io/payments/hosted-fields-jsapi/post-generate-sale-hosted-fields-jsapi)
- [Test Cards and Payment Methods](https://docs.payme.io/payments/getting-started/test-cards-and-payment-methods)
- [Checkout steps for AI agents](https://docs.payme.io/agents/steps/checkout)
- [Template sales (one link, many payments)](https://docs.payme.io/accepting-payments/checkout-and-in-person/multi-payment-page): A template sale is one payment link that many buyers can pay; each payment creates its own sale. Create it with generate-sale and sale_type template; close it with cancel-template or sale_expiry_seconds.
# Template sales (one link, many payments)
A template sale is one payment link that many buyers can pay, for example a link you share on a social network. Create it with [`generate-sale`](https://docs.payme.io/payments/hosted-payment-page/post-generate-sale) and `sale_type: template`. The `sale_url` you get back has the form `…/sale/template/`.
| Field | Value |
|---|---|
| `sale_type` | `template` |
How it works:
- Each payment creates a new sale (`sale_type` `4`, `SaleFromTemplate`) with its own `payme_sale_id` and its own callbacks. The template sale itself stays `initial`.
- The link stays open until you cancel it with [`cancel-template`](https://docs.payme.io/payments/post-sale-actions/post-cancel-template) (send the template's ID as `sale_payme_id`), or until `sale_expiry_seconds` passes, if you sent it. Cancelling works only while the template is `initial` and sets it to `canceled`; payments on it then fail with error `305`.
Limits:
- You can't send `buyer_key` with a template (error `606`).
- `echeck` isn't supported on templates (error `4`).
Every other `generate-sale` field is on [Create a sale](https://docs.payme.io/payments/hosted-payment-page/post-generate-sale). A template is not the multi-method checkout (`sale_payment_method: multi`), which lets one buyer choose how to pay: see [Create a multi-method checkout sale](https://docs.payme.io/payments/hosted-payment-page/post-generate-sale-2).
- [Take in-person payments with a POS device](https://docs.payme.io/accepting-payments/checkout-and-in-person/point-of-sale): For partners. Order POS devices with vas-enable (extend_items in vas_data adds devices). PayMe pairs new devices; to pair yourself call pos/pair (payme_client_key, seller_payme_id, pos_id, terminal_id, optional name), then pos/authenticate with the 6-digit verification_code. Callbacks: point-of-sale-action-pair-update, -authenticate-update. Pay: POST /sales with payment.method pos, pos_id, currency; a decline is HTTP 200 status_code 1; 26020 means still verifying, wait for the callback. Refund: PUT /sales/{id} with payment.action refund. pos/transmit returns acknowledge_number and report.
## Prerequisites
- Partner credentials (payme_client_key) from PayMe Partners, for ordering and pairing devices
- The seller's seller_payme_id (MPL)
- The POS service active on the seller's account
- A callback URL on your partner account, for the pairing callbacks
## Related
- [Point of Sale (POS)](https://docs.payme.io/payments/point-of-sale-pos)
- [Order POS devices](https://docs.payme.io/payments/point-of-sale-pos/post-vas-enable)
- [Create a POS payment](https://docs.payme.io/payments/point-of-sale-pos/post-payment)
- [Refund a POS sale](https://docs.payme.io/payments/point-of-sale-pos/put-sales)
- [Callback types reference](https://docs.payme.io/payments/getting-started/callback-types)
- [Enable payment methods and services for your sellers](https://docs.payme.io/marketplaces-and-platforms/seller-onboarding/enable-services)
- [Understand the sale lifecycle](https://docs.payme.io/payments/codes-statuses/sale-lifecycle)
- [Errors](https://docs.payme.io/payments/getting-started/errors)
- [List sales](https://docs.payme.io/payments/query-apis/post-get-sales)
# Take in-person payments with a POS device
A PayMe POS device takes card-present payments for a seller. Your system sends each payment to the device through the Payments API, the buyer pays on the device, and the result comes back in the same response. This guide covers the whole flow: ordering devices, pairing them, taking and refunding payments, and transmitting the day's transactions.
Endpoint details are in the [POS module overview](https://docs.payme.io/payments/point-of-sale-pos) and its endpoint pages.
## How it works
1. **Order the devices.** A partner orders devices for its seller with `vas-enable`. PayMe prepares the devices, pairs them and ships them.
2. **Pair and authenticate.** A device takes payments only after it is paired and then authenticated. PayMe does both for new devices. You can also do it yourself with `pos/pair` and `pos/authenticate`. Each step sends you a callback.
3. **Take a payment.** Call `POST /sales` with `payment.method: pos` and the device's `pos_id`. PayMe pushes the payment to the device and waits for the buyer.
4. **Refund on the device.** Call `PUT /sales/{payme_sale_id}` with `payment.action: refund`.
5. **Transmit.** `pos/transmit` sends the device's transactions for deposit and returns the transmission report.
## Before you start
| You need | For |
|---|---|
| Your partner key (`payme_client_key`) | Ordering devices, and the `pos/pair`, `pos/authenticate` and `pos/transmit` calls. These calls are for partners only. |
| The seller's `seller_payme_id` (MPL) | Every call. On its own, it authenticates payments and refunds. |
| The POS service active on the seller's account | Without it, POS calls return error `720`. |
| A callback URL on your partner account | The `point-of-sale-action-*` callbacks. If your partner account has none, they aren't sent. |
Base URLs: `https://sandbox.payme.io/api` (sandbox) and `https://live.payme.io/api` (production). Send JSON with `Content-Type: application/json`. On the `pos/*` calls, every field goes in the JSON body, including `payme_client_key`.
## Step 1: Order the devices
Order devices for the seller with [Order POS devices](https://docs.payme.io/payments/point-of-sale-pos/post-vas-enable): one `vas-enable` call turns on the POS payment method, and a second one sends the device list in `vas_data`. The general `vas-enable` flow, including how to check the result, is in [Enable payment methods and services for your sellers](https://docs.payme.io/marketplaces-and-platforms/seller-onboarding/enable-services).
- **Adding devices later.** Send only the new devices, with `vas_data.extend_items: true`. Without it, the list you send replaces the devices already ordered.
- **It takes time.** The order is handled by hand: PayMe requests a new terminal, which can take up to 5 business days, then prepares, pairs and ships the devices.
- **Keep each `pos_id`.** It names the device in every later call. Send it exactly as it appears in the order and in the pair callback.
## Step 2: Pair and authenticate a device
A device can take payments only after two steps: `pos/pair` registers the device for the seller, and `pos/authenticate` completes the pairing with a 6-digit verification code. PayMe runs both steps for new devices before they ship, and you receive the two callbacks. To pair a device from your own system, use the calls below.
### Pair
```bash
curl -X POST https://sandbox.payme.io/api/pos/pair \
-H 'Content-Type: application/json' \
-d '{
"payme_client_key": "payme_partner_key",
"seller_payme_id": "MPLDEMO-MPLDEMO-MPLDEMO-1234567",
"pos_id": "001",
"terminal_id": "YOUR_TERMINAL_ID",
"name": "Front counter"
}'
```
| Field | Required | Description |
|---|---|---|
| `payme_client_key` | Yes | Your partner key. |
| `seller_payme_id` | Yes | The seller's MPL. |
| `pos_id` | Yes | The device's ID from the seller's device order. A device that isn't in the order returns `26014`. |
| `terminal_id` | Yes | The device's payment terminal ID. |
| `name` | No | A name for the device. Default: the seller's business name. The callbacks return it as `pos_name`. |
On success, the response is `status_code` `0`, PayMe records the device as paired but not yet active, and it sends `point-of-sale-action-pair-update`.
```json
{
"status_code": 0,
"session": "FhT3aXe7"
}
```
Pairing a device again starts over: the device stops taking payments until you authenticate it again.
### Authenticate
```bash
curl -X POST https://sandbox.payme.io/api/pos/authenticate \
-H 'Content-Type: application/json' \
-d '{
"payme_client_key": "payme_partner_key",
"seller_payme_id": "MPLDEMO-MPLDEMO-MPLDEMO-1234567",
"pos_id": "001",
"terminal_id": "YOUR_TERMINAL_ID",
"verification_code": "482913"
}'
```
`verification_code` is the 6-digit verification code for this pairing. Send it as a string, so that a leading zero is kept. A code that isn't a number returns error `10`, and one that isn't exactly 6 digits returns `999`. Authenticating a device that was never paired returns `26017`.
On success, the response is `status_code` `0`, the device becomes active, and PayMe sends `point-of-sale-action-authenticate-update`. The device can now take payments.
If you don't have a device's terminal ID or its verification code, ask PayMe Partners ().
### The pairing callbacks
PayMe sends both callbacks to your partner callback URL. They carry the seller fields of the seller callbacks, plus:
| `notify_type` | When | Device fields |
|---|---|---|
| `point-of-sale-action-pair-update` | `pos/pair` succeeded | `pos_id`, `pos_name` |
| `point-of-sale-action-authenticate-update` | `pos/authenticate` succeeded, and the device is active | `pos_id`, `pos_name` |
They aren't signed. The seller fields and the delivery rules are on [Callback types](https://docs.payme.io/payments/getting-started/callback-types#sellers).
### When the device service refuses
`pos/pair`, `pos/authenticate` and `pos/transmit` pass your request to the service that runs the devices. If that service refuses the request or can't be reached, the call returns **HTTP 200** with `status_code` `1`, `status_error_code` `20002`, and the service's message in `status_error_details`:
```json
{
"status_code": 1,
"session": "FhT3aXe7",
"status_error_code": 20002,
"status_error_details": "Message from the device service"
}
```
Always check `status_code`, not the HTTP status. A refused call changes nothing for the device and sends no callback.
## Step 3: Take a payment
Send the payment to the device with [Create a POS payment](https://docs.payme.io/payments/point-of-sale-pos/post-payment):
```bash
curl -X POST https://sandbox.payme.io/api/sales \
-H 'Content-Type: application/json' \
-d '{
"seller_payme_id": "MPLDEMO-MPLDEMO-MPLDEMO-1234567",
"sale_price": 10000,
"currency": "ILS",
"product_name": "Coffee beans 1kg",
"transaction_id": "order-1001",
"sale_callback_url": "https://your-server.example.com/payme/callback",
"payment": {
"method": "pos",
"pos_id": "001"
},
"language": "en"
}'
```
`currency` is required, and `sale_price` is in minor units (`10000` = 100.00). PayMe pushes the payment to the device and waits while the buyer pays, so the call stays open until the device answers. Give your HTTP client a long timeout.
A paid sale returns, shortened:
```json
{
"status_code": 0,
"payme_status": "success",
"status_error_code": 0,
"payme_sale_id": "SALE1700-000000AA-EXAMPLE1-SALE0001",
"payme_sale_code": 12346578,
"payme_sale_status": "completed",
"sale_status": "completed",
"currency": "ILS",
"transaction_id": "order-1001",
"price": 10000,
"payme_transaction_id": "TRAN1688-034834SZ-OYNALKNE-DWOXFEUZ",
"payme_transaction_auth_number": "12345678",
"installments": 1
}
```
Keep `payme_sale_id`: you need it to refund.
| Outcome | Response | What to do |
|---|---|---|
| Paid | HTTP 200, `status_code` `0`, `payme_sale_status` `completed` | Done. |
| Declined or canceled on the device | HTTP 200, `status_code` `1`, with `status_error_code` and `status_error_details` | Show the reason. To try again, send a new payment. |
| The device didn't answer in time | HTTP 400, `status_error_code` `26020` ("The payment is being verified") | Don't send the payment again. PayMe keeps checking it for up to 5 minutes, then completes or fails the sale. Wait for the sale callback, or read the sale with [`get-sales`](https://docs.payme.io/payments/query-apis/post-get-sales). |
| The device can't take payments | HTTP 400 with `720`, `26014`, `26017` or `26018` | See [Errors](#errors). |
A paid sale sends `sale-complete` and a failed one sends `sale-failure`, to `sale_callback_url`. See [Callback types](https://docs.payme.io/payments/getting-started/callback-types#sales).
More options:
- `sale_type: authorize` only authorizes the card. `installments` and the other [`generate-sale`](https://docs.payme.io/payments/hosted-payment-page/post-generate-sale) sale fields work here too.
- You can also create the sale first with `generate-sale` and `sale_payment_method: pos`, then push it to the device with `PUT /sales/{payme_sale_id}`. The [POS module overview](https://docs.payme.io/payments/point-of-sale-pos) shows this two-step flow.
- Which payment methods a device accepts depends on the device. Ask PayMe Partners () for the current list.
### What the buyer sees on the device
1. The payment is sent to the device.
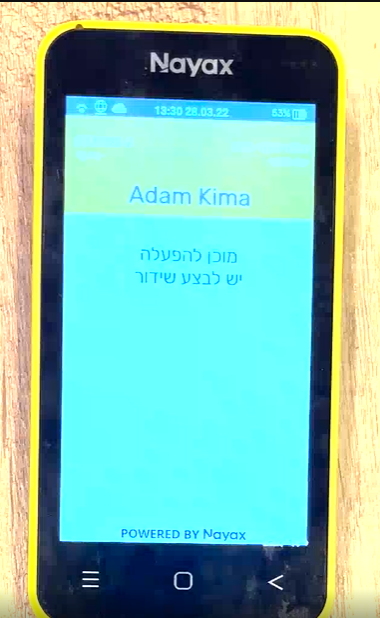
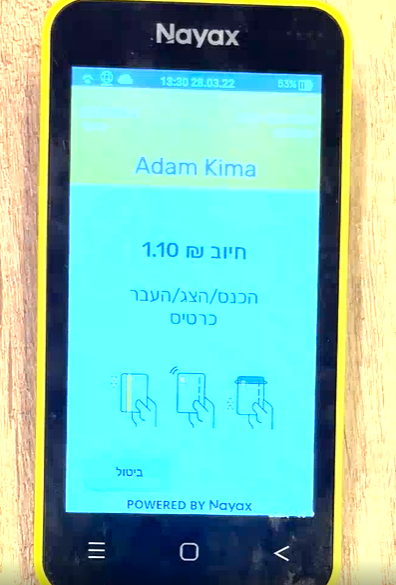
2. The buyer pays.
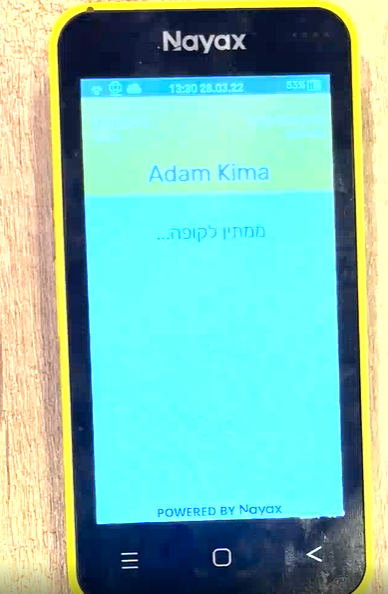
3. Pending approval from the card company.
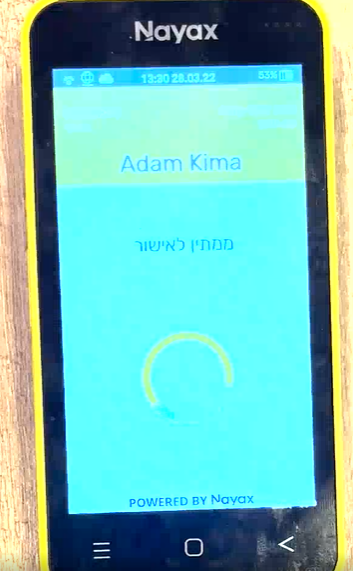
4. Payment confirmed.
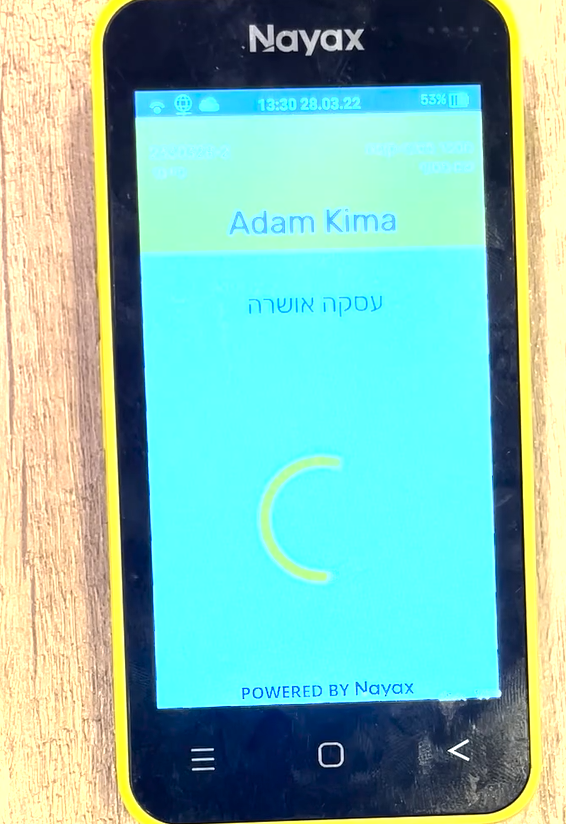
5. Payment deposited.
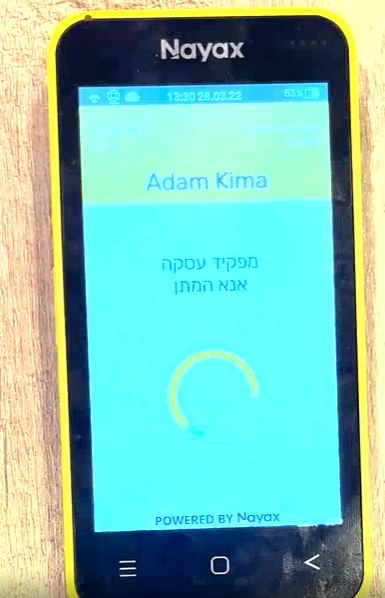
6. Final confirmation.
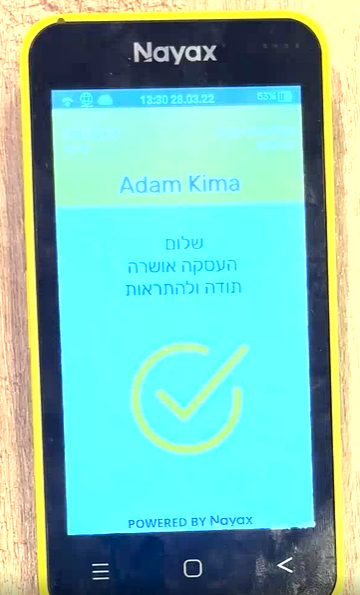
## Step 4: Refund on the device
Refund with [Refund a POS sale](https://docs.payme.io/payments/point-of-sale-pos/put-sales). The refund runs on the device in `payment.pos_id`:
```bash
curl -X PUT https://sandbox.payme.io/api/sales/SALE1700-000000AA-EXAMPLE1-SALE0001 \
-H 'Content-Type: application/json' \
-d '{
"seller_payme_id": "MPLDEMO-MPLDEMO-MPLDEMO-1234567",
"payment": {
"method": "pos",
"action": "refund",
"pos_id": "001"
},
"language": "en"
}'
```
- **Always send `payment.action: refund`.** Without it, this call pays the sale instead of refunding it.
- Leave out `payment.amount` to refund everything that can still be refunded, or send a smaller amount, in minor units, for a partial refund.
- The result comes back in the same response: `payme_sale_status` is `refunded`, or `partial-refund`. PayMe also sends a `refund` callback.
## Step 5: Transmit the day's transactions
The device's transactions are deposited when they are transmitted. `pos/transmit` runs this transmission now, for example at the end of the business day, and returns its report. Ask PayMe Partners whether the seller's devices also transmit on their own.
```bash
curl -X POST https://sandbox.payme.io/api/pos/transmit \
-H 'Content-Type: application/json' \
-d '{
"payme_client_key": "payme_partner_key",
"seller_payme_id": "MPLDEMO-MPLDEMO-MPLDEMO-1234567",
"pos_id": "001",
"terminal_id": "YOUR_TERMINAL_ID"
}'
```
```json
{
"status_code": 0,
"session": "FhT3aXe7",
"acknowledge_number": "000123",
"report": "Transmission report text"
}
```
| Field | Type | Description |
|---|---|---|
| `acknowledge_number` | string | The acknowledgment number of the transmission. Empty if the device service returned none. |
| `report` | string | The transmission report (Z report), as text from the device service. Empty if it returned none. |
Call it only for a paired device. A refused transmission returns `status_code` `1` with `20002`, as in [Step 2](#when-the-device-service-refuses).
## Errors
| Code | HTTP | Calls | Meaning | What to do |
|---|---|---|---|---|
| `1` | 500 | All | A required field is missing. `status_additional_info` names it. | Add the field. |
| `720` | 400 | All | The POS service isn't active for the seller. | Order the devices ([Step 1](#step-1-order-the-devices)). |
| `26014` | 400 | All | `pos_id` is missing, or no device in the seller's order has it. | Send the `pos_id` from the order. |
| `26017` | 400 | Authenticate, payment, refund | The device hasn't been paired. | Pair it. |
| `26018` | 400 | Payment, refund | The device is paired but not authenticated, for example after it was paired again. | Authenticate it. |
| `26020` | 400 | Payment | The device didn't answer in time. PayMe is still checking the payment. | Wait for the sale callback. Don't send the payment again. |
| `20002` | 200, `status_code` `1` | Pair, authenticate, transmit | The device service refused the request or couldn't be reached. | Check the IDs and the code, then try again. |
| `10` | 500 | Authenticate | `verification_code` isn't a number. | Send 6 digits. |
| `999` | 500 | Authenticate | `verification_code` isn't exactly 6 digits. | Send 6 digits, as a string. |
| A decline code | 200, `status_code` `1` | Payment | The payment was declined or canceled on the device. | Show the reason; send a new payment to try again. |
Credential errors, such as `200` (unknown partner key) and `251` (unknown seller key), are on [Errors](https://docs.payme.io/payments/getting-started/errors).
## Related
- [POS module overview](https://docs.payme.io/payments/point-of-sale-pos)
- [Order POS devices](https://docs.payme.io/payments/point-of-sale-pos/post-vas-enable), [Create a POS payment](https://docs.payme.io/payments/point-of-sale-pos/post-payment), [Refund a POS sale](https://docs.payme.io/payments/point-of-sale-pos/put-sales)
- [Callback types](https://docs.payme.io/payments/getting-started/callback-types)
- [Understand the sale lifecycle](https://docs.payme.io/payments/codes-statuses/sale-lifecycle)
- [Let the buyer choose how to pay](https://docs.payme.io/accepting-payments/checkout-and-in-person/let-the-buyer-choose): Send sale_payment_method: multi to generate-sale (default is credit-card). The card form is always shown. Apple Pay, Google Pay and Bit appear only if the seller's service is active and installments is 1, 0 or 102-112; fixed 2-12 leaves card only. Wallet buttons need a browser that supports them; Bit is ILS only; capture_buyer keeps card and Apple Pay (if set up). Wallets and Bit pay in one payment. Callbacks carry the method used in sale_payment_method; get-sales keeps multi, get-transactions has transaction_payment_method. Not a template sale.
## Prerequisites
- The seller's seller_payme_id (MPL)
- Apple Pay, Google Pay or Bit turned on for the seller, to offer more than cards
- A public HTTPS URL for sale_callback_url
## Related
- [Create a multi-method checkout sale](https://docs.payme.io/payments/hosted-payment-page/post-generate-sale-2)
- [Template sales (one link, many payments)](https://docs.payme.io/accepting-payments/checkout-and-in-person/multi-payment-page)
- [Accept Apple Pay](https://docs.payme.io/accepting-payments/payment-methods/apple-pay)
- [Accept Google Pay](https://docs.payme.io/accepting-payments/payment-methods/google-pay)
- [Accept Bit payments](https://docs.payme.io/accepting-payments/payment-methods/bit)
- [Enable payment methods and services for your sellers](https://docs.payme.io/marketplaces-and-platforms/seller-onboarding/enable-services)
- [Callbacks](https://docs.payme.io/payments/getting-started/callbacks)
- [List transactions](https://docs.payme.io/payments/query-apis/post-get-transactions)
- [Refund a sale](https://docs.payme.io/payments/post-sale-actions/post-refund-sale)
# Let the buyer choose how to pay
With `sale_payment_method: multi`, PayMe's payment page offers every payment method that is turned on for the seller, and the buyer picks one: a card, Apple Pay, Google Pay or Bit. You create one sale and get one result, whichever method the buyer used.
Use `multi` when you don't want to choose the method for the buyer. To offer a single method, send that method instead, for example `apple-pay` or `bit`.
## Create the sale
Call [`generate-sale`](https://docs.payme.io/payments/hosted-payment-page/post-generate-sale-2) from your server with `sale_payment_method: multi`. The field defaults to `credit-card`, so a request without it gets a card-only page.
`POST https://sandbox.payme.io/api/generate-sale` (production: `https://live.payme.io/api/generate-sale`)
```json
{
"seller_payme_id": "MPLDEMO-MPLDEMO-MPLDEMO-1234567",
"sale_payment_method": "multi",
"sale_price": 1000,
"currency": "ILS",
"product_name": "Smartphone",
"transaction_id": "order-1001",
"installments": "1",
"sale_callback_url": "https://your-server.example.com/payme/callback",
"sale_return_url": "https://your-site.example.com/payment/success",
"sale_name": "First Last",
"sale_email": "buyer@example.com",
"sale_mobile": "+972500000040",
"language": "en"
}
```
```json
{
"status_code": 0,
"session": "AtsJ0as5",
"sale_url": "https://sandbox.payme.io/sale/generate/SALE1700-000000AA-EXAMPLE1-SALE0001",
"payme_sale_id": "SALE1700-000000AA-EXAMPLE1-SALE0001",
"payme_sale_code": 12345678,
"price": 1000,
"transaction_id": "order-1001",
"currency": "ILS",
"sale_payment_method": "multi"
}
```
Show `sale_url` to the buyer in an iframe or a redirect. Store `payme_sale_id`: refunds and queries use it.
- Partners also send `payme_client_key`. See [Authentication](https://docs.payme.io/payments/getting-started/authentication).
- `sale_name`, `sale_email` and `sale_mobile` pre-fill the buyer's details on the page, for the card form and for Bit.
- Creating a `multi` sale doesn't check which methods the seller has. A seller with no other method turned on gets a page with the card form only.
- Every other field, and the `sale_url` validity rules, are on [Create a multi-method checkout sale](https://docs.payme.io/payments/hosted-payment-page/post-generate-sale-2).
## Which methods the buyer sees
The card form is always on the page. Apple Pay, Google Pay and Bit appear only when every rule below allows them. PayMe applies the rules each time the page opens.
### 1. The seller has the method turned on
A method appears only when the seller's service for it is active. A seller installs Apple Pay, Google Pay or Bit from the dashboard app store (חנות אפליקציות); a partner turns them on with `vas-enable`. See [Enable payment methods and services for your sellers](https://docs.payme.io/marketplaces-and-platforms/seller-onboarding/enable-services). When a service is turned off, its button no longer appears.
### 2. The installments allow a single payment
Apple Pay, Google Pay and Bit pay in one payment, so a fixed number of installments hides them:
| `installments` you send | Methods on the page |
|---|---|
| `1` (default) or `0` | Card, and every active wallet and Bit. One payment. |
| `2`–`12` (a fixed number) | Card only |
| `102`–`112` (the buyer chooses up to the last two digits) | Card, and every active wallet and Bit. A card buyer chooses the number of payments; a buyer who pays with Apple Pay, Google Pay or Bit pays in one payment, and the Bit option says so. |
More than one installment is ILS only (error `312`).
### 3. The buyer's device can pay with the wallet
PayMe shows a wallet button only when the buyer's browser can use it:
- **Apple Pay** appears when the browser supports Apple Pay and it is set up on the device, for example Safari on an iPhone with Apple Pay set up. See [Accept Apple Pay](https://docs.payme.io/accepting-payments/payment-methods/apple-pay) for the supported devices.
- **Google Pay** appears when Google Pay reports that the buyer can pay in this browser. See [Accept Google Pay](https://docs.payme.io/accepting-payments/payment-methods/google-pay).
When the check fails, the button is left out and the buyer still sees the other methods. A test from Chrome on Windows, for example, shows no Apple Pay.
### 4. Saving the card (`capture_buyer`) limits the methods
With `capture_buyer`, only methods that can save a token for later charges are offered: the card, and Apple Pay when PayMe has set up the seller's Apple Pay service for saved tokens. Google Pay and Bit are left out.
### 5. Bit pays in ILS only
Bit charges in ILS only, so a buyer can complete a Bit payment only on an ILS sale. See [Accept Bit payments](https://docs.payme.io/accepting-payments/payment-methods/bit).
### Not on this page
PayPal, bank transfers, Israeli direct debit and the other methods on [Available Payment Methods](https://docs.payme.io/payments/wallets-apms) aren't offered on a `multi` page. Create the sale with that method's `sale_payment_method` instead.
## What the buyer does
The Apple Pay and Google Pay buttons come first, then the card form and Bit. When both the card and Bit are offered, each is a section the buyer opens. When the card is the only method, the page opens straight on the card form.
- **Card:** the buyer fills in the card form. 3D Secure runs as on any card sale.
- **Apple Pay or Google Pay:** the buyer taps the button and approves the payment in the wallet.
- **Bit:** the buyer confirms their details, then scans the QR code (on a computer) or opens the Bit app (on a phone), and approves the payment in Bit.
If the buyer opens a Bit request and then pays another way, PayMe cancels the open Bit request, so the sale can't be paid twice. A failed attempt doesn't close the page: the buyer can try again, with the same method or another one. After a successful payment, PayMe redirects the buyer to `sale_return_url`, if you sent it.
## Callbacks
A `multi` sale sends the same callbacks as any sale, to `sale_callback_url`:
| `notify_type` | When |
|---|---|
| `sale-complete` | The buyer paid, with any method |
| `sale-authorized` | With `sale_type: authorize`: the payment was authorized and waits for [capture](https://docs.payme.io/accepting-payments/capture-and-saved-cards/capture-sale) |
| `sale-failure` | An attempt failed. Sent once per failed attempt; the sale can still complete afterwards |
| `refund` | The sale was refunded |
| `sale-create` | The sale was created. Only when you send `sale_send_creation_callback: true` |
In `sale-complete`, `sale-authorized` and `sale-failure`, `sale_payment_method` is the method of that attempt: `credit-card`, `apple-pay`, `google-pay` or `bit`, never `multi`. After an Apple Pay, Google Pay or Bit payment, `installments` is `1`.
The fields, the signature and the delivery rules are on [Callbacks](https://docs.payme.io/payments/getting-started/callbacks). Before you fulfil the order, confirm the sale's status and amount with [`get-sales`](https://docs.payme.io/payments/query-apis/post-get-sales).
## Find out how the buyer paid
| Where | What you see |
|---|---|
| Callbacks about a payment attempt | `sale_payment_method`: the method of that attempt |
| [`get-sales`](https://docs.payme.io/payments/query-apis/post-get-sales) | `sale_payment_method` stays `multi` |
| [`get-transactions`](https://docs.payme.io/payments/query-apis/post-get-transactions) | `transaction_payment_method`: the method used on each transaction. You can also filter on it. |
## Refunds
Refund a `multi` sale with [`refund-sale`](https://docs.payme.io/payments/post-sale-actions/post-refund-sale), as any other sale. The money goes back to the method the buyer paid with.
## `multi` and template sales
The two are easy to confuse. The guide [Template sales](https://docs.payme.io/accepting-payments/checkout-and-in-person/multi-payment-page) was formerly titled "Multi Payment Page"; it is about one link that many buyers pay, not about choosing a payment method.
| | `multi` | Template sale |
|---|---|---|
| You send | `sale_payment_method: multi` | `sale_type: template` |
| It solves | One buyer chooses how to pay | Many buyers pay the same link |
| Sales | One sale | A new sale for each payment |
You can combine them: a template sale with `sale_payment_method: multi` lets each buyer of the shared link choose how to pay.
## Test in the sandbox
- Pay with the cards on [Test Cards and Payment Methods](https://docs.payme.io/payments/getting-started/test-cards-and-payment-methods).
- The Apple Pay and Google Pay buttons appear only on a device and browser that support them (rule 3).
- To test Bit, see [Accept Bit payments](https://docs.payme.io/accepting-payments/payment-methods/bit).
- [Accept payments in a mobile app](https://docs.payme.io/accepting-payments/checkout-and-in-person/mobile-apps): Mobile app checkout: the app calls your server; your server calls generate-sale with the MPL and returns sale_url; the app opens it in SFSafariViewController (iOS) or Chrome Custom Tabs (Android), not a WebView. sale_return_url must be a public http(s) URL (myapp:// fails with error 21): use an HTTPS page that hands back with Universal Links/App Links or a button. Handle a closed browser. Confirm with the sale-complete callback and get-sales (sale_status completed, sale_price). Test wallets in the in-app browser on real devices. The iOS and Android SDKs are legacy.
## Prerequisites
- A server that holds your seller_payme_id (MPL) and receives callbacks
- Sandbox credentials (see Authentication)
## Related
- [Create a sale (hosted payment page)](https://docs.payme.io/payments/hosted-payment-page/post-generate-sale)
- [Hosted Payment Page options](https://docs.payme.io/accepting-payments/checkout-and-in-person/hosted-payment-page-options)
- [Callbacks](https://docs.payme.io/payments/getting-started/callbacks)
- [List sales](https://docs.payme.io/payments/query-apis/post-get-sales)
- [Understand the sale lifecycle](https://docs.payme.io/payments/codes-statuses/sale-lifecycle)
- [Let the buyer choose how to pay](https://docs.payme.io/accepting-payments/checkout-and-in-person/let-the-buyer-choose)
- [Save a card and charge it later](https://docs.payme.io/accepting-payments/capture-and-saved-cards/save-a-card-and-charge-it-later)
- [Hosted Fields JSAPI guide](https://docs.payme.io/accepting-payments/checkout-and-in-person/hosted-fields-jsapi-guide)
- [Authentication](https://docs.payme.io/payments/getting-started/authentication)
- [Get API access and go live: from sandbox to production](https://docs.payme.io/payments/getting-started/go-live)
- [iOS SDK](https://docs.payme.io/payments/ios-sdk)
- [Android SDK](https://docs.payme.io/payments/android-sdk)
# Accept payments in a mobile app
To take payments in an iOS or Android app, create the sale on your server and open PayMe's payment page in a secure in-app browser. The buyer types the card details into PayMe's page, your app holds no PayMe credentials, and your server confirms the result before you deliver the order. This guide shows the flow, the parts that are specific to apps, and what to test.
## How it works
1. The buyer taps **Pay** in your app. Your app asks your own server to start a checkout for the order.
2. Your server calls [`generate-sale`](https://docs.payme.io/payments/hosted-payment-page/post-generate-sale) with your MPL and sends the `sale_url` back to the app.
3. The app opens `sale_url` in a secure in-app browser: `SFSafariViewController` on iOS, Chrome Custom Tabs on Android.
4. The buyer pays. PayMe sends a callback to your server and redirects the in-app browser to your `sale_return_url`.
5. Your return page hands the buyer back to the app, and the app asks your server for the order's status.
6. Your server confirms the sale with [`get-sales`](https://docs.payme.io/payments/query-apis/post-get-sales) before it marks the order paid.
The app talks only to your server. Your server is the only part that talks to PayMe.
## Step 1: Create the sale on your server
When the app asks for a checkout, your server creates the sale:
```bash
curl -X POST https://sandbox.payme.io/api/generate-sale \
-H 'Content-Type: application/json' \
-d '{
"seller_payme_id": "MPLDEMO-MPLDEMO-MPLDEMO-1234567",
"sale_price": 1000,
"currency": "ILS",
"product_name": "Order 1001",
"transaction_id": "order-1001",
"sale_callback_url": "https://your-server.example.com/payme/callback",
"sale_return_url": "https://your-site.example.com/app/payment-done",
"language": "en"
}'
```
The response holds `sale_url` and `payme_sale_id`. Store `payme_sale_id` with the order on your server, and send only `sale_url` to the app.
- **Protect your own endpoint.** The app calls your server's checkout endpoint with your app's own user authentication. Your server decides the price, never the app.
- **One sale per order.** If the buyer leaves and comes back to the same unpaid order, reopen the same `sale_url` instead of creating a new sale. A second sale gives the buyer two payable pages. To close a sale after a set time, send `sale_expiry_seconds`. See [Understand the sale lifecycle](https://docs.payme.io/payments/codes-statuses/sale-lifecycle).
- **Pre-fill the buyer's details** with `sale_name`, `sale_email` and `sale_mobile`, so the buyer types less on a phone. See [Hosted Payment Page options](https://docs.payme.io/accepting-payments/checkout-and-in-person/hosted-payment-page-options).
## Step 2: Open `sale_url` in a secure in-app browser
| Platform | Open `sale_url` in | Not in |
|---|---|---|
| iOS | `SFSafariViewController` | `WKWebView` |
| Android | Chrome Custom Tabs | `WebView` |
A secure in-app browser runs the page in the system browser, apart from your app: your app can't read or change the page, and the buyer can see its address. In a WebView, your app controls the page and could read what the buyer types, so card details would pass through your app.
With a cross-platform framework such as Flutter or React Native, use a plugin that opens these same system browsers, not one that embeds a WebView.
Open `sale_url` exactly as returned. You can add the pre-fill query parameters from [Hosted Payment Page options](https://docs.payme.io/accepting-payments/checkout-and-in-person/hosted-payment-page-options#pre-fill-the-payment-page).
## Step 3: Bring the buyer back to the app
After a successful payment, PayMe redirects the in-app browser to your `sale_return_url`, with the sale details as query parameters. See [Success redirect](https://docs.payme.io/accepting-payments/checkout-and-in-person/hosted-payment-page-options#success-redirect).
`sale_return_url` must be an `http://` or `https://` address with a public host. A custom app scheme, such as `myapp://payment-done`, fails the whole `generate-sale` call with error `21`. See [Callback URL rules](https://docs.payme.io/payments/getting-started/callbacks#callback-url-rules). So:
1. Point `sale_return_url` at an HTTPS page on your own domain.
2. From that page, hand the buyer back to the app. Register the page's address as a Universal Link (iOS) or an App Link (Android), so the system can open your app for it. Also show a **Return to the app** button on the page that opens your app.
3. Keep the page useful on its own: it shows the result and the button. Whether a redirect opens your app directly depends on the operating system, the browser and your app's link setup, so test it on real devices.
The buyer can also close the in-app browser without paying. Then there is no redirect. Handle that case too: on iOS, `SFSafariViewControllerDelegate` calls `safariViewControllerDidFinish(_:)`; on Android, your activity resumes. In both cases, ask your server for the order's status.
Use the query parameters only to choose what the app shows next. The order's status comes from your server.
## Step 4: Confirm the payment on your server
PayMe sends a `sale-complete` callback to your `sale_callback_url`: a form-encoded `POST`. Reply `200` within 5 seconds. See [Callbacks](https://docs.payme.io/payments/getting-started/callbacks).
Before you deliver, confirm the sale. Call `get-sales` with the `payme_sale_id` you stored:
```bash
curl -X POST https://sandbox.payme.io/api/get-sales \
-H 'Content-Type: application/json' \
-d '{
"seller_payme_id": "MPLDEMO-MPLDEMO-MPLDEMO-1234567",
"sale_payme_id": "SALE1767-704312AB-CD3FGH12-JKLM4567"
}'
```
Check that the sale in `items` has `sale_status` `completed` and the `sale_price` of your order. Then mark the order paid. When the app asks for the order's status, answer from your own records.
If the app asks before the callback arrives, your server can call `get-sales` itself. By default `get-sales` leaves out unpaid sales (status `initial`), so include `initial` in `sale_status`, for example `"sale_status": ["initial", "completed", "failed"]`. A `failed` sale isn't final: the buyer can still pay it on the same page. See [Understand the sale lifecycle](https://docs.payme.io/payments/codes-statuses/sale-lifecycle).
Partners also verify `payme_signature` on the callback. A seller without a partner key relies on the `get-sales` check above.
## Payment methods inside an in-app browser
- **Apple Pay and Google Pay** appear on PayMe's page only when the buyer's browser can use them. Inside an in-app browser, that depends on the device, the operating system version and the browser. Test each wallet in your app on real devices before you offer it, and keep the card as the fallback. See [Let the buyer choose how to pay](https://docs.payme.io/accepting-payments/checkout-and-in-person/let-the-buyer-choose).
- **Bit and 3D Secure** can take the buyer to another app or to the bank's page, and back. Test that the buyer returns to the in-app browser and finishes the payment.
## Save a card for faster checkouts
The same flow can save the buyer's card: create the sale with `capture_buyer` (charge and save) or `sale_type` `token` (save only). Later charges run from your server with the `buyer_key`, with no payment page and nothing to open in the app. See [Save a card and charge it later](https://docs.payme.io/accepting-payments/capture-and-saved-cards/save-a-card-and-charge-it-later).
## Your own checkout design
If you need your own checkout design, build it as a web page on your domain with [Hosted Fields](https://docs.payme.io/accepting-payments/checkout-and-in-person/hosted-fields-jsapi-guide), and open that page in the in-app browser in the same way. The page uses the public key only, and your server charges the token and confirms the result. Wallets on your own page need their own setup: see [Accept Apple Pay](https://docs.payme.io/accepting-payments/payment-methods/apple-pay) and [Accept Google Pay](https://docs.payme.io/accepting-payments/payment-methods/google-pay).
## Keep credentials out of the app
- Never put `seller_payme_id` (the MPL), `payme_client_key` or the client password in your app, its configuration or its network calls. Anyone can unpack an app, and the MPL alone authenticates calls such as refunds. See [Authentication](https://docs.payme.io/payments/getting-started/authentication).
- The flow on this page needs no PayMe key in the app at all.
- The callback goes to your server, never to the app.
## The legacy iOS and Android SDKs
PayMe's [iOS SDK](https://docs.payme.io/payments/ios-sdk/ios-sdk) and [Android SDK](https://docs.payme.io/payments/android-sdk/android-sdk) are legacy. They collect card details inside your app and put your MPL in it, so they aren't recommended for new apps. Their pages stay available for existing integrations. Build new apps with the flow on this page.
## Before you release
- [ ] The app calls only your server. No PayMe credential is in the app.
- [ ] `sale_url` opens in `SFSafariViewController` or Chrome Custom Tabs, not in a WebView.
- [ ] `sale_return_url` is an HTTPS page on your domain that leads back to the app, tested on iOS and Android devices.
- [ ] The app handles a buyer who closes the browser without paying.
- [ ] Your server marks an order paid only after the callback and a `get-sales` check.
- [ ] Each payment method you offer works in the in-app browser on real devices.
- [ ] Production calls use `https://live.payme.io/api` and your production MPL. See [Get API access and go live](https://docs.payme.io/payments/getting-started/go-live).
## Payment Methods
- [Accept Apple Pay](https://docs.payme.io/accepting-payments/payment-methods/apple-pay): Accept Apple Pay on PayMe's Hosted Payment Page, or show the Apple Pay button on your own page: host PayMe's domain file, register the domains with vas-enable, create the sale and call appleSale().
# Accept Apple Pay
Apple Pay works on Apple devices only:
| iOS devices | macOS devices |
|---|---|
| Safari on an iPhone or iPad with Apple Pay set up | Safari on a Mac with Touch ID, or on a Mac from 2012 or later paired with an iPhone or Apple Watch that has Apple Pay set up and Handoff turned on |
You can offer it in two ways:
- **On PayMe's Hosted Payment Page.** Nothing to build: enable the service, then create a sale with `sale_payment_method: "apple-pay"` or `multi`.
- **On your own page**, with the browser SDK's `appleSale()`. You host PayMe's domain file, register your domains, and show the Apple Pay button yourself. The steps are below.
Installments aren't available with Apple Pay: a sale with `sale_payment_method: "apple-pay"` and more than one installment fails with error `351`. On a `multi` page that lets the buyer choose the number of installments, a buyer who pays with Apple Pay pays in a single payment.
## Enable Apple Pay
A seller installs Apple Pay from the dashboard app store (חנות אפליקציות), and it is active as soon as it is installed. A partner enables it for its seller with [vas-enable](https://docs.payme.io/payments/apple-pay/post-vas-enable-apple-pay). Without the service, `generate-sale` with `apple-pay` fails with error `720`.
## On PayMe's Hosted Payment Page
You don't need an Apple developer account or a domain file: PayMe's Apple merchant ID is used. The button appears only in Safari on an Apple device with a card in Wallet, so a test from Chrome or Windows shows no Apple Pay.
Recurring payments with Apple Pay need a merchant token, which only the Hosted Payment Page requests, and PayMe-side configuration of the account. See [Recurring Payments](https://docs.payme.io/payments/saved-cards-recurring).
## On your own page
1. [Host PayMe's domain file](#step-1-host-paymes-domain-file) on every domain that shows the button.
2. [Register the domains](#step-2-register-your-domains) with `vas-enable`.
3. [Get the testing account](#step-3-get-the-testing-account).
4. [Create the sale](#step-4-create-the-sale) on your server.
5. [Show the Apple Pay button](#step-5-show-the-apple-pay-button) with the browser SDK.
6. [Test your integration](#step-6-test-your-integration).
`appleSale()` doesn't request merchant tokens, so it pays one-time sales only. For recurring Apple Pay, use the Hosted Payment Page.
Registering domains with `vas-enable` takes a partner key. If you are a seller without a partner, contact PayMe Partners () to register your domains.
### Step 1: Host PayMe's domain file
Download PayMe's file from the environment where you call `vas-enable`:
| Environment | Download from |
|---|---|
| Sandbox | `https://sandbox.payme.io/.well-known/apple-developer-merchantid-domain-association` |
| Production | `https://live.payme.io/.well-known/apple-developer-merchantid-domain-association` |
The two files are different. Serve the sandbox file while you test, and replace it with the production file before you register the domains in production.
Serve the file unchanged at `https:///.well-known/apple-developer-merchantid-domain-association`, with no file extension, on every domain and subdomain that shows the button. Register each of them, for example `example.com` and `shop.example.com`, separately.
PayMe fetches the file from every domain during the `vas-enable` call and compares it byte for byte with its own file for that environment. Check that the file is:
- served over HTTPS with status 200, with no redirect and no error page;
- exactly the file you downloaded from PayMe, never one generated in your own Apple developer account, with nothing added (not even a line break at the end);
- not blocked by a CDN or a firewall.
If any domain fails, the whole call fails with error `703` and a message naming the site: "Certificate does not match, please reconfigure." or "Cannot locate certificate." Fix the file and send the call again: nothing is left pending.
### Step 2: Register your domains
Call [vas-enable](https://docs.payme.io/payments/apple-pay/post-vas-enable-apple-pay) with the domains that show the button in `vas_data.websites`, up to 99 per call. PayMe checks each domain's file and registers the domains with Apple in the same call.
```json
{
"payme_client_key": "payme_partner_key",
"seller_payme_id": "MPLDEMO-MPLDEMO-MPLDEMO-1234567",
"vas_payme_id": "VASLDEMO-VASLDEMO-VASLDEMO-1234567",
"vas_data": {
"websites": ["example.com", "shop.example.com"]
}
}
```
The response's `vas_data.websites` lists the approved domains, PayMe's own host included. To add a domain later, call `vas-enable` again with the new domain: domains already approved stay approved. (Partners can also use `vas-update`; contact PayMe support for its details.) See [vas-enable](https://docs.payme.io/payments/apple-pay/post-vas-enable-apple-pay) for the response and errors.
### Step 3: Get the testing account
PayMe provides a testing iCloud account, and the test cards are in [Apple Pay testing information](https://docs.payme.io/payments/getting-started/test-cards-and-payment-methods#apple-pay-testing-information). Ask PayMe which environment to test Apple Pay in.
Devices you can test on: iPhone 6 or later, iPad mini 3 or later, iPad Air 2, iPad Pro and Apple Watch. You can't test on a Mac.
### Step 4: Create the sale
On your server, create the sale with [generate-sale](https://docs.payme.io/payments/apple-pay/post-generate-sale-apple-pay) and `sale_payment_method: "apple-pay"`. It authenticates with `seller_payme_id`; never send this call from the browser.
`POST https://sandbox.payme.io/api/generate-sale` (production: `https://live.payme.io/api/generate-sale`)
```json
{
"seller_payme_id": "MPLDEMO-MPLDEMO-MPLDEMO-1234567",
"sale_price": 1000,
"currency": "ILS",
"product_name": "Order 1234",
"sale_payment_method": "apple-pay"
}
```
```json
{
"status_code": 0,
"sale_url": "https://sandbox.payme.io/sale/generate/SALE1655-3843870J-NTPYLJNW-SOWRLK9X",
"payme_sale_id": "SALE1655-3843870J-NTPYLJNW-SOWRLK9X",
"payme_sale_code": 1027305,
"price": 1000,
"transaction_id": "",
"currency": "ILS",
"sale_payment_method": "apple-pay"
}
```
Pass `payme_sale_id` to your page: `appleSale()` takes it as `saleGuid`.
### Step 5: Show the Apple Pay button
#### Load the scripts
Load Apple's `apple-pay-sdk.js`, which provides the `` element, and PayMe's SDK, which provides the global `PayMe`:
```html
```
If your site sets a Content Security Policy, allow `script-src https://cdn.payme.io https://applepay.cdn-apple.com`, `frame-src https://hf.payme.io` and `connect-src https://sandbox.payme.io https://live.payme.io`.
#### Add the button
Follow Apple's [buttons and marks guidelines](https://developer.apple.com/design/human-interface-guidelines/apple-pay/overview/buttons-and-marks/). Give the button an `id` or a class: you pass its selector to the SDK.
```html
```
`buttonstyle`, `type` and `locale` are Apple's attributes: see [Apple's button documentation](https://developer.apple.com/documentation/apple_pay_on_the_web/applepaybuttonstyle).
#### Check that Apple Pay is available
Show the button only when both checks pass:
| Check | Returns `true` when |
|---|---|
| `PayMe.isApplePayAvailable()` | The browser has Apple Pay (`window.ApplePaySession` exists) |
| `PayMe.isSupportsApplePayVersion()` | The browser supports Apple Pay JS API version `PayMe.applePayApiVersion` (`4`) |
| `instance.isMerchantSupportsApplePay(merchantId)` | Optional: Apple Pay is set up on the device (Apple's `canMakePayments()`) |
```javascript
if (!(PayMe.isApplePayAvailable() && PayMe.isSupportsApplePayVersion())) {
document.getElementById('pay-with-apple-pay').classList.add('hidden');
}
```
#### Start the sale
```javascript
const publicKey = 'xxxxxxxx-xxxx-xxxx-xxxx-xxxxxxxxxxxx'; // the seller's public key
const paymeSaleId = 'SALE1655-3843870J-NTPYLJNW-SOWRLK9X'; // from Step 4
const testMode = true; // false in production
const instance = await PayMe.create(publicKey, { testMode });
let sale;
try {
sale = instance.appleSale({ merchantId: 'merchant.paymeproduction', saleGuid: paymeSaleId });
} catch (error) {
// error.message is PayMe.ERR_MESSAGES.NOT_SUPPORTED_DEVICE, NO_APPLE_PAY or NOT_SUPPORTED_VERSION:
// hide Apple Pay and offer another payment method.
}
if (sale) {
sale.letsRock({
payButtonSelector: '#pay-with-apple-pay',
buttonLocale: 'he', // optional: sets locale="he-IL" on the
canceled() {
// the buyer closed the Apple Pay sheet
},
validated(err) {
// PayMe finished Apple's merchant validation; err is set if it failed
},
paymentCompleted(err, result) {
if (err) return showError(err.message); // ":" for PayMe errors
if (result.sale_status === 'completed') confirmOnServer(result.payme_sale_id);
else showError(result.status_error_details);
},
}).catch((err) => showError(err.message)); // config errors, VALIDATION_NO_NETWORKS, PayMe errors
}
```
`appleSale()` options:
| Option | Required | What it is |
|---|---|---|
| `saleGuid` | Yes | The `payme_sale_id` from Step 4 |
| `merchantId` | Yes | Pass `merchant.paymeproduction`. The SDK uses it only for the device check; the identifier Apple validates comes from the seller's Apple Pay service. |
| `debugFn` | No | A function that receives the SDK's debug messages |
`letsRock(config)` takes the button's selector as a string, or this object:
| Key | Default | What it does |
|---|---|---|
| `payButtonSelector` | none | A CSS selector for your Apple Pay button |
| `buttonLocale` | none | Sets the `locale` of an ``: `en` becomes `en-US`, `he` becomes `he-IL`, and a value with a region, such as `fr-FR`, is used as is |
| `canceled()` | does nothing | Called when the buyer closes the Apple Pay sheet |
| `validated(err)` | does nothing | Called after PayMe completes Apple's merchant validation, before the buyer authorizes the payment. `err` is set if the validation failed. |
| `paymentCompleted(err, result)` | does nothing | Called with the payment's result. `result` is the sale: `payme_sale_id`, `sale_status`, `payme_transaction_auth_number`, `buyer_card_mask`… |
The callbacks must be plain functions or arrow functions, not `async` functions: an `async` callback makes `letsRock()` reject with a `validation:invalid-type-for-…-callback` error.
Treat the order as paid only when `result.sale_status` is `completed`, and confirm it with the [sale callback](https://docs.payme.io/payments/getting-started/callbacks) on your server before you fulfil.
`letsRock()` resolves to a start function and attaches it to your button's click. Other methods on the sale:
- `sale.setButtonLocale(locale)` changes the button's locale later.
- `sale.destroy()` detaches the button and aborts an open Apple Pay session. Call it before you start a new sale on the same page.
- `sale.manual()` returns `{ verify, preparePayment }`, the two steps `letsRock()` runs. You don't need it with `letsRock()`.
#### Start the payment from your own control
If your page has no Apple Pay button for the SDK to find, give `letsRock()` a selector that matches nothing, and call the start function it resolves to from your own click handler:
```javascript
sale.letsRock('.no-apple-pay-button').then((startPayment) => {
document.getElementById('my-custom-button').addEventListener('click', startPayment);
});
```
Only a user action can start an Apple Pay payment. Call `startPayment` synchronously inside a click or tap handler. A call from a timer, or from a `postMessage` that a timer sent, fails with Apple's error "Must create a new ApplePaySession from a user gesture handler" ([Apple's documentation](https://developer.apple.com/documentation/apple_pay_on_the_web/apple_pay_js_api/creating_an_apple_pay_session)).
#### Inside another site's iframe
Apple validates the top-level page's domain. When the SDK runs inside another site's iframe, pass that domain, which must be registered in Step 2:
```javascript
const instance = await PayMe.create(publicKey, { testMode, domainName: 'shop.example.com' });
```
### Step 6: Test your integration
1. Put the test page below on your registered domain, for example `https://shop.example.com/apple-pay-test.html`.
2. Create a sale as in Step 4.
3. Open the page in Safari on a test device, fill in the seller's public key and the sale ID, and select **Start interaction**.
4. Pay with Apple Pay, and check that `paymentCompleted` and your sale callback both report the sale.
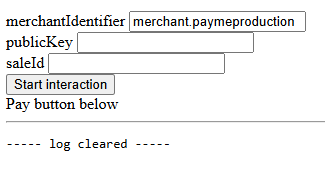
```html
Apple Pay test page
Pay button below
```
## Errors
The SDK reports errors as an `Error` whose `message` is one of the values in `PayMe.ERR_MESSAGES`, or a PayMe error.
| `PayMe.ERR_MESSAGES` key | `message` | When | Raised by |
|---|---|---|---|
| `NOT_SUPPORTED_DEVICE` | `no-supported:apple-pay-not-available-for-device` | The browser has no Apple Pay (`window.ApplePaySession` is missing) | `instance.appleSale()` throws |
| `NO_APPLE_PAY` | `no-supported:apple-pay-jsapi-not-available` | Apple Pay isn't set up on the device (`canMakePayments()` returned `false`) | `instance.appleSale()` throws |
| `NOT_SUPPORTED_VERSION` | `no-supported:apple-pay-version-not-supported` | The browser doesn't support Apple Pay JS API version 4. There is no workaround: offer another payment method. | `instance.appleSale()` throws |
| `VALIDATION_NO_NETWORKS` | `validation-error:no-supported-networks` | None of the seller's card brands is supported by Apple Pay. Contact PayMe support. | `letsRock()` rejects |
| `INVALID_CFG_PARAM` | `validation:unknown-configuration-parameter` | `letsRock()` got something other than a selector or a config object | `letsRock()` rejects |
| `INVALID_VALIDATED_CB`, `INVALID_CANCELLED_CB`, `INVALID_COMPLETED_CB` | `validation:invalid-type-for-validated-callback`, `validation:invalid-type-for-cancelled-callback`, `validation:invalid-type-for-payment-completed-callback` | That callback isn't a plain function (for example, it is `async`) | `letsRock()` rejects |
When PayMe rejects a call (the sale doesn't exist or isn't payable, the service isn't enabled, the merchant validation failed, the payment was declined), `letsRock()` rejects, or `validated(err)` or `paymentCompleted(err)` gets an `Error` whose message is `":"`.
The `message` values are codes, not text for buyers. Map them to your own messages:
```javascript
const messages = PayMe.ERR_MESSAGES;
const buyerMessages = {
[messages.NOT_SUPPORTED_DEVICE]: 'This device does not support Apple Pay',
[messages.NO_APPLE_PAY]: 'Apple Pay is not set up on this device',
[messages.NOT_SUPPORTED_VERSION]: 'This device does not support the current Apple Pay version',
[messages.VALIDATION_NO_NETWORKS]: 'Apple Pay is not available for this seller',
};
function showError(code) {
alert(buyerMessages[code] ?? 'Apple Pay is not available. Please choose another payment method.');
}
```
- [Accept Google Pay](https://docs.payme.io/accepting-payments/payment-methods/google-pay): Accept Google Pay on PayMe's Hosted Payment Page, or render the Google Pay button on your own page with googleSale(): setup, the payment result including 3D Secure, errors and testing.
# Accept Google Pay
Google Pay™ lets buyers pay with the cards saved in their Google account. It works for one-time sales, including `multi` sales where [the buyer chooses how to pay](https://docs.payme.io/accepting-payments/checkout-and-in-person/let-the-buyer-choose).
PayMe accepts Visa, Mastercard, American Express, Discover and JCB through Google Pay. If one of these networks is missing on your PayMe account, ask PayMe support () to add it.
You can offer it in two ways:
- **On PayMe's Hosted Payment Page.** Enable the service, create a sale with `sale_payment_method: "google-pay"` (or `multi`), and send the buyer to its `sale_url`. PayMe shows the Google Pay button.
- **On your own page**, with the browser SDK's `googleSale()`: register with Google, enable the service, create the sale, and render the button. The steps are below.
## Enable Google Pay
A seller installs Google Pay from the dashboard app store (חנות אפליקציות), and it is active as soon as it is installed. A partner enables it for its seller with [vas-enable](https://docs.payme.io/payments/google-pay/post-vas-enable-google-pay). Without the service, `generate-sale` with `google-pay` fails with error `720`.
## Limitations
- Google Pay is for one-time payments only: it can't pay a subscription. Use a card or Apple Pay for recurring payments.
- Installments aren't available: a sale with `sale_payment_method: "google-pay"` and more than one installment fails with error `351`. On a `multi` page that lets the buyer choose the number of installments, a buyer who pays with Google Pay pays in a single payment.
- Approved domains are managed in the Google Pay & Wallet Console of the merchant-ID owner, not in PayMe. Google error codes (for example `OR_BIBED_11`) come from Google.
## Google Pay terms
By integrating Google Pay, you agree to the [Google Pay and Wallet API Acceptable Use Policy](https://payments.developers.google.com/terms/aup) and accept Google's [terms of service](https://payments.developers.google.com/terms/sellertos).
## On your own page
### Step 1: Register in the Google Pay & Wallet Console
Before you show Google Pay on your own page, register your domain with Google:
1. Go to the Google Pay & Wallet Console:
2. Enter your business name in English, and check the first checkbox.
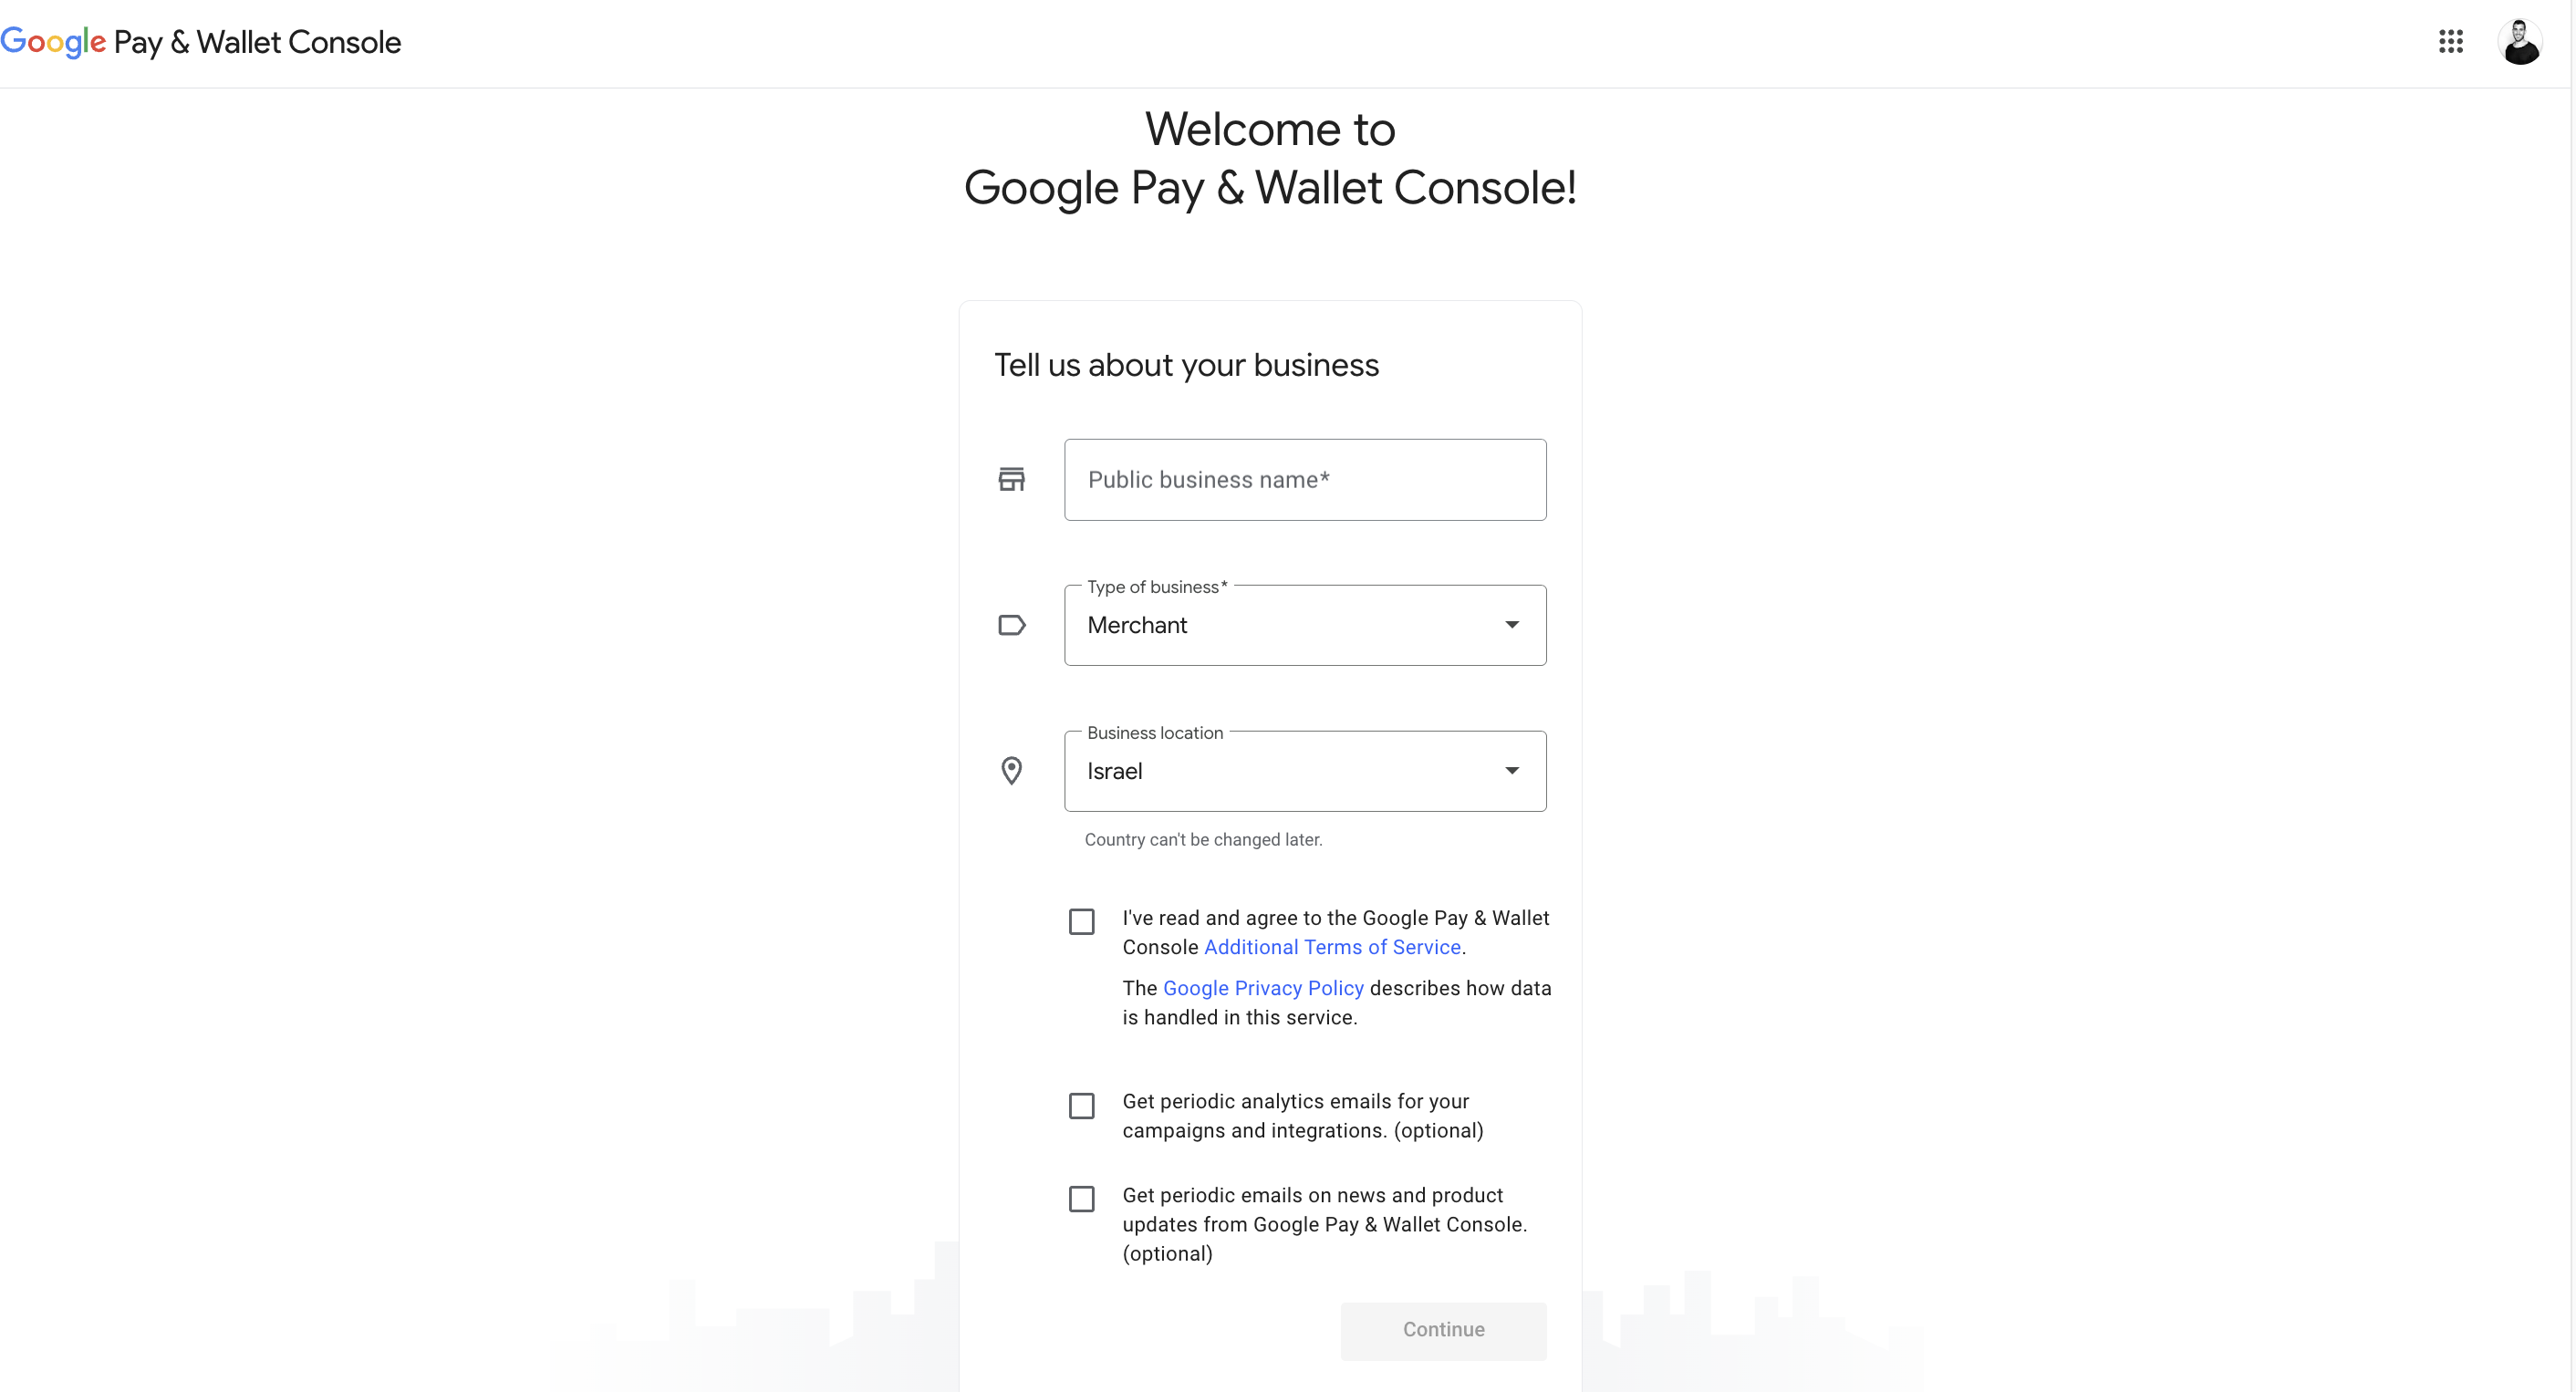
3. Select **Google Pay API**, then **Create an integration**.
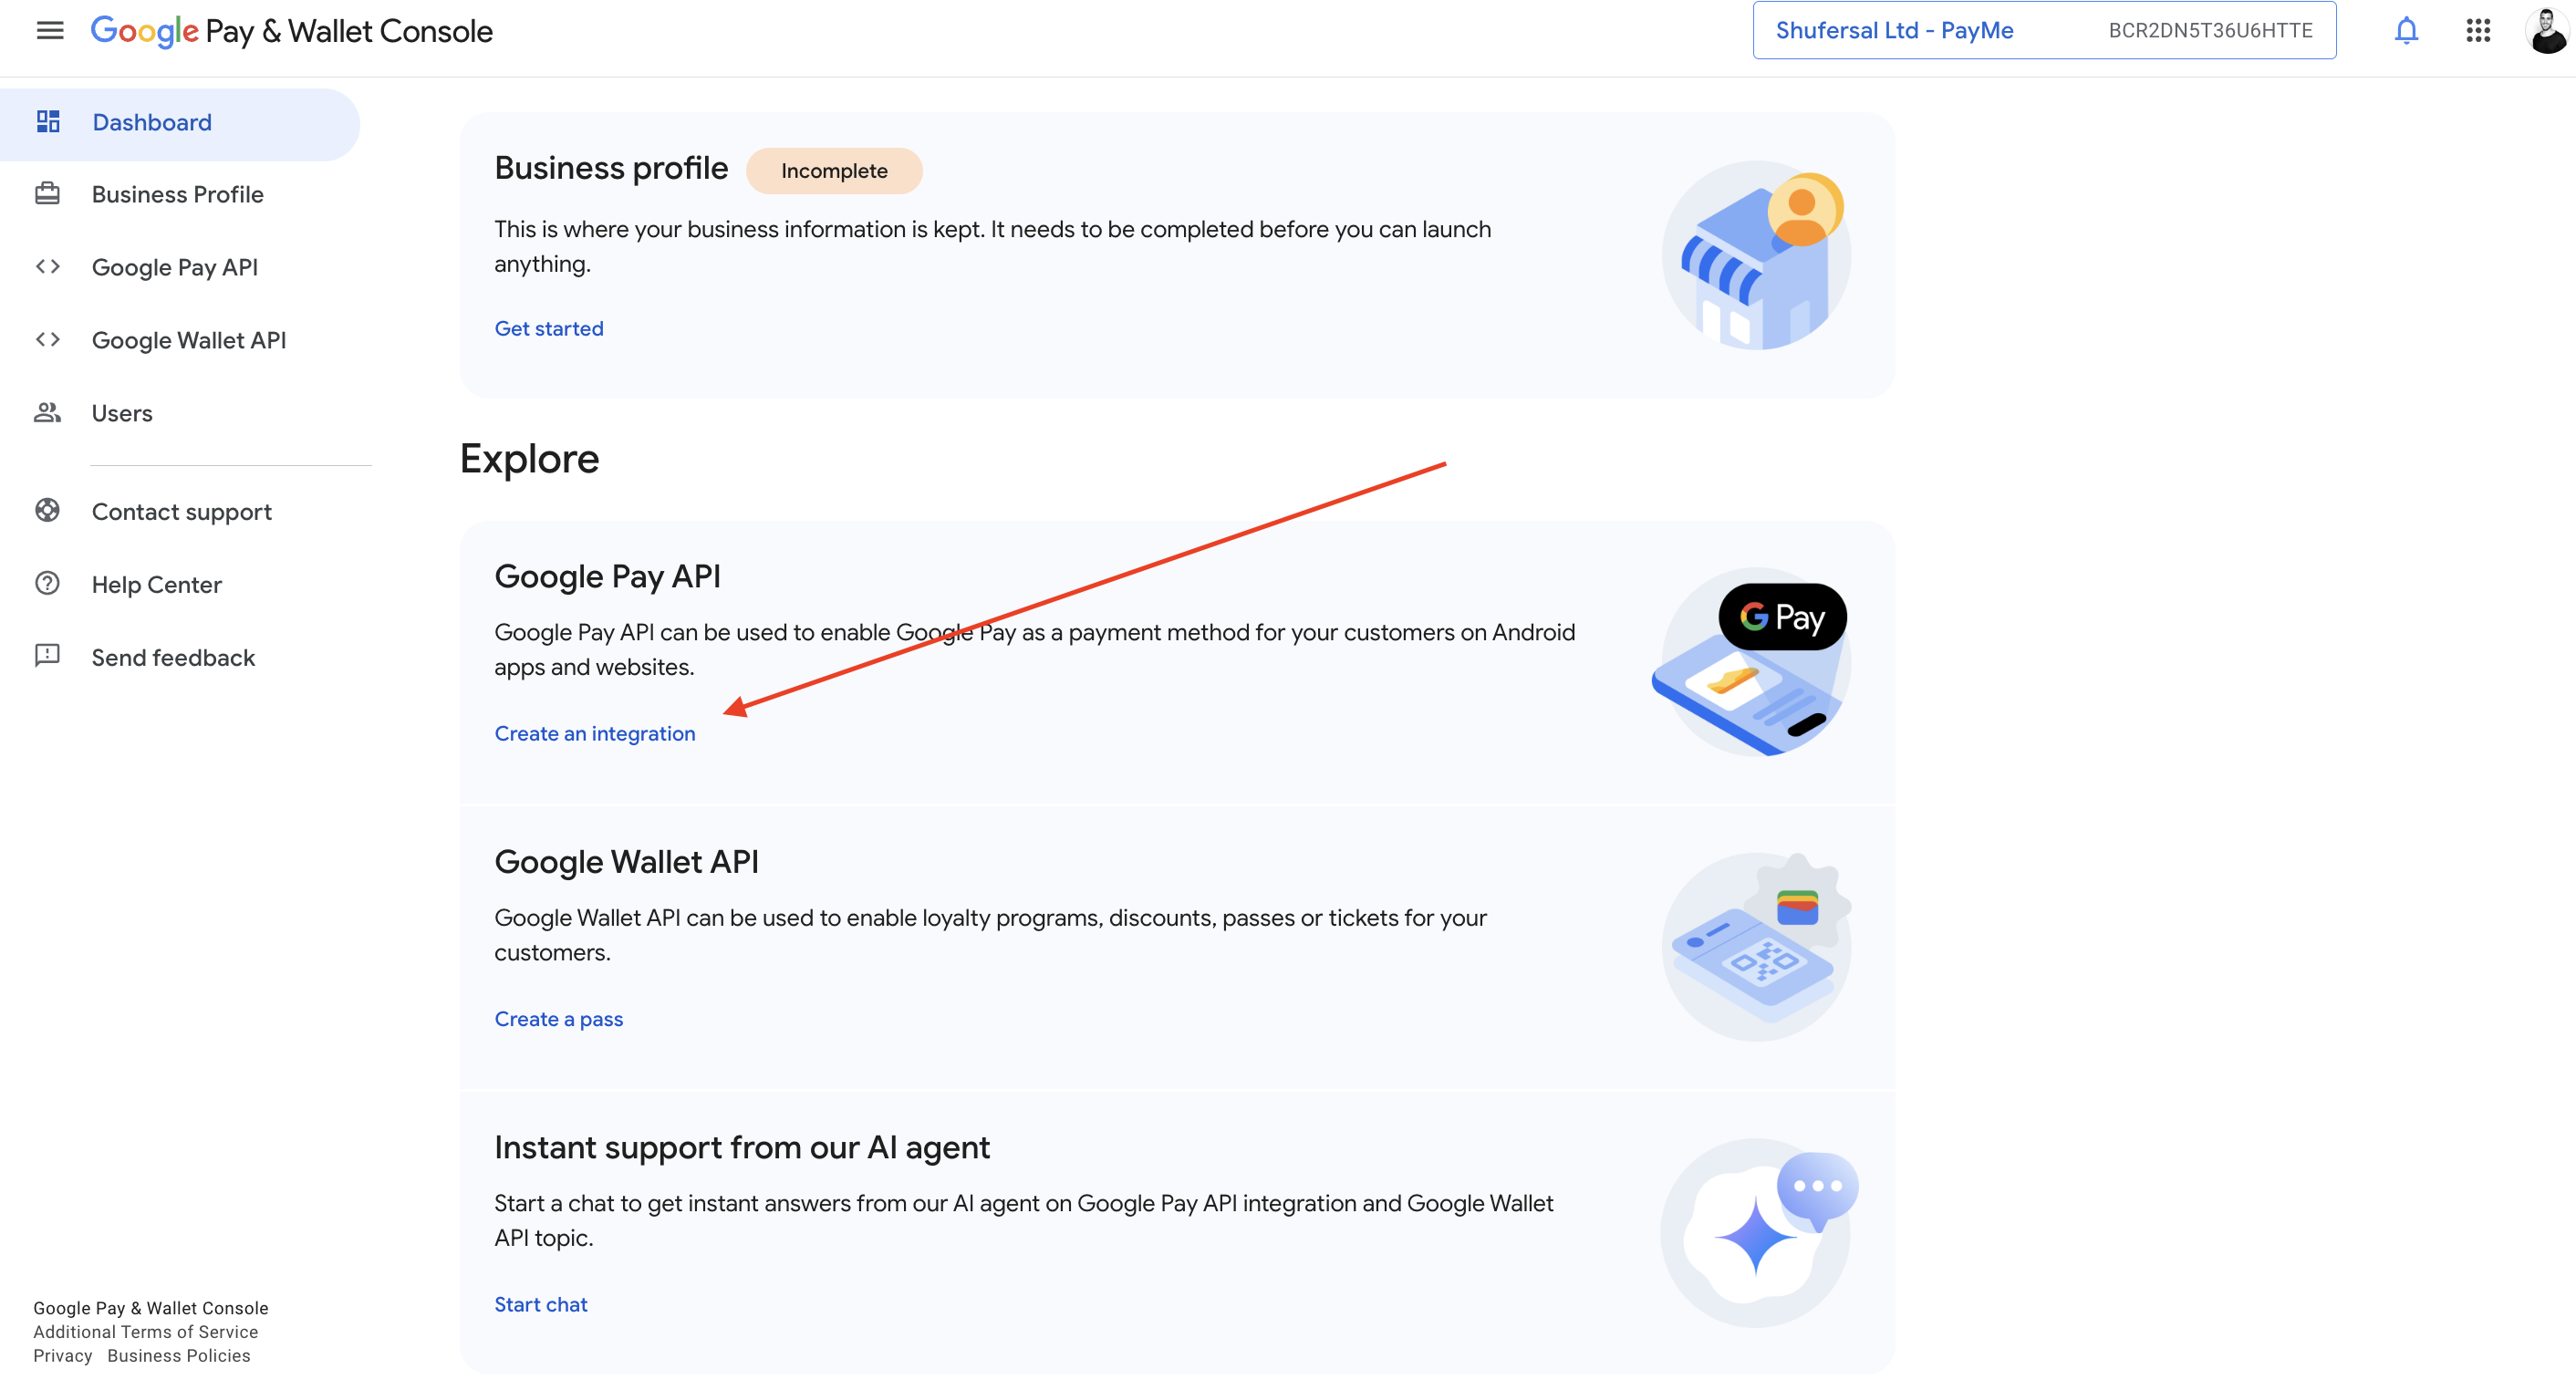
4. Choose **Web integration**.
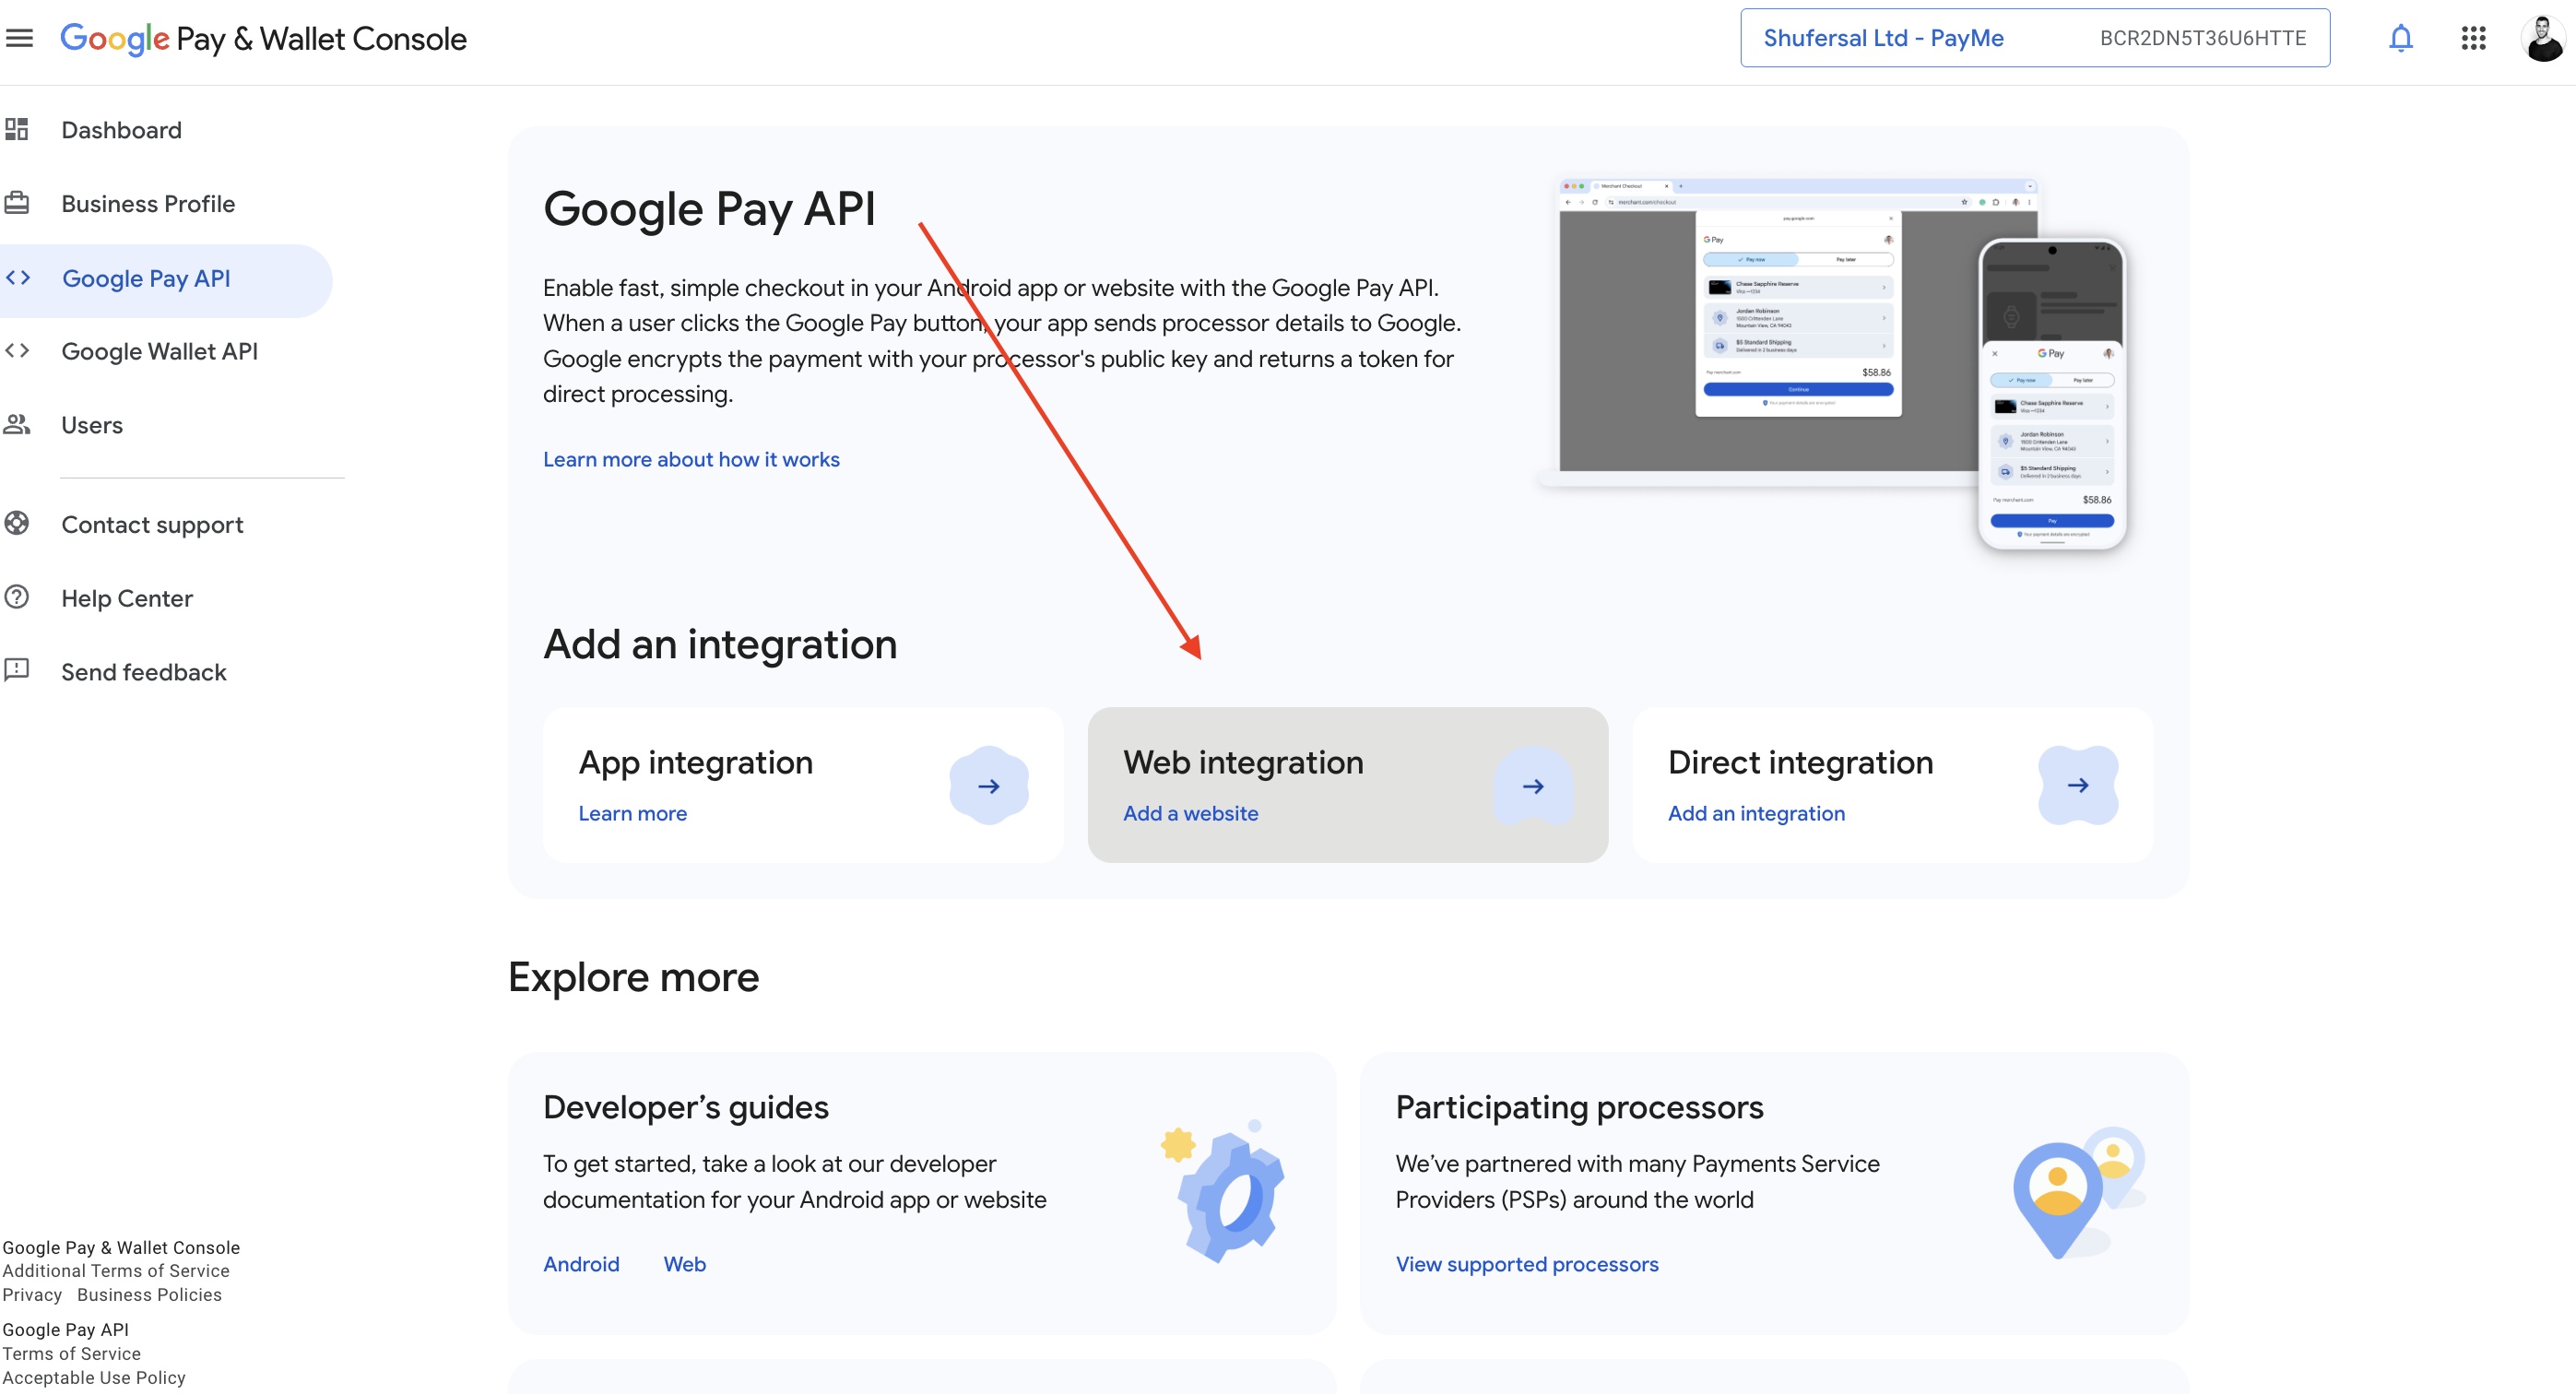
5. Under **Your website**, enter your website's URL. Under **Your Google Pay API integration type**, select **Gateway**.
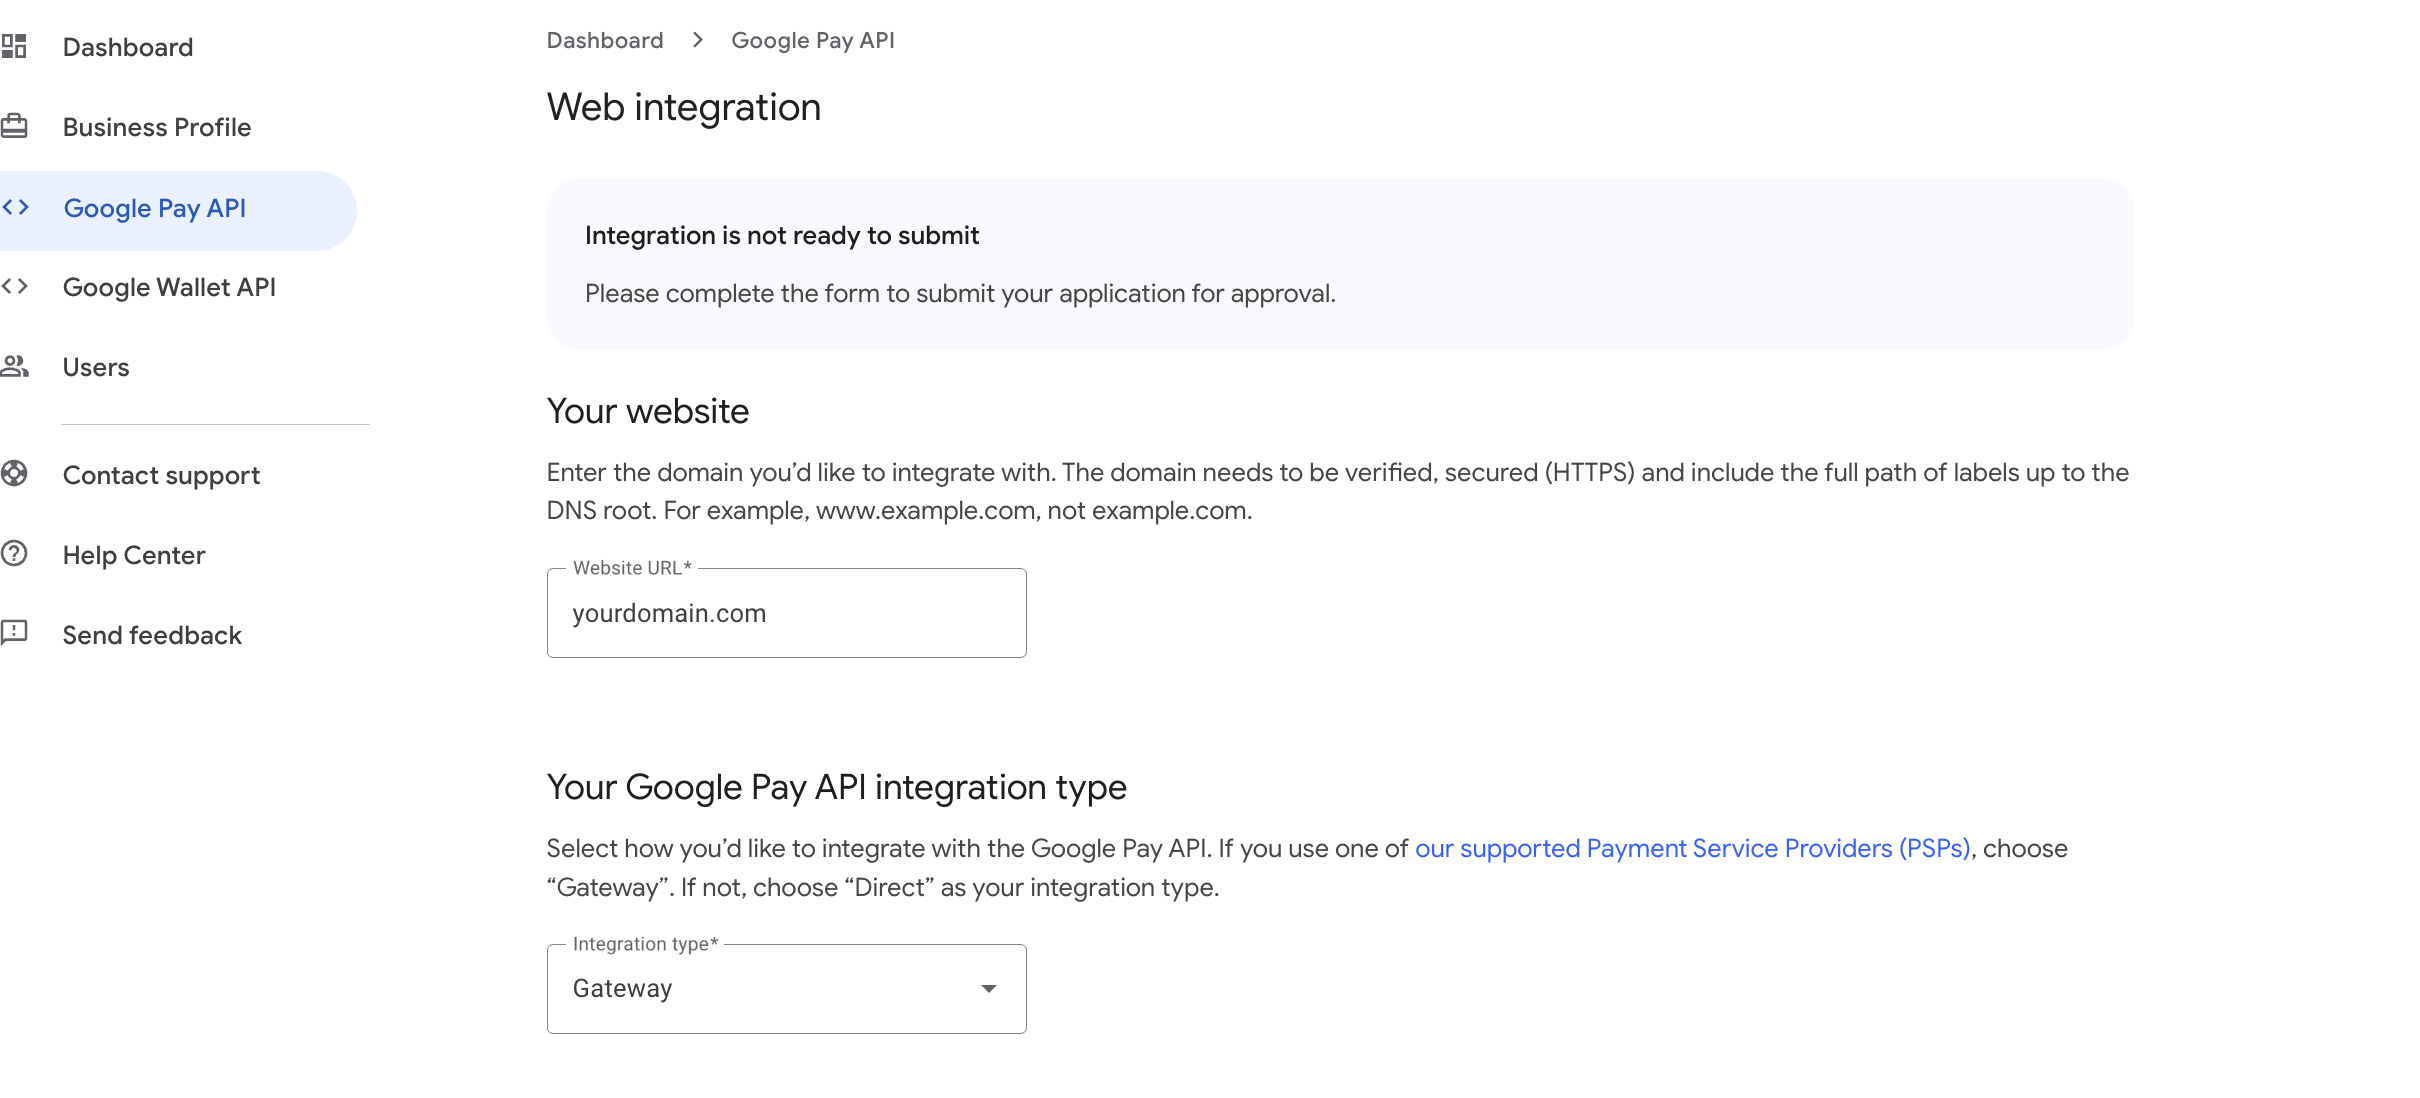
6. In **Screenshots of your buyflow**, upload a screenshot of each step Google asks for, taken on your site.
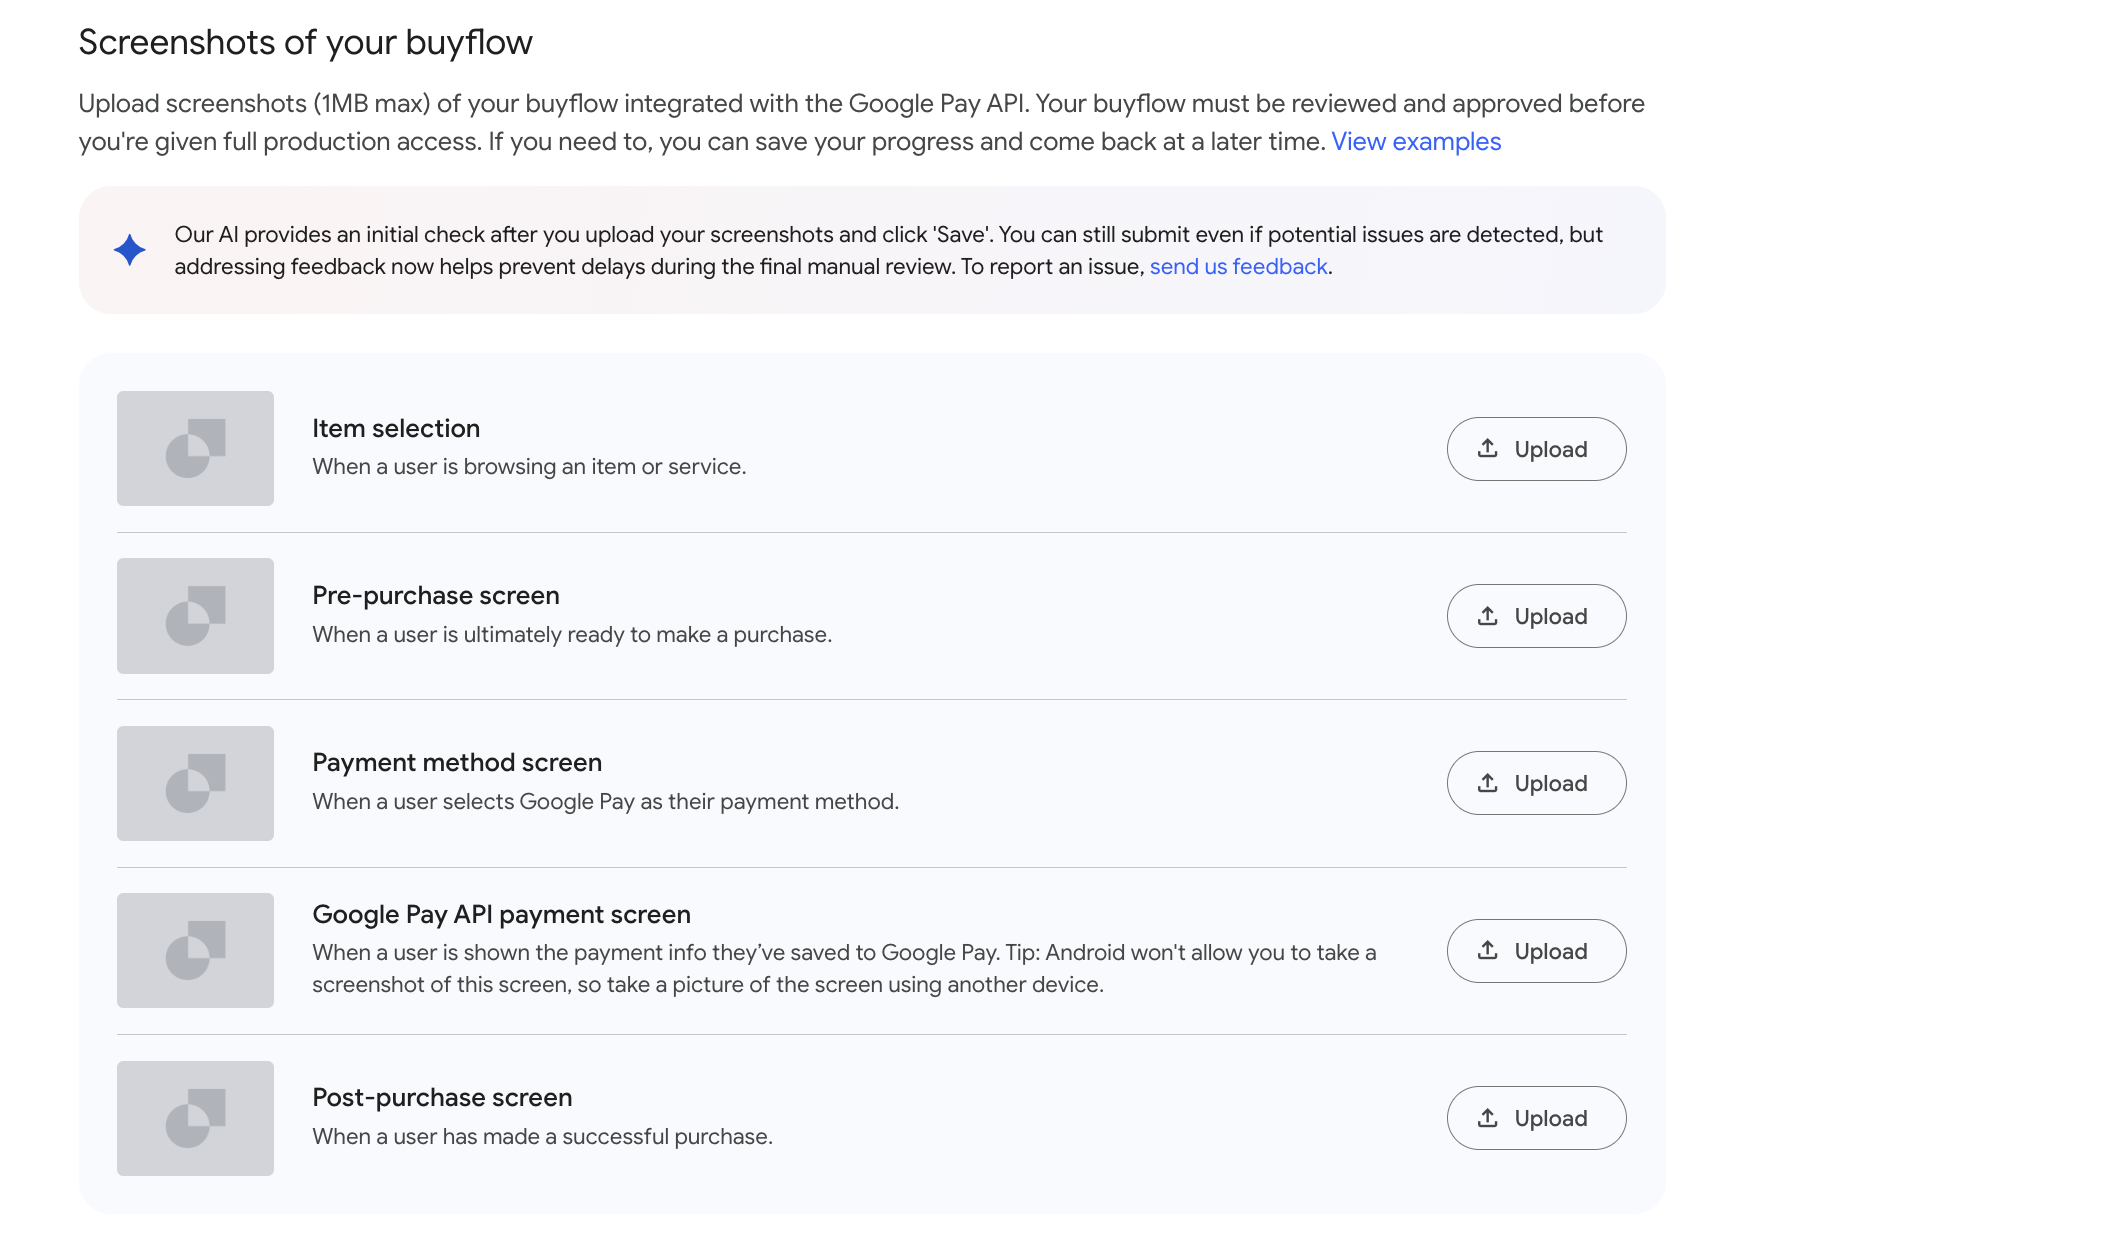
For the **Google Pay API payment screen**, upload a screenshot of this error:
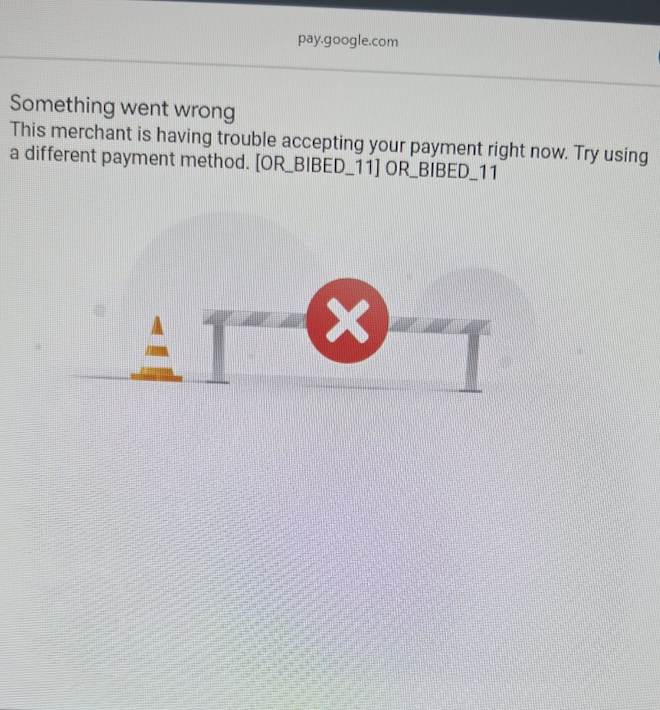
7. A nonprofit organization must also complete steps 1 to 3 of the [Google for Nonprofits](https://support.google.com/nonprofits/answer/3367631) validation.
8. When the registration is complete, email PayMe Partners () to confirm it. PayMe continues the setup on its side.
### Step 2: Enable Google Pay
See [Enable Google Pay](#enable-google-pay). A partner calls [vas-enable](https://docs.payme.io/payments/google-pay/post-vas-enable-google-pay) with its Google Pay service ID:
```json
{
"payme_client_key": "payme_partner_key",
"seller_payme_id": "MPLDEMO-MPLDEMO-MPLDEMO-1234567",
"vas_payme_id": "VASLDEMO-GOOGLEPAY-VASLDEMO-1234567"
}
```
### Step 3: Create a Google Pay sale
On your server, create the sale with [generate-sale](https://docs.payme.io/payments/google-pay/post-generate-sale-google-pay) and `sale_payment_method: "google-pay"`. Set `sale_callback_url` and `sale_return_url`: a payment that needs 3D Secure ends there (see [Step 5](#step-5-handle-the-result)).
`POST https://sandbox.payme.io/api/generate-sale` (production: `https://live.payme.io/api/generate-sale`)
```json
{
"seller_payme_id": "MPLDEMO-MPLDEMO-MPLDEMO-1234567",
"sale_price": 1000,
"currency": "ILS",
"product_name": "Order 1234",
"sale_payment_method": "google-pay",
"sale_callback_url": "https://www.example.com/payment/callback",
"sale_return_url": "https://www.example.com/payment/success"
}
```
```json
{
"status_code": 0,
"sale_url": "https://sandbox.payme.io/sale/generate/SALE1655-3843870J-NTPYLJNW-SOWRLK9X",
"payme_sale_id": "SALE1655-3843870J-NTPYLJNW-SOWRLK9X",
"payme_sale_code": 1027305,
"price": 1000,
"transaction_id": "",
"currency": "ILS",
"sale_payment_method": "google-pay"
}
```
Pass `payme_sale_id` to your page: `googleSale()` takes it as `saleGuid`.
### Step 4: Show the Google Pay button
Use the official Google Pay button and logo, unchanged, as the [Google Pay web brand guidelines](https://developers.google.com/pay/api/web/guides/brand-guidelines) and [Android brand guidelines](https://developers.google.com/pay/api/android/guides/brand-guidelines) require. Show the button only after the availability check passes, and always keep another payment method available.
#### 4.1 Load the PayMe SDK
```html
```
Use this URL in the sandbox and in production. The `testMode` option chooses the environment.
The SDK loads Google's `https://pay.google.com/gp/p/js/pay.js` itself. If your site sets a Content Security Policy, allow `script-src https://cdn.payme.io https://pay.google.com`, `frame-src https://hf.payme.io` and `connect-src https://sandbox.payme.io https://live.payme.io`, plus what Google Pay's own documentation requires.
#### 4.2 Add a container for the button
The SDK renders Google's button into this element:
```html
```
#### 4.3 Check availability, then start
```javascript
const publicKey = 'xxxxxxxx-xxxx-xxxx-xxxx-xxxxxxxxxxxx'; // the seller's public key
const paymeSaleId = 'SALE1655-3843870J-NTPYLJNW-SOWRLK9X'; // from Step 3
const testMode = true; // false in production
if (await PayMe.isGooglePayAvailable(testMode)) {
const instance = await PayMe.create(publicKey, { testMode });
const googleSale = instance.googleSale({
saleGuid: paymeSaleId,
debugFn: (message) => console.log('[PayMe]', message), // optional
});
await googleSale.letsRock({
payButtonSelector: '#pay-with-google-pay',
buttonType: 'buy',
buttonColor: 'default',
canceled() {
// the buyer closed the Google Pay sheet
},
paymentCompleted(err, sale) {
if (err) return showError(err.message); // ":"
if (sale.status_code === 5 && sale.redirect_url) {
window.location.assign(sale.redirect_url); // 3D Secure: the buyer completes it there
return;
}
if (sale.sale_status === 'completed') confirmOnServer(sale.payme_sale_id);
},
});
} else {
// hide Google Pay and offer another payment method
}
```
`PayMe.isGooglePayAvailable(testMode)` loads Google's script and asks Google whether the browser can pay. It resolves to `false` instead of rejecting.
`googleSale()` options:
| Option | Required | What it is |
|---|---|---|
| `saleGuid` | Yes | The `payme_sale_id` from Step 3 |
| `debugFn` | No | A function that receives the SDK's debug messages |
`letsRock(config)` takes the container's selector as a string, or this object:
| Key | Default | Values |
|---|---|---|
| `payButtonSelector` | none | A CSS selector for the container |
| `buttonType` | `buy` | `buy`, `book`, `checkout`, `donate`, `order`, `pay`, `plain`, `subscribe` |
| `buttonColor` | `default` | `default`, `black`, `white` |
| `buttonRadius` | `4` | The corner radius, in pixels |
| `buttonSizeMode` | `fill` | `fill` (fills the container) or `static` |
| `buttonLocale` | the browser's language | A two-letter language code, e.g. `en`. Google can't render a Hebrew button, so `he` shows the logo-only `plain` button. |
| `canceled()` | does nothing | Called when the buyer closes the Google Pay sheet |
| `paymentCompleted(err, sale)` | does nothing | Called with the payment's result: see Step 5 |
The callbacks must be plain functions or arrow functions, not `async` functions: an `async` callback makes `letsRock()` reject with a `validation:invalid-type-for-…-callback` error.
`letsRock()` resolves to the start function, which the button's click already calls. Other methods on the sale:
- `googleSale.setButtonLocale(locale)` re-renders the button in another language.
- `googleSale.destroy()` removes the button. Call it before you start a new sale on the same page.
- `googleSale.manual()` returns `{ createButton(target), startPayment() }`, to render the button into another element or start the payment from your own click handler.
### Step 5: Handle the result
The buyer pays with a card saved in their Google account. Whether 3D Secure runs depends on the card, not on the device:
- A card stored on the buyer's device (Google's `CRYPTOGRAM_3DS`) is charged directly.
- A card saved in the Google account (`PAN_ONLY`) always goes through PayMe's 3D Secure, on any device. This needs the seller's 3D Secure service; without it, the payment fails with error `21017` "Verification failed, please try again".
`paymentCompleted(err, sale)` gets one of these:
| You get | Meaning | What to do |
|---|---|---|
| `err` is `null`, `sale.status_code` is `5`, `sale.redirect_url` is set | 3D Secure needs the buyer | Send the buyer's browser to `redirect_url`. The result is posted to `sale_callback_url`, and the buyer lands on `sale_return_url`. **The sale isn't paid yet.** |
| `err` is `null`, `sale.status_code` is `0`, `sale.sale_status` is `completed` | Paid | Confirm on your server, then fulfil the order |
| `err` is an `Error` | The payment failed or was declined | `err.message` is `":"` |
Before you fulfil, confirm the payment with the [sale callback](https://docs.payme.io/payments/getting-started/callbacks) on your server, or with [get-transactions](https://docs.payme.io/payments/query-apis/post-get-transactions).
### Errors
`letsRock()` rejects with an `Error` whose `message` is:
| `message` | When |
|---|---|
| `no-supported:google-pay-jsapi-not-available` (`PayMe.ERR_MESSAGES.NO_GOOGLE_PAY`) | Google's `pay.js` didn't load, or Google says the browser can't pay |
| `not-found:google-pay-button-not-found` (`PayMe.ERR_MESSAGES.NO_GOOGLE_PAY_BUTTON`) | No element matches `payButtonSelector` |
| `Google Pay merchant settings are missing` | PayMe returned no Google Pay settings for the sale. Check that Google Pay is enabled for the seller. |
| `validation:unknown-configuration-parameter`, `validation:invalid-type-for-cancelled-callback`, `validation:invalid-type-for-payment-completed-callback` | The config isn't a selector or an object, or a callback isn't a plain function |
| `":"` | PayMe rejected the request, for example because the sale doesn't exist or can't be paid |
Payment errors arrive in `paymentCompleted(err)`, and `canceled()` runs when the buyer closes the Google Pay sheet.
### Step 6: Test your integration
1. Create a `google-pay` sale in the sandbox.
2. Load your page with `testMode: true` and the seller's sandbox public key.
3. Check that the availability check passes and the Google Pay button appears.
4. Pay with a card in a Google test account.
5. Check that `paymentCompleted` and your sale callback both report the sale. Then check the cancel flow by closing the Google Pay sheet.
| Problem | Likely cause | What to do |
|---|---|---|
| The Google Pay button doesn't appear | `PayMe.isGooglePayAvailable(testMode)` returned `false` | Check browser and device support, and keep other payment methods available |
| `PayMe.create` fails | A missing or wrong public key | Use the seller's public key for the environment you set with `testMode` |
| `generate-sale` fails | A wrong request or seller setup | Check the MPL and the sale fields, and that Google Pay is enabled for the seller (error `720` when it isn't) |
- [Israeli Direct Debit](https://docs.payme.io/accepting-payments/payment-methods/israeli-direct-debit): Collect an Israeli direct debit authorization (mandate) with generate-sale and sale_type token, then charge the bank account with the returned token (buyer_key). Covers the callbacks and timing of each step.
# Israeli Direct Debit
> **Availability.** Israeli Direct Debit is offered to high-volume sellers only. It is enabled per account after approval by your PayMe sales representative; it is not self-service.
In order to create a direct debit mandate for Israeli customers, you can use our generate-sale API endpoint to complete the two actions of:
1. Generating a mandate request.
2. Generating a new payment request.
### Generating a new bank authorization
#### Prerequisites
PayMe enables Israeli direct debit on the account after approval. Until then, `generate-sale` returns `720`.
The solution is based on our iframe, where the following details will be collected:
1. Account type (Individual/Company/Non-Profit/etc)
2. Account Owner Name
3. Account Owner Social ID/Business Code
4. Email Address
5. Phone Number
6. Bank
7. Bank Branch
8. Bank Account Number
9. Signature
In order to create a new bank authorization request, you will need to initiate the following request:
```
POST https://.payme.io/api/generate-sale
{
"seller_payme_id": "MPLDEMO-MPLDEMO-MPLDEMO-1234567",
"sale_price": "1000",
"currency": "ILS",
"product_name": "Shirt",
"sale_payment_method": "il-direct-debit",
"sale_type": "token"
}
```
Send all of these fields: `product_name` and a numeric `sale_price` are required even though nothing is charged. `currency` is optional for the setup (the account's default is used), so send `ILS`.
The response will include a URL for our iframe for the user to insert the details:
```
{
"status_code": 0,
"sale_url": "https://sandbox.payme.io/sale/generate/SALEGUID",
"payme_sale_id": "SALEGUID",
"payme_sale_code": 123456,
"price": 100,
"transaction_id": "",
"currency": "ILS",
"sale_payment_method": "il-direct-debit"
}
```
Once the bank authorization request was successfully created, the token for the buyer will remain inactive until we receive an official update from the bank that the authorization was successfully created and the account can be charged. PayMe then sends `sale-complete` (or `sale-failure` if the bank rejects it), followed by `sale-il-direct-debit-update`, to your callback URL.
### Creating a new payment request using the Israeli Direct Debit Payment Method
In order to create a new payment request using the IL DD, you will need to use our generate-sale API in the following form:
```
{
"seller_payme_id": "MPLDEMO-MPLDEMO-MPLDEMO-1234567",
"sale_price": "1000",
"currency": "ILS",
"product_name": "Shirt",
"language": "en",
"sale_payment_method": "il-direct-debit",
"sale_type": "sale",
"buyer_key": "BUYERDEMO-BUYERDEMO-BUYERDEMO-1234567"
}
```
If the charging request was successful, you will receive the following response:
```
{
"status_code": 0,
"payme_status": "success",
"status_error_code": null,
"payme_sale_id": "SALEGUID",
"payme_sale_code": 1088759,
"sale_created": "2022-07-03 08:52:16",
"payme_sale_status": "initial",
"sale_status": "initial",
"currency": "ILS",
"transaction_id": "",
"is_token_sale": false,
"price": 1000,
"payme_signature": "signatureID",
"sale_deferred_months": null,
"payme_transaction_id": "TRANGUID",
"payme_transaction_total": "1000",
"payme_transaction_card_brand": "PrivateLabel",
"payme_transaction_auth_number": null,
"payme_transaction_voucher": null,
"payme_transaction_emv_uid": null,
"payme_transaction_acquirer": null,
"payme_transaction_auth_source": null,
"payme_transaction_card_issuer": null,
"payme_transaction_credit_type": null,
"buyer_name": "Ran Tester",
"buyer_email": "TestTest@paymeservice.com",
"buyer_phone": "05222222",
"buyer_card_mask": null,
"buyer_card_exp": null,
"buyer_card_is_foreign": false,
"buyer_social_id": "123456789",
"installments": 1,
"transaction_first_payment": "1000",
"transaction_periodical_payment": 0,
"sale_paid_date": "2022-07-03 08:54:10",
"sale_release_date": null,
"sale_3ds": false
}
```
In this phase, the payment request will go through a process of validation with the related bank.
The approval will be received after 8 calendar days - a decline will be received earlier than that.
Callbacks: `sale-paid` when the debit is submitted, `sale-complete` about 8 days later, or `sale-failure` if the bank returns it. See [Callbacks](https://docs.payme.io/payments/getting-started/callbacks#israeli-direct-debit).
#### Authorization Cancellations and Revokes
The bank is eligible to revoke an authorization at any point of time - this means that once an authorization is revoked, PayMe will update the token to be inactive and you won't be able to use it for new payments anymore. The update can be communicated using our callback system to your designated URL.
- [Accept Bit payments](https://docs.payme.io/accepting-payments/payment-methods/bit): Bit runs on PayMe's payment page only. Enable it: the seller installs Bit from the dashboard app store, or a partner calls vas-enable (status_code 2 means PayMe completes it); without it generate-sale returns 720. Create the sale with sale_payment_method: bit (or multi), currency ILS, one payment (351), no capture_buyer (4). The buyer scans a QR code or opens the Bit app and approves. sale-complete on success; sale-failure with 23001 rejected, 23002 canceled, 23003 expired; the same sale_url stays payable. Refund with refund-sale.
## Prerequisites
- The seller's seller_payme_id (MPL)
- The Bit service active on the seller's account
- A public HTTPS URL for sale_callback_url
## Related
- [Create a sale (hosted payment page)](https://docs.payme.io/payments/hosted-payment-page/post-generate-sale)
- [Let the buyer choose how to pay](https://docs.payme.io/accepting-payments/checkout-and-in-person/let-the-buyer-choose)
- [Enable payment methods and services for your sellers](https://docs.payme.io/marketplaces-and-platforms/seller-onboarding/enable-services)
- [Callbacks](https://docs.payme.io/payments/getting-started/callbacks)
- [Errors](https://docs.payme.io/payments/getting-started/errors)
- [Refund a sale](https://docs.payme.io/payments/post-sale-actions/post-refund-sale)
- [List sales](https://docs.payme.io/payments/query-apis/post-get-sales)
# Accept Bit payments
Bit is an Israeli payment app. The buyer approves the payment in the Bit app on their phone, then PayMe completes the charge and sends you the result. Bit runs on PayMe's payment page: create a sale with `sale_payment_method: bit` to offer Bit alone, or with `multi` to offer it next to cards and wallets.
Limits:
- **ILS only.** Create Bit sales with `currency: ILS`.
- **One payment.** A `bit` sale with more than one installment fails with error `351`. On a `multi` page where the buyer chooses the number of installments, a buyer who pays with Bit pays in one payment.
- **No saved payment method.** `capture_buyer` with `bit` returns error `4`, and a `multi` page with `capture_buyer` doesn't offer Bit.
- **Payment page only.** The browser SDK has no Bit method.
## Enable Bit
- **A seller** installs Bit from the dashboard app store (חנות אפליקציות). It is active as soon as it is installed.
- **A partner** turns Bit on for its seller with `vas-enable`, sending your partner key, the seller's MPL and your partner account's Bit service ID as `vas_payme_id`:
```json
{
"payme_client_key": "payme_partner_key",
"seller_payme_id": "MPLDEMO-MPLDEMO-MPLDEMO-1234567",
"vas_payme_id": "VASLDEMO-BIT-VASLDEMO-1234567"
}
```
The response is either the seller's active service (`status_code: 0`, `vas_is_active: true`), or `status_code: 2` with the message `Zendesk ticket created` when PayMe's team completes the setup. The whole flow, including how to check the result, is on [Enable payment methods and services for your sellers](https://docs.payme.io/marketplaces-and-platforms/seller-onboarding/enable-services).
Without the service, `generate-sale` with `bit` fails with error `720`, and `multi` pages don't show Bit.
## Create a Bit sale
Call [`generate-sale`](https://docs.payme.io/payments/hosted-payment-page/post-generate-sale) from your server with `sale_payment_method: bit`.
`POST https://sandbox.payme.io/api/generate-sale` (production: `https://live.payme.io/api/generate-sale`)
```json
{
"seller_payme_id": "MPLDEMO-MPLDEMO-MPLDEMO-1234567",
"sale_payment_method": "bit",
"sale_price": 1000,
"currency": "ILS",
"product_name": "Order 1234",
"transaction_id": "order-1001",
"sale_callback_url": "https://your-server.example.com/payme/callback",
"sale_return_url": "https://your-site.example.com/payment/success",
"sale_mobile": "+972500000040",
"language": "en"
}
```
```json
{
"status_code": 0,
"session": "AtsJ0as5",
"sale_url": "https://sandbox.payme.io/sale/generate/SALE1700-000000AA-EXAMPLE1-SALE0001",
"payme_sale_id": "SALE1700-000000AA-EXAMPLE1-SALE0001",
"payme_sale_code": 12345678,
"price": 1000,
"transaction_id": "order-1001",
"currency": "ILS",
"sale_payment_method": "bit"
}
```
Show `sale_url` to the buyer in an iframe or a redirect, and store `payme_sale_id`. Partners also send `payme_client_key`; see [Authentication](https://docs.payme.io/payments/getting-started/authentication).
Options:
- `layout: qr-sms` adds a "Payment link via SMS" option: the buyer enters an Israeli mobile number and gets the payment link by SMS. `sale_mobile` pre-fills the number.
- To offer Bit next to cards and wallets, send `sale_payment_method: multi`. See [Let the buyer choose how to pay](https://docs.payme.io/accepting-payments/checkout-and-in-person/let-the-buyer-choose).
The request the buyer sees in the Bit app carries the seller's business name, not `product_name`.
## What the buyer does
1. The buyer opens `sale_url`.
2. On a computer, the page shows a QR code: the buyer scans it with their phone. On a phone, the page shows a button that opens the Bit app.
3. The buyer approves the payment in Bit. On a phone, Bit then brings the buyer back to the payment page.
4. PayMe completes the charge with Bit, shows the result, sends `sale-complete`, and redirects the buyer to `sale_return_url`, if you sent it.
Each new Bit request on a sale cancels the open one before it, so a buyer who reloads the page can't pay twice.
If the buyer closes the page after approving, PayMe keeps checking the request in the background. The sale still completes and the callback still arrives, possibly several minutes later. Don't treat a closed page as a failed payment: wait for the callback, or check the sale with [`get-sales`](https://docs.payme.io/payments/query-apis/post-get-sales).
## Outcomes and callbacks
| `notify_type` | When |
|---|---|
| `sale-complete` | The buyer approved and PayMe completed the charge. `sale_payment_method` is `bit` (also on a `multi` sale), and `installments` is `1`. |
| `sale-failure` | A Bit request ended without a payment. The reason is in `status_error_code`. |
| `refund` | The sale was refunded |
A Bit request ends with one of these codes:
| `status_error_code` | Meaning | PayMe's message | What to do |
|---|---|---|---|
| `23001` | The buyer rejected the request in Bit | "The request was rejected by the customer" | Let the buyer try again or choose another method. |
| `23002` | The request was canceled before the buyer paid it | "The request was canceled by the business" | Let the buyer start a new request. |
| `23003` | The request expired before the buyer approved it | "The request has expired" | Let the buyer start a new request, and approve it in Bit straight away. |
Other codes are listed on [Errors](https://docs.payme.io/payments/getting-started/errors).
A failed request doesn't close the sale: its status is `failed`, and the same `sale_url` stays payable, unless `sale_expiry_seconds` has passed. The buyer can start a new Bit request from the page, and a later success sends `sale-complete`. Callback fields, signature and delivery rules are on [Callbacks](https://docs.payme.io/payments/getting-started/callbacks).
## Refunds
Refund a Bit sale with [`refund-sale`](https://docs.payme.io/payments/post-sale-actions/post-refund-sale), in full or in part. The money goes back to the buyer through Bit.
```json
{
"seller_payme_id": "MPLDEMO-MPLDEMO-MPLDEMO-1234567",
"payme_sale_id": "SALE1700-000000AA-EXAMPLE1-SALE0001",
"sale_refund_amount": 500,
"language": "en"
}
```
If you refund a Bit sale in several parts, leave at least 5 minutes between two refunds of the same sale.
## Test Bit
Ask PayMe how to test Bit in the sandbox before you go live. You can test the rest of your integration (callbacks, `get-sales`, refunds) with the cards on [Test Cards and Payment Methods](https://docs.payme.io/payments/getting-started/test-cards-and-payment-methods).
- [Accept PayPal payments](https://docs.payme.io/accepting-payments/payment-methods/paypal): PayPal sales settle in the seller's own PayPal account, not the PayMe balance: no withdrawals, no market_fee, refunds paid from PayPal. Activation: contact PayMe Partners (partners@payme.io); without it generate-sale returns 720. Create the sale with generate-sale, sale_payment_method paypal, and send sale_callback_url, sale_return_url and cancel_url. Redirect the buyer to sale_url (not an iframe). One payment only (351), no capture_buyer (4), not on multi. Authorize: capture-sale or multi-capture; void the whole authorization only. PayPal disputes don't reach PayMe.
## Prerequisites
- The seller's seller_payme_id (MPL)
- The PayPal service active on the seller's account and connected to the seller's PayPal account
- A public HTTPS URL for sale_callback_url
## Related
- [Create a sale (hosted payment page)](https://docs.payme.io/payments/hosted-payment-page/post-generate-sale)
- [Authorize now, capture later](https://docs.payme.io/accepting-payments/capture-and-saved-cards/capture-sale)
- [Capture an authorization in several parts](https://docs.payme.io/accepting-payments/capture-and-saved-cards/multi-capture)
- [Void an authorization](https://docs.payme.io/payments/post-sale-actions/void-sale)
- [Refund a sale](https://docs.payme.io/payments/post-sale-actions/post-refund-sale)
- [Callbacks](https://docs.payme.io/payments/getting-started/callbacks)
- [Handle chargebacks](https://docs.payme.io/accepting-payments/after-the-sale/handle-chargebacks)
# Accept PayPal payments
With PayPal, the buyer pays from their PayPal account. The seller connects its own PayPal account to PayMe, and the money from PayPal sales goes to that PayPal account. You create the sale with `sale_payment_method: paypal`, the buyer approves the payment on PayPal, and PayMe completes it and sends you the result.
How PayPal differs from cards:
- **The money stays in PayPal.** PayPal sales aren't added to the seller's PayMe balance, so they aren't part of PayMe withdrawals. Refunds are paid from the seller's PayPal account.
- **No platform fee.** PayMe doesn't apply `market_fee` to PayPal sales.
- **Not on the `multi` page.** Create a sale with `sale_payment_method: paypal` to offer PayPal.
- **One payment.** A `paypal` sale with more than one installment fails with error `351`.
- **No saved payment method.** `capture_buyer` with `paypal` returns error `4`.
- **Payment page only.** Hosted Fields has no PayPal method.
## Turn on PayPal
PayPal must be active on the seller's account and connected to the seller's PayPal account. To set it up, contact PayMe Partners () with the seller's MPL.
Without the service, `generate-sale` with `paypal` fails with error `720`.
## Create a PayPal sale
Call [`generate-sale`](https://docs.payme.io/payments/hosted-payment-page/post-generate-sale) from your server with `sale_payment_method: paypal`.
`POST https://sandbox.payme.io/api/generate-sale` (production: `https://live.payme.io/api/generate-sale`)
```json
{
"seller_payme_id": "MPLDEMO-MPLDEMO-MPLDEMO-1234567",
"sale_payment_method": "paypal",
"sale_price": 1000,
"currency": "ILS",
"product_name": "Order 1234",
"transaction_id": "order-1001",
"sale_callback_url": "https://your-server.example.com/payme/callback",
"sale_return_url": "https://your-site.example.com/payment/success",
"cancel_url": "https://your-site.example.com/payment/canceled",
"language": "en"
}
```
```json
{
"status_code": 0,
"session": "AtsJ0as5",
"sale_url": "https://sandbox.payme.io/sale/generate/SALEDEMO-XXXXXXXX-XXXXXXXX-XXXXXXXX",
"payme_sale_id": "SALEDEMO-XXXXXXXX-XXXXXXXX-XXXXXXXX",
"payme_sale_code": 12345678,
"price": 1000,
"transaction_id": "order-1001",
"currency": "ILS",
"sale_payment_method": "paypal"
}
```
Store `payme_sale_id`, and redirect the buyer to `sale_url` in the full browser window. The page sends the buyer straight on to PayPal, so don't show it in an iframe. Partners also send `payme_client_key`; see [Authentication](https://docs.payme.io/payments/getting-started/authentication).
Send these URLs on every PayPal sale:
| Field | Why |
|---|---|
| `sale_callback_url` | Where PayMe sends the result. See [Callbacks](https://docs.payme.io/payments/getting-started/callbacks). |
| `sale_return_url` | Where the buyer goes after approving the payment on PayPal. |
| `cancel_url` | Where PayPal sends a buyer who cancels. Without it, a buyer who cancels on PayPal doesn't come back to your site. |
## What the buyer does
1. The buyer opens `sale_url`, and PayMe sends them to PayPal.
2. The buyer logs in to PayPal and approves the payment.
3. PayMe completes the payment, sends `sale-complete` to your `sale_callback_url`, and the buyer is sent to `sale_return_url`.
The buyer can reach `sale_return_url` before your callback arrives. Fulfil the order on `sale-complete`, or after you check the sale with [`get-sales`](https://docs.payme.io/payments/query-apis/post-get-sales), not on the redirect.
If the buyer cancels on PayPal, PayPal sends them to `cancel_url`. The sale stays `initial` and PayMe sends no callback. The buyer can open `sale_url` again to pay.
## Outcomes and callbacks
| `notify_type` | When |
|---|---|
| `sale-complete` | The buyer approved and PayMe completed the payment, or you captured an authorization. `sale_payment_method` is `paypal`. |
| `sale-authorized` | The buyer approved a sale created with `sale_type: authorize`. |
| `sale-failure` | PayPal declined the payment, or PayMe couldn't complete it. The reason is in `status_error_code`. |
| `refund` | The sale was refunded, or the authorization was voided. |
`buyer_name`, `buyer_email` and `buyer_phone` come from the buyer's PayPal account. When PayPal doesn't share one, PayMe uses the value you sent in `sale_name`, `sale_email` or `sale_mobile`.
Callback fields, signature and delivery rules are on [Callbacks](https://docs.payme.io/payments/getting-started/callbacks), and every type is on [Callback types reference](https://docs.payme.io/payments/getting-started/callback-types).
## Authorize now, capture later
PayPal supports authorizations. Create the sale with `sale_type: authorize`. When the buyer approves, the sale becomes `authorized` and PayMe sends `sale-authorized`. Then:
- **Capture once** with [`capture-sale`](https://docs.payme.io/payments/post-sale-actions/post-capture-sale), for the full amount or less, within 7 days. The flow is the same as for cards; see [Authorize now, capture later](https://docs.payme.io/accepting-payments/capture-and-saved-cards/capture-sale).
- **Capture in several parts** with [multi-capture](https://docs.payme.io/accepting-payments/capture-and-saved-cards/multi-capture#paypal), sending `paypal` as the payment method.
- **Void the whole authorization** with [`refund-sale`](https://docs.payme.io/payments/post-sale-actions/void-sale), leaving out `sale_refund_amount`. Partial voids aren't supported for PayPal. To charge less than you authorized, capture a lower amount instead.
## Refunds
Refund a PayPal sale with [`refund-sale`](https://docs.payme.io/payments/post-sale-actions/post-refund-sale), in full or in parts. The money goes back to the buyer through PayPal, and is paid from the seller's PayPal account, not from the PayMe balance.
```json
{
"seller_payme_id": "MPLDEMO-MPLDEMO-MPLDEMO-1234567",
"payme_sale_id": "SALEDEMO-XXXXXXXX-XXXXXXXX-XXXXXXXX",
"sale_refund_amount": 500,
"language": "en"
}
```
The rules on the `refund-sale` page apply, for example the minimum amount of each partial refund. Refund through `refund-sale` rather than in PayPal, so that PayMe records the refund and sends the `refund` callback.
## Disputes
A dispute that a buyer opens on a PayPal payment is handled in PayPal, between the buyer, PayPal and the seller's PayPal account. PayMe isn't notified, so it sends no `sale-chargeback` callback for it. Chargebacks on other payment methods are covered in [Handle chargebacks](https://docs.payme.io/accepting-payments/after-the-sale/handle-chargebacks).
## Reporting
PayPal sales appear in [`get-sales`](https://docs.payme.io/payments/query-apis/post-get-sales) and [`get-transactions`](https://docs.payme.io/payments/query-apis/post-get-transactions) like other sales, with `paypal` as the payment method. Because the money is paid out by PayPal, they don't appear in [withdrawals](https://docs.payme.io/marketplaces-and-platforms/fees-and-payouts/withdrawals).
## Test PayPal
Ask PayMe how to test PayPal in the sandbox before you go live. You can test the rest of your integration (callbacks, `get-sales`, refunds) with the cards on [Test Cards and Payment Methods](https://docs.payme.io/payments/getting-started/test-cards-and-payment-methods).
## Capture and Saved Cards
- [Authorize now, capture later](https://docs.payme.io/accepting-payments/capture-and-saved-cards/capture-sale): Place a hold on the buyer's card, then charge it within 7 days with capture-sale, or release it with refund-sale.
# Authorize now, capture later
Also known as pre-authorization. PayMe places a hold on the buyer's card; you charge it later with [`capture-sale`](https://docs.payme.io/payments/post-sale-actions/post-capture-sale), once, for the full amount or less.
Capture within 7 days (168 hours) of the authorization; after that, `capture-sale` fails with error `516`. The card issuer decides how long the hold stays on the card.
## Flow
1. Create the sale with [`generate-sale`](https://docs.payme.io/payments/hosted-payment-page/post-generate-sale) and `sale_type: "authorize"`. Show the buyer the `sale_url`.
2. When the buyer pays, the sale's status becomes `authorized` and PayMe sends a `sale-authorized` callback to your `sale_callback_url`.
3. Call `capture-sale` with `payme_sale_id` and, to charge less, `sale_price`. The sale becomes `completed` and PayMe sends a `sale-complete` callback.
### Create the sale
| Field | Value |
|---|---|
| `sale_type` | `authorize` |
| `sale_price` | The amount to hold, in minor units (`10000` = 100.00). |
All other `generate-sale` fields work as for a regular sale.
### Capture it
| Field | Required | Description |
|---|---|---|
| `seller_payme_id` | yes, unless you send `seller_id` with `payme_client_key` | The seller's MPL, as on `refund-sale`. |
| `payme_sale_id` | yes | The authorized sale. |
| `sale_price` | no | Amount to capture, in minor units. Default: the full authorized amount. At least the account's minimum sale value (500 by default). |
| `installments` | no | Number of installments, `1`–`36`. Default: the sale's installments. |
To capture in several parts, use [multi-capture](https://docs.payme.io/accepting-payments/capture-and-saved-cards/multi-capture).
## Releasing a hold
To cancel, void the hold with [`refund-sale`](https://docs.payme.io/payments/post-sale-actions/void-sale) while the sale is `authorized`. PayMe never voids an authorization on its own. If you don't release it, the card issuer releases the hold on its own schedule (days, up to about 30).
A partly voided sale can't be captured. To charge less than you authorized, capture with a lower `sale_price` instead.
## Errors
- `516`: the 7 days have passed. The error doesn't release the hold; void it with `refund-sale`.
- `305`: the sale isn't `authorized` (for example, already captured, voided or partly voided). `status_additional_info` holds its status.
- `352`: `sale_price` is `0`, below the account minimum (500 by default) or above the authorized amount.
- `518`: the sale's authorization is no longer open, for example because the authorization failed.
- A declined capture returns HTTP 200 with `status_code: 1` and leaves the sale `failed`. You can retry while the authorization is still valid.
- `20001`: the acquirer refused a void or refund. Contact PayMe with the `payme_sale_id` and the time of the call.
A captured sale that shows a balance of 0 right after the capture is normal: the funds reach the wallet during settlement.
- [Capture an authorization in several parts](https://docs.payme.io/accepting-payments/capture-and-saved-cards/multi-capture): Multi-capture: charge an authorized card or PayPal sale in several parts, each a new sale linked to the authorization.
# Capture an authorization in several parts
Multi-capture charges an authorized sale in several parts, for example one per shipment. Each part is a new sale linked to the original authorization. Cards (`credit-card`) and PayPal (`paypal`) are supported; any other payment method returns error `4`.
## Step 1: authorize
Create a sale with `sale_type: "authorize"`, in one of two ways:
- [`generate-sale`](https://docs.payme.io/payments/hosted-payment-page/post-generate-sale): PayMe returns a `sale_url` where the buyer enters the card.
- `sales`: you send the card details in the request (PCI DSS Level 1 partners only), and the response holds the result.
When the buyer's card is authorized, the sale's status is `authorized`.
`POST /generate-sale` request:
```json
{
"seller_payme_id": "MPLDEMO-MPLDEMO-MPLDEMO-1234567",
"sale_price": 10000,
"currency": "ILS",
"product_name": "Shirt",
"sale_type": "authorize",
"sale_payment_method": "credit-card",
"language": "en"
}
```
Response:
```json
{
"status_code": 0,
"sale_url": "https://sandbox.payme.io/sale/generate/SALEDEMO-XXXXXXXX-XXXXXXXX-XXXXXXXX",
"payme_sale_id": "SALEDEMO-XXXXXXXX-XXXXXXXX-XXXXXXXX",
"payme_sale_code": 1185468,
"price": 10000,
"transaction_id": "",
"currency": "ILS",
"sale_payment_method": "credit-card"
}
```
`POST /sales` request:
```json
{
"seller_payme_id": "MPLDEMO-MPLDEMO-MPLDEMO-1234567",
"product_name": "Shirt",
"sale_price": 10000,
"currency": "ILS",
"sale_type": "authorize",
"payment": {
"method": "credit-card",
"card_number": "5326105300985846",
"card_expiry": "1230",
"card_cvv": "658"
},
"customer": {
"name": "Israel Israeli",
"email": "buyer@example.com",
"phone": "+972500000000",
"social_id": "008336174"
}
}
```
Response (abridged):
```json
{
"status_code": 0,
"payme_sale_id": "SALEDEMO-XXXXXXXX-XXXXXXXX-XXXXXXXX",
"payme_sale_code": 1185468,
"sale_status": "authorized",
"payme_sale_status": "authorized",
"currency": "ILS",
"price": 10000,
"payme_transaction_total": "10000",
"buyer_card_mask": "532610******5846",
"installments": 1
}
```
## Step 2: capture each part
Call `generate-sale` once per part, with these fields on top of the usual ones:
| Field | Type | Description |
|---|---|---|
| `sale_type` | string | `multi-capture`. |
| `origin_sale_id` | string | The authorized sale's `payme_sale_id`. |
| `currency` | string | Required. The same currency as the authorized sale. |
| `sale_price` | integer | The amount of this part, in minor units. At least the account's minimum sale value (500 by default). |
PayMe charges at once, and the response holds the result.
`POST /generate-sale` request:
```json
{
"seller_payme_id": "MPLDEMO-MPLDEMO-MPLDEMO-1234567",
"sale_price": 4000,
"currency": "ILS",
"product_name": "Shirt, first shipment",
"sale_type": "multi-capture",
"origin_sale_id": "SALEDEMO-XXXXXXXX-XXXXXXXX-XXXXXXXX",
"sale_payment_method": "credit-card",
"language": "en"
}
```
Response (abridged):
```json
{
"status_code": 0,
"status_error_code": 0,
"payme_status": "success",
"payme_sale_id": "SALEDEMO-YYYYYYYY-YYYYYYYY-YYYYYYYY",
"payme_sale_code": 1185470,
"sale_created": "2026-11-09 09:58:26",
"sale_status": "completed",
"payme_sale_status": "completed",
"price": 4000,
"transaction_id": "",
"currency": "ILS",
"sale_payment_method": "credit-card",
"is_token_sale": false,
"sale_description": "Shirt, first shipment",
"sale_deferred_months": null,
"redirect_url": null,
"transaction_cc_auth_number": "123456",
"payme_transaction_auth_number": "123456"
}
```
A declined part returns HTTP 200 with `status_code: 1` and `status_error_code`.
## Rules
- The original sale must be `authorized` (error `305`).
- Each part must use the original's payment method (error `303`) and its currency, which you must send (error `320`). Both sales must belong to the same partner (error `303`).
- All parts together can't exceed the authorized amount, unless PayMe has set a higher capture limit on your account (error `352`).
- Don't send `buyer_key` or `token` with a multi-capture (error `357`).
- Once a part is captured, the authorization can't be voided (error `369`). The original sale stays `authorized`, and the card issuer releases what you don't capture.
## PayPal
Multi-capture works the same way for PayPal payments. You need a PayPal-enabled MPL on PayMe and a PayPal account for the authorization.
Use `generate-sale` for PayPal, sending `paypal` wherever the examples above use `credit-card`. The capture runs in the request, so the response holds the result, and PayMe also sends a `sale-complete` or `sale-failure` callback.
- [Save a card with a token sale](https://docs.payme.io/accepting-payments/capture-and-saved-cards/create-payment-with-buyer-key-token): Moved. Saving a buyer's card as a token (buyer_key) and charging it later is covered in the guide Save a card and charge it later: /accepting-payments/capture-and-saved-cards/save-a-card-and-charge-it-later
# Save a card with a token sale
This page has moved. Saving a card and charging it later is now covered in [Save a card and charge it later](https://docs.payme.io/accepting-payments/capture-and-saved-cards/save-a-card-and-charge-it-later).
- [Build recurring billing with subscriptions](https://docs.payme.io/accepting-payments/capture-and-saved-cards/build-recurring-billing): generate-subscription: status 1 with sub_url, or status 2 with a permanent buyer_key. A job charges each iteration from sub_start_date; each attempt is a sale_type 3 sale; success sends sub-iteration-success with payme_sale_id. List a subscription's sales with get-sales sale_type 3 + sale_parent_code = sub_payme_code. Card check fails: status 4, no retry. Renewal fails: status 7, daily retry, 7 attempts, then 5 + sub-cancel. Pause skips iterations; a paused subscription can't be canceled (305). set-price changes future charges. No wallets.
## Prerequisites
- Seller's seller_payme_id (MPL), sent in the JSON body
- A public HTTPS URL for sub_callback_url (not localhost or a private IP)
- For the saved-card model: a permanent buyer_key
## Related
- [Create a subscription](https://docs.payme.io/payments/subscriptions/post-generate-subscription)
- [Pay a subscription](https://docs.payme.io/payments/subscriptions/post-generate-subscription-2)
- [Pause a subscription](https://docs.payme.io/payments/subscriptions/post-pause-subscription)
- [Resume a subscription](https://docs.payme.io/payments/subscriptions/patch-subscriptions-sub-payme-id-resume)
- [Cancel a subscription](https://docs.payme.io/payments/subscriptions/postcancel-subscription)
- [Update a subscription's price](https://docs.payme.io/payments/subscriptions/patch-subscriptions-sub-id-set-price)
- [List subscriptions](https://docs.payme.io/payments/query-apis/post-get-subscriptions)
- [List sales](https://docs.payme.io/payments/query-apis/post-get-sales)
- [Save a card and charge it later](https://docs.payme.io/accepting-payments/capture-and-saved-cards/save-a-card-and-charge-it-later)
# Build recurring billing with subscriptions
A subscription charges a buyer's saved card on a fixed schedule (daily, weekly, monthly, quarterly or yearly) for a set number of iterations or until you cancel it. PayMe runs the schedule, retries failed charges and reports each step with a callback. You create the subscription, keep your records in sync from the callbacks, and pause, reprice or cancel it through the API.
Each iteration is charged separately; nothing is authorized up front. Wallets such as Apple Pay, Google Pay and Bit aren't offered for subscriptions.
This guide follows a subscription from creation to its last charge. The fields of each call are on the endpoint pages linked in each step.
## Before you start
- **Credentials.** [`generate-subscription`](https://docs.payme.io/payments/subscriptions/post-generate-subscription) needs the seller's `seller_payme_id` (MPL) in the JSON body; the `PayMe-Merchant-Key` header alone isn't enough there. Partners also send `payme_client_key`. See [Authentication](https://docs.payme.io/payments/getting-started/authentication).
- **Base URL.** `https://sandbox.payme.io/api/` in the sandbox, `https://live.payme.io/api/` in production.
- **A callback URL.** Send `sub_callback_url` when you create the subscription: no call changes it later. Without it, callbacks go to your partner's default callback URL, if one is set; a seller has no such setting. `localhost` and private IP addresses are refused with error `21`.
## Choose how the buyer signs up
| Model | How | Use it when |
|---|---|---|
| Payment link | Create the subscription and send the buyer to its `sub_url` to enter a card. | You don't have the buyer's card yet. |
| Saved card | Save a permanent card first, then create the subscription with its `buyer_key`. | The buyer already paid you, or you collect cards in your own checkout. |
| Template link | Create one subscription with `sub_type` `10` and share its `sub_url`. Each buyer who pays it gets their own subscription. | One public sign-up link for many buyers, for example on social media. |
How to save a permanent card: [Save a card and charge it later](https://docs.payme.io/accepting-payments/capture-and-saved-cards/save-a-card-and-charge-it-later).
**Charge now, then every month.** Charge the first payment as a regular sale with `capture_buyer: 1`, which also saves the card. Then create the subscription with that `buyer_key` and `sub_start_date` one period later (for a monthly plan, a day from 1 to 28). Nothing is charged before `sub_start_date`, so the buyer isn't charged twice.
## 1. Create the subscription
Call [`generate-subscription`](https://docs.payme.io/payments/subscriptions/post-generate-subscription):
```json
{
"seller_payme_id": "MPLDEMO-MPLDEMO-MPLDEMO-1234567",
"sub_price": 5000,
"sub_currency": "ILS",
"sub_description": "Monthly plan",
"sub_iteration_type": 3,
"sub_iterations": 12,
"sub_start_date": "01/12/2026",
"subscription_id": "order-1001",
"sub_callback_url": "https://www.example.com/payment/callback",
"sub_return_url": "https://www.example.com/payment/success",
"language": "en"
}
```
- `sub_price` is the price of one iteration, in minor units (`5000` = 50.00).
- `sub_iteration_type`: `1` daily, `2` weekly, `3` monthly, `4` yearly, `5` quarterly. See [Subscription iteration types](https://docs.payme.io/payments/codes-statuses/subscription-iteration-types).
- `sub_iterations`: `-1` (the default) for no end, or 1–54.
- `sub_start_date` is the date of the first charge, `DD/MM/YYYY`. The default is today. It can't be in the past (error `374`), and a monthly subscription must start on day 1–28 (error `375`).
- `subscription_id` is your own reference. It isn't unique: sending the same value twice creates two subscriptions.
The response returns the subscription in status `1` (Initial), with its `sub_url`, `sub_payme_id` and `sub_payme_code`. Store `sub_payme_id`: every other subscription call uses it. PayMe sends `sub-create`.
**With a saved card,** add a permanent `buyer_key` and skip `sub_url`. The subscription is created in status `2` (Active) at once, and PayMe also sends `sub-active`. A single-use token returns error `376`. A template can't take a `buyer_key`.
## 2. The buyer pays and the subscription starts
On `sub_url` the buyer enters a card. PayMe checks the card and saves it; nothing is charged yet. The subscription moves to status `2` (Active), PayMe sends `sub-active`, and the buyer is sent to `sub_return_url` if you set one. If you are PCI DSS Level 1 certified and collect the card in your own form, send it with [`pay-subscription`](https://docs.payme.io/payments/subscriptions/post-generate-subscription-2) instead.
A background job that runs once a minute makes every charge, including the first. The first charge runs within about a minute after `sub_start_date`, once a card is attached.
If the card check fails, the subscription moves to status `4` (Failed) and PayMe sends `sub-failure`. PayMe doesn't retry it and doesn't cancel it. The buyer can open `sub_url` again and enter another card, or you can send one with `pay-subscription`.
## 3. Each charge
When `sub_next_date` arrives, PayMe charges the saved card, with no CVV and no 3D Secure. Every attempt creates a sale of type `3` (`SaleFromSubscription`). When the charge succeeds:
- the subscription is in status `2`;
- `sub_prev_date` holds the time of the charge, and `sub_iterations_completed` goes up by one;
- `sub_next_date` moves to the next iteration. It is always counted from `sub_start_date`, so the billing day doesn't drift;
- PayMe sends `sub-iteration-success`, with the new sale's `payme_sale_id` and `payme_sale_code`.
After the last iteration the status becomes `6` (Completed) and PayMe sends `sub-complete`.
## 4. Link each charge to its subscription
A renewal sale doesn't name its subscription, and its own sale callbacks don't go to `sub_callback_url` (only to your partner's default callback URL, if one is set). Link charges in one of two ways:
1. **From the callback.** When `sub-iteration-success` arrives, store its `payme_sale_id` against the `sub_payme_id`. Refunds and reports work on the sale.
2. **From a query.** Call [`get-sales`](https://docs.payme.io/payments/query-apis/post-get-sales) with `sale_type` `3` and `sale_parent_code` set to the subscription's `sub_payme_code`. The result also lists failed attempts (`sale_status` `failed`); send `sale_status` to narrow it.
```json
{
"seller_payme_id": "MPLDEMO-MPLDEMO-MPLDEMO-1234567",
"sale_type": 3,
"sale_parent_code": 477004
}
```
The `sub-iteration-success` fields you need:
| Field | Example | Use |
|---|---|---|
| `notify_type` | `sub-iteration-success` | What happened. |
| `sub_payme_id` | `SUB16885-68336QPL-UQSSS1CC-SYKXI53N` | The subscription. |
| `subscription_id` | `order-1001` | Your reference, if you sent one. |
| `payme_sale_id` | `SALE1700-000000AA-EXAMPLE1-SALE0001` | The sale this charge created. |
| `payme_sale_code` | `12345678` | The same sale's numeric code. |
| `sub_price` | `5000` | The amount charged, in minor units. |
| `sub_prev_date` | `2026-12-01 00:01:00` | When the charge ran. |
| `sub_next_date` | `2027-01-01 00:00:00` | When the next charge is due. |
| `sub_iterations_completed`, `sub_iterations_left` | `1`, `11` | Progress. |
## 5. Handle failed charges
| What failed | Status | Callback | What PayMe does next |
|---|---|---|---|
| The card check when the buyer pays | `4` Failed | `sub-failure` | Nothing: the buyer must pay again. |
| A scheduled charge, with a retry left | `7` Failed, retry pending | `sub-failure` | Moves `sub_next_date` one day ahead and tries again. |
| A scheduled charge of a daily subscription, or the seventh failure in a row | `5` Canceled | `sub-cancel`, without `sub-failure` | Nothing: the subscription is over, and `sub_next_date` becomes `null`. |
- PayMe makes at most 7 attempts per charge, one a day: the original and 6 retries. This limit is fixed and can't be changed per account or per subscription.
- `sub-failure` carries `sub_error_text`, the decline message with its code in brackets. It carries no sale ID and no attempt counter. Each failed attempt is a `failed` sale, which you can list with `get-sales` as in step 4.
- When a retry succeeds, PayMe sends `sub-iteration-success` and the status returns to `2`. The billing day doesn't change.
- **To recover sooner,** have the buyer enter a new card: `sub_url` opens again while the status is `1`, `4` or `7`, or you can call `pay-subscription`. The new card is checked and saved, and the status becomes `2`. Nothing is charged at that moment: the job charges at `sub_next_date`, which for a status-`7` subscription is the next retry date.
- No call charges an iteration on demand.
- These charge retries are separate from callback delivery, which PayMe retries 3 times within about 90 seconds.
## 6. Pause, resume and cancel
| Call | Allowed in status | Result | Callback |
|---|---|---|---|
| [Pause](https://docs.payme.io/payments/subscriptions/post-pause-subscription): `POST /pause-subscription` | `2`, `4`, `7` | Status `3`. Nothing is charged. | `sub-pause` |
| [Resume](https://docs.payme.io/payments/subscriptions/patch-subscriptions-sub-payme-id-resume): `PATCH /subscriptions/{sub_payme_id}/resume` | `3` | Status `2`. The next charge runs at `sub_next_date`. | None |
| [Cancel](https://docs.payme.io/payments/subscriptions/postcancel-subscription): `POST /cancel-subscription` | `1`, `2`, `4`, `7` | Status `5`. Final. | `sub-cancel` |
- While a subscription is paused, each iteration whose date passes is skipped: it counts in `sub_iterations_skipped`, reduces `sub_iterations_left`, and PayMe sends `sub-iteration-skipped`. Skipped iterations are never charged, not even after you resume. If every remaining iteration is skipped, the subscription becomes `6` (Completed) while still paused.
- **A paused subscription can't be canceled:** `cancel-subscription` returns error `305`. Resume it, then cancel it right away.
- A canceled subscription can't be reactivated. Create a new one.
- After a cancel, `sub_next_date` keeps its old value. Ignore it.
- Cancelling emails the buyer. Buyers can't cancel on their own: the seller cancels, through the API or in the dashboard.
- Don't pause a status-`4` subscription to fix it: it has no working card. Have the buyer pay again instead.
- A status the call doesn't accept returns error `305`: HTTP 400 on resume, HTTP 500 on pause and cancel.
## 7. Change the price
Call [`PATCH /subscriptions/{sub_payme_id}/set-price`](https://docs.payme.io/payments/subscriptions/patch-subscriptions-sub-id-set-price) with the new `sub_price`, for example `PATCH https://sandbox.payme.io/api/subscriptions/SUB16885-68336QPL-UQSSS1CC-SYKXI53N/set-price`:
```json
{
"seller_payme_id": "MPLDEMO-MPLDEMO-MPLDEMO-1234567",
"sub_price": 7500
}
```
- The new price applies to future iterations. Nothing is charged, and `sub_next_date`, `sub_start_date`, the counters and the status don't change.
- You can update an active subscription (status `2`), a template in status `1`, or a status-`1` subscription whose `sub_start_date` is still in the future. Anything else returns error `377` (HTTP 400).
- The path takes `sub_payme_id`. Your own `subscription_id` returns error `371`.
- If the price changed and the subscription has a buyer email, PayMe emails the buyer about the new price, subject to the seller's email settings.
**Mid-cycle upgrade.** There is no proration. Work out the difference yourself, for example (new price − old price) × days left ÷ days in the cycle. Charge it once with `generate-sale` and the subscription's `buyer_key` (read it with [`get-buyer-key`](https://docs.payme.io/payments/tokenization/post-get-buyer-key) and `sub_payme_id`), then call `set-price`. The next cycle charges the full new price on the same billing day. Don't cancel and re-create the subscription: that resets `sub_start_date` and the counters.
## 8. Change the card
- **A failing subscription (status `4` or `7`).** Send the buyer back to `sub_url`, or call `pay-subscription` with the new card. The new card replaces the old one.
- **An active subscription.** No documented call replaces its card. Contact PayMe at .
If you can't wait, move the buyer to a new subscription: save the new card as a permanent token, create a subscription with that `buyer_key` and `sub_start_date` set to the old subscription's `sub_next_date`, then cancel the old one before that date. The new subscription has its own `sub_payme_id` and counters, so set `sub_iterations` to the iterations left. Cancelling the old one sends `sub-cancel` and emails the buyer.
## 9. Share one link with many buyers (templates)
A template (`sub_type` `10`) is one payment link for many buyers. Send the number `10`: the text `template` is rejected with error `24`.
- Share the template's `sub_url`. Each buyer who pays it gets a new subscription (`sub_type` `2`) with its own `sub_payme_id`, and PayMe sends `sub-create` and then `sub-active` for it.
- A buyer's subscription copies the template's price, schedule, `sub_callback_url` and `subscription_id`. Tell buyers apart by `sub_payme_id`.
- To list the buyers' subscriptions, call [`get-subscriptions`](https://docs.payme.io/payments/query-apis/post-get-subscriptions) with `sub_parent_code` set to the template's `sub_payme_code`.
- The link works while the template is in status `1`. Cancelling the template closes the link; subscriptions already created from it keep running, and you cancel them one by one.
- `set-price` on the template changes the price for buyers who join afterwards. Subscriptions already created keep their price.
## Callbacks
| `notify_type` | When |
|---|---|
| `sub-create` | The subscription was created. |
| `sub-active` | A card was attached and the subscription is active. |
| `sub-iteration-success` | A charge succeeded. Carries `payme_sale_id` and `payme_sale_code`. |
| `sub-failure` | The card check failed (status `4`), or a scheduled charge failed and will be retried (status `7`). |
| `sub-pause` | The subscription was paused. |
| `sub-iteration-skipped` | An iteration date passed while the subscription was paused. |
| `sub-complete` | The last iteration was charged or skipped. |
| `sub-cancel` | The subscription was canceled, by the seller or automatically. |
Subscription callbacks are form-encoded `POST` requests to `sub_callback_url`. They carry no `payme_signature`: before acting on one, confirm the state with [`get-subscriptions`](https://docs.payme.io/payments/query-apis/post-get-subscriptions) and `sub_payme_id`. They never contain the `buyer_key`. The same callback can arrive more than once, so process each one once; for `sub-iteration-success`, de-duplicate on `payme_sale_id`. Dates are Asia/Jerusalem local time. Every field: [Callbacks → Subscriptions](https://docs.payme.io/payments/getting-started/callbacks#subscriptions).
## Test it in the sandbox
- **A working subscription.** Create one that starts today and pay its `sub_url` with `5326105300985846`, expiry `12/30`, CVV `658`. You receive `sub-create`, `sub-active`, then `sub-iteration-success` when the first charge runs.
- **A failed renewal.** Save `4000000000000036` with `capture-buyer-token` and `buyer_is_permanent: true` (or with Hosted Fields), then create a monthly subscription with that `buyer_key`. Its scheduled charge is declined with `20004`, so the subscription moves to status `7` and you receive `sub-failure`.
- Later renewals and retries follow the real schedule: no call charges an iteration early.
More cards: [Test Cards and Payment Methods](https://docs.payme.io/payments/getting-started/test-cards-and-payment-methods).
## See also
- [Subscriptions overview](https://docs.payme.io/payments/subscriptions): endpoints, statuses and iteration types.
- [Subscription statuses](https://docs.payme.io/payments/codes-statuses/subscription-statuses)
- [List subscriptions](https://docs.payme.io/payments/query-apis/post-get-subscriptions)
- [Save a card and charge it later](https://docs.payme.io/accepting-payments/capture-and-saved-cards/save-a-card-and-charge-it-later): Save a card as a buyer_key: capture_buyer: 1 on generate-sale (charge and save), sale_type: token (save, no charge), Hosted Fields tokenize() or capture-buyer-token (PCI). capture-buyer-token is single-use unless buyer_is_permanent: true; a used token gives 604. buyer_is_private: true = one seller; default = any seller of the partner, and get-buyer-key then needs payme_client_key (603). Charge: generate-sale + buyer_key, at once, no CVV, no 3D Secure; a decline is HTTP 200 with status_code 1. Store buyer_key encrypted, server-side.
## Prerequisites
- Seller's seller_payme_id (MPL), kept on your server
- A public HTTPS URL for callbacks (not localhost or a private IP)
## Related
- [Save a card (token sale)](https://docs.payme.io/payments/tokenization/post-generate-sale-tokenization)
- [Save a card as a token](https://docs.payme.io/payments/tokenization/post-capture-buyer-token)
- [Get the buyer key of a sale or subscription](https://docs.payme.io/payments/tokenization/post-get-buyer-key)
- [Create a sale (hosted payment page)](https://docs.payme.io/payments/hosted-payment-page/post-generate-sale)
- [Hosted Fields JSAPI guide](https://docs.payme.io/accepting-payments/checkout-and-in-person/hosted-fields-jsapi-guide)
- [Build recurring billing with subscriptions](https://docs.payme.io/accepting-payments/capture-and-saved-cards/build-recurring-billing)
- [Test Cards and Payment Methods](https://docs.payme.io/payments/getting-started/test-cards-and-payment-methods)
# Save a card and charge it later
Save a buyer's card once as a token, the `buyer_key`, and charge it from your server whenever you need to: a repeat order, a top-up, or a charge after delivery. The buyer doesn't have to be present, and the card number never reaches your servers.
This guide covers the ways to save a card, the two settings that decide what a token can do, how to charge it, and how to keep tokens safe. To charge a saved card on a fixed schedule, see [Build recurring billing with subscriptions](https://docs.payme.io/accepting-payments/capture-and-saved-cards/build-recurring-billing).
## Before you start
- **Credentials.** The seller's `seller_payme_id` (MPL), in the JSON body. Partners also send `payme_client_key`. Keep both on your server: together with a `buyer_key`, the MPL is all it takes to charge the card. See [Authentication](https://docs.payme.io/payments/getting-started/authentication).
- **Base URL.** `https://sandbox.payme.io/api/` in the sandbox, `https://live.payme.io/api/` in production. A token works only in the environment where it was saved.
- **A callback URL.** A public address for `sale_callback_url`. `localhost` and private IP addresses are refused with error `21`. See [Callbacks](https://docs.payme.io/payments/getting-started/callbacks).
## 1. Save the card
| Way | Charges the buyer? | Who handles the card | Use it when |
|---|---|---|---|
| `capture_buyer: 1` on [`generate-sale`](https://docs.payme.io/payments/hosted-payment-page/post-generate-sale) | Yes, the sale amount | PayMe's payment page (`sale_url`) | The first order should also save the card. |
| `sale_type: token` on [`generate-sale`](https://docs.payme.io/payments/tokenization/post-generate-sale-tokenization) | No | PayMe's payment page (`sale_url`) | You want a card on file before any charge, for example at sign-up. |
| Hosted Fields `tokenize()` | No | PayMe's card fields inside your own checkout | Your checkout must look native to your site. |
| [`capture-buyer-token`](https://docs.payme.io/payments/tokenization/post-capture-buyer-token) | No | Your server sends the card number | You are PCI DSS Level 1 certified. |
Saving works with the payment methods `credit-card`, `apple-pay`, `il-direct-debit` and `multi`. Other methods return error `4`.
### Save while charging (`capture_buyer`)
Add `capture_buyer: 1` to a regular `generate-sale` and show the buyer the `sale_url`. When the buyer pays, PayMe charges the card, saves it, and sends the `buyer_key` in the `sale-complete` callback.
```json
{
"seller_payme_id": "MPLDEMO-MPLDEMO-MPLDEMO-1234567",
"sale_price": 5000,
"currency": "ILS",
"product_name": "First order",
"transaction_id": "order-1001",
"capture_buyer": 1,
"buyer_is_private": true,
"sale_callback_url": "https://your-server.example.com/payme/callback",
"language": "en"
}
```
### Save without charging (`sale_type: token`)
Send `sale_type: token` on `generate-sale` and show the buyer the `sale_url`. Nothing is charged: PayMe sets the price to `100` and doesn't charge it, but `product_name` and a numeric `sale_price` are still required. The `buyer_key` arrives in the `sale-complete` callback. For a page that can be opened only once, add `layout: token-capture` and `sale_should_be_opened_once: true`.
```json
{
"seller_payme_id": "MPLDEMO-MPLDEMO-MPLDEMO-1234567",
"sale_type": "token",
"sale_price": 100,
"currency": "ILS",
"product_name": "Save card",
"buyer_is_private": true,
"sale_callback_url": "https://your-server.example.com/payme/callback",
"language": "en"
}
```
### Save in your own checkout (Hosted Fields)
In the browser, `instance.tokenize()` returns a `token`: that is the `buyer_key`. Send it to your server and charge it there. A Hosted Fields token is permanent unless you create the instance with `tokenIsPermanent: false`, and account-level unless you pass `buyerIsPrivate: true` (both explained below). Setup and code: [Hosted Fields JSAPI guide](https://docs.payme.io/accepting-payments/checkout-and-in-person/hosted-fields-jsapi-guide).
### Save from your server (`capture-buyer-token`)
`capture-buyer-token` takes the card number, expiry and CVV, so use it only if you are PCI DSS Level 1 certified. It returns the `buyer_key` in the response. **The token is single-use unless you send `buyer_is_permanent: true`.**
## 2. Decide what the token can do
Two settings, sent when you save the card, decide how often the token can be charged and who can charge it.
### Single-use or permanent
| Saved with | Default |
|---|---|
| `capture_buyer` or `sale_type: token` | Permanent. |
| Hosted Fields | Permanent. `tokenIsPermanent: false` makes it single-use. |
| `capture-buyer-token` | **Single-use.** `buyer_is_permanent: true` makes it permanent. |
A permanent token can be charged any number of times and doesn't expire in PayMe. A single-use token is deactivated by the first charge, even when that charge is declined. Later charges return error `604` ("Buyer inactive"), and a subscription refuses it with error `376`. Save permanent tokens unless you want exactly one charge.
### Seller-level or account-level (`buyer_is_private`)
| | `buyer_is_private: true` (seller-level) | Not sent (account-level, the default) |
|---|---|---|
| Who can charge it | Only the seller (MPL) that saved it | Any seller of the same partner |
| Read it back with [`get-buyer-key`](https://docs.payme.io/payments/tokenization/post-get-buyer-key) | `seller_payme_id`, or a partner's `payme_client_key` | `payme_client_key` only. Sending `seller_payme_id` returns error `603`. |
In Hosted Fields the option is `buyerIsPrivate` (default `false`).
- **Direct sellers:** send `buyer_is_private: true`. Without a partner key you can't read an account-level token back.
- **Partners:** an account-level token lets several of your sellers charge the same buyer's card. Use seller-level tokens unless you need that.
- Error `603` comes only from `get-buyer-key`. A seller charges its own account-level token with its MPL as usual. A token that belongs to another seller, or to another partner, returns error `605` when you charge it.
## 3. Charge the saved card
Send the `buyer_key` to [`generate-sale`](https://docs.payme.io/payments/hosted-payment-page/post-generate-sale) from your server. The call charges the card at once: there is no payment page, no `sale_url`, no CVV and no 3D Secure.
```json
{
"seller_payme_id": "MPLDEMO-MPLDEMO-MPLDEMO-1234567",
"buyer_key": "BUYERDEMO-BUYERDEMO-BUYERDEMO-1234567",
"sale_price": 5000,
"currency": "ILS",
"product_name": "Repeat order",
"transaction_id": "order-1002",
"sale_callback_url": "https://your-server.example.com/payme/callback",
"language": "en"
}
```
The response holds the result (abridged):
```json
{
"status_code": 0,
"payme_status": "success",
"status_error_code": 0,
"payme_sale_id": "SALE1700-000000AA-EXAMPLE1-SALE0001",
"payme_sale_code": 12345678,
"sale_status": "completed",
"sale_payment_method": "credit-card",
"price": 5000,
"currency": "ILS",
"transaction_id": "order-1002",
"payme_transaction_id": "TRAN1700-000000AA-EXAMPLE1-TXN00001",
"buyer_card_mask": "532610******5846",
"sale_3ds": false
}
```
A declined charge also returns **HTTP 200**, with `status_code: 1` (abridged):
```json
{
"status_code": 1,
"status_error_code": 20004,
"status_error_details": "Refusal by credit company. Please try a different card",
"payme_sale_id": "SALE1700-000000AA-EXAMPLE1-SALE0002",
"sale_status": "failed"
}
```
- **Check `status_code`, not the HTTP status.** Request errors, such as an unusable token or a field that can't be combined with `buyer_key`, also return `status_code: 1`, with an HTTP error status.
- **Every call creates a new sale**, even when the charge is declined. PayMe doesn't de-duplicate `transaction_id`, so a repeated call charges again. After a timeout, look the sale up with [`get-sales`](https://docs.payme.io/payments/query-apis/post-get-sales) before you retry. See [Idempotency and Retries](https://docs.payme.io/payments/getting-started/idempotency-and-retries).
- **Callbacks** follow as for any sale: `sale-complete` for a charge, `sale-failure` for a decline.
- **The token's payment method** is used, whatever `sale_payment_method` you send.
- **To hold the amount instead of charging it**, add `sale_type: authorize`. The sale becomes `authorized`, and you capture it later: see [Authorize now, capture later](https://docs.payme.io/accepting-payments/capture-and-saved-cards/capture-sale).
Because the buyer isn't there, nothing is checked with them when you charge: no CVV and no 3D Secure. Charge a saved card only for payments the buyer has agreed to.
## 4. Get a token back
- **From the save itself.** The `sale-complete` callback of a `capture_buyer` or `token` sale carries `buyer_key`. `capture-buyer-token` returns it in the response, and Hosted Fields returns it from `tokenize()`.
- **If you missed it.** Call [`get-buyer-key`](https://docs.payme.io/payments/tokenization/post-get-buyer-key) with the `payme_sale_id` of the paid sale that saved the card. For a subscription whose card was entered on `sub_url`, send `sub_payme_id`: subscription calls and callbacks never return the `buyer_key`.
- **Same card, same key.** Saving the same card again for the same buyer and seller can return the `buyer_key` you already have. Store one record per `buyer_key`.
## 5. Store tokens safely
- **Treat `buyer_key` like a card number.** With the seller's MPL it charges the card. Store it encrypted, on your server only.
- **Keep it out of the browser.** Never send `buyer_key` or the MPL to a web page or an app, and keep both out of URLs and logs.
- **Store what you show, not the card.** Keep `buyer_card_mask` and the expiry next to the token, so the buyer can see which card is on file. Never store the card number or the CVV: you don't need them.
- **Record how it was saved:** which seller saved it, and whether it is permanent and seller-level.
- **When a buyer removes a card,** delete the `buyer_key` on your side and stop charging it.
## 6. Keep saved cards up to date (Card Updater)
Cards expire, and card companies replace lost or stolen ones. A charge on the old card then fails, and you have to save the new card and replace the stored `buyer_key`.
With the Card Updater service active on the seller's account, PayMe updates saved cards when an Israeli card company reports a replacement card. The `buyer_key` stays the same, so stored tokens and subscriptions keep working. The new masked number and expiry show the next time you read the token with `get-buyer-key`. PayMe sends no callback when it updates a card. To activate Card Updater, contact PayMe.
## Errors
| Code | When | What to do |
|---|---|---|
| `601` | `buyer_key` sent with `capture_buyer` | Send one or the other. |
| `602` | `buyer_key` sent with `sale_type` `token` or `seller-token` | Charge with a regular sale type. |
| `606` | `buyer_key` sent with `sale_type: template` | A template can't be charged with a token. |
| `357` | `buyer_key` sent with `sale_type: multi-capture` | Capture the original authorization instead. |
| `604` | The token is inactive, or a single-use token was already charged | Save the card again, as a permanent token. |
| `605` | The token belongs to another seller or another partner | Charge with the seller that saved it. |
| `603` | `get-buyer-key` with `seller_payme_id` for an account-level token | Send `payme_client_key` instead. |
| `600` | `get-buyer-key` found no saved card on the sale or subscription, or the sale isn't paid | Check the ID, and that the sale was paid. |
| `130` | The charge is over the seller's processing limit | Contact PayMe. |
| `4` | Saving isn't supported for the sale's payment method | Use one of the methods listed in step 1. |
| `608` | `buyer_perform_validation` sent without `capture_buyer` or a token sale | Remove it, or save a card in the same request. |
| A decline code, for example `20004` | The card issuer declined the charge (HTTP 200, `status_code: 1`) | Ask the buyer for another card. |
All codes: [Errors](https://docs.payme.io/payments/getting-started/errors).
## Test it in the sandbox
- Save and charge with `5326105300985846`, expiry `12/30`, CVV `658`, social ID `008336174`. It's a local Israeli card that accepts ILS only.
- `4000000000000036` saves through Hosted Fields or `capture-buyer-token`, and a later charge with its token is declined with `20004`. On a payment page with `capture_buyer` or `sale_type: token`, it's declined at once and no token is saved.
- To see the single-use rule, save a card with `capture-buyer-token` without `buyer_is_permanent` and charge it twice: the second charge returns `604`.
- Save and charge sandbox tokens with sandbox credentials on `https://sandbox.payme.io`.
More cards: [Test Cards and Payment Methods](https://docs.payme.io/payments/getting-started/test-cards-and-payment-methods).
## 3D Secure
- [3D Secure as a service](https://docs.payme.io/accepting-payments/3d-secure/3d-secure-as-a-service): Run PayMe's 3D Secure 2 authentication as its own API call, without charging the card, and use the result with PayMe or another gateway.
# 3D Secure as a service
## What is the standalone 3D Secure service?
The standalone 3D Secure service runs PayMe's 3D Secure authentication as its own API call, without charging or authorizing the card. You can rely on the result to authorize or charge the card later, with PayMe or with another gateway.
## When to use it
Use it when the card must pass 3D Secure at a specific point in your flow, before any charge. For example, authenticate the card when the customer signs up, then charge it only after you ship the order, or when the customer starts using a service.
## How it works
PayMe runs 3D Secure 2 with the buyer's browser data. The issuer either approves the card without asking the buyer anything (frictionless), or asks for a challenge, such as a one-time code.
1. **Start authentication.** Collect the browser data with PayMe's JS library ([3DS integration using JS API](https://docs.payme.io/accepting-payments/3d-secure/3ds-with-hosted-fields)), then call [Start 3D Secure authentication](https://docs.payme.io/payments/standalone-3d-secure-service/post-initialize-3dsecure-request) (`POST /sales/{payme_sale_id}/3ds`) with the card and the browser data. A frictionless approval returns `hash_3dsecure` at once. A challenge returns a `redirect_url` for the buyer, and the hash comes back after the challenge.
2. **Resolve the hash.** Call [Resolve a 3D Secure hash](https://docs.payme.io/payments/standalone-3d-secure-service/get-sales-payme-sale-id-3ds-hash) (`GET /sales/{payme_sale_id}/3ds/{hash_3dsecure}`) from your server with the seller's MPL. You get `eci`, `cavv` and `xid` to send to your gateway.
The seller must have the 3D Secure service active; otherwise the call returns error `720`. The full flow: [Standalone 3D Secure: process flow](https://docs.payme.io/payments/standalone-3d-secure-service).
## When PayMe applies 3D Secure to its own sales
On sales that PayMe processes, rules on the account can apply 3D Secure automatically: a minimum amount, a minimum number of installments, and cards issued abroad. The amount rule compares the sale's amount in minor units with the account's threshold, without converting currencies. A card counts as foreign when its issuing country differs from the seller's registered country.
- [3DS with Hosted Fields](https://docs.payme.io/accepting-payments/3d-secure/3ds-with-hosted-fields): Run 3D Secure on a Hosted Fields token: collect the browser data with PayMe.clientData, pay the sale with pay-sale and meta_data_jwt, and handle the challenge redirect and the result.
# 3DS with Hosted Fields
When 3D Secure is active on the seller's account and a sale meets its selection rules (a foreign card, an amount above the account's threshold, or 3 or more installments), pay the Hosted Fields token with `pay-sale` and the buyer's browser data. PayMe then runs 3D Secure: either frictionless, or with a challenge screen the buyer completes. No `services` parameter is needed to turn it on.
**Always send the browser data (`meta_data_jwt`).** Without it, `pay-sale` charges the token without 3D Secure.
The challenge screen opens at the `redirect_url` PayMe returns. If you restrict hosts with allow-lists or a Content Security Policy, allow the host of that URL. See [Environments](https://docs.payme.io/payments/getting-started/environments).
## Step 1: Tokenize
Tokenize the card as in the [Hosted Fields guide's minimal integration](https://docs.payme.io/accepting-payments/checkout-and-in-person/hosted-fields-jsapi-guide#minimal-integration). The result's `token` is the `buyer_key`. The 3D Secure part needs no extra HTML.
## Step 2: Collect the browser data
In the same page, call `PayMe.clientData(testMode)` and send the `hash` it resolves to your server, together with the token:
```html
```
Pass the same `testMode` you use for `PayMe.create`: `PayMe.clientData(true)` in the sandbox, `PayMe.clientData(false)` (or no argument) in production. The data is encrypted for that environment. If your site sets a Content Security Policy, allow `connect-src https://hf.payme.io`.
## Step 3: Create the sale
On your server, call [generate-sale](https://docs.payme.io/payments/hosted-payment-page/post-generate-sale) **without** a `buyer_key`, and keep the `payme_sale_id` it returns. Set the two URLs here: `pay-sale` doesn't take them.
- `sale_callback_url`: PayMe posts the result there, including the result of a challenge.
- `sale_return_url`: where the buyer lands after a challenge.
```json
{
"seller_payme_id": "MPLDEMO-MPLDEMO-MPLDEMO-1234567",
"sale_price": 1000,
"currency": "ILS",
"product_name": "Order 1234",
"sale_payment_method": "credit-card",
"sale_callback_url": "https://www.example.com/payment/callback",
"sale_return_url": "https://www.example.com/payment/success"
}
```
The response has other fields as well; you need `payme_sale_id`:
```json
{
"status_code": 0,
"payme_sale_id": "SALE1655-3843870J-NTPYLJNW-SOWRLK9X"
}
```
## Step 4: Pay the sale
On your server, call [pay-sale](https://docs.payme.io/payments/direct-api/post-pay-sale) with the sale, the token and the hash:
```json
{
"payme_sale_id": "SALE1655-3843870J-NTPYLJNW-SOWRLK9X",
"buyer_key": "BUYERDEMO-BUYERDEMO-BUYERDEMO-1234567",
"meta_data_jwt": ""
}
```
With a `buyer_key`, the buyer's name, email and ID come from the token, so don't send them. `installments` is read only when the sale lets the buyer choose the number of installments.
`POST` it to `https://sandbox.payme.io/api/pay-sale`, or `https://live.payme.io/api/pay-sale` in production.
## Step 5: Handle the result
| `status_code` | Meaning | What to do |
|---|---|---|
| `5` | A challenge is needed | Send the buyer's browser (the top window) to `redirect_url`. The result is posted to `sale_callback_url`, and the buyer lands on `sale_return_url`. |
| `0` | Paid without a challenge: `sale_status` is `completed` | Confirm, then fulfil the order |
| `1` | Declined: `sale_status` is `failed` | `status_error_code` and `status_error_details` say why |
Don't read `payme_status`: it is `success` on a declined payment too. `status_message` and `status_error_details` are in Hebrew unless you add `"language": "en"` to the `pay-sale` request.
A challenge:
```json
{
"status_code": 5,
"status_message": "Generating validation page, please wait",
"redirect_url": ""
}
```
Paid without a challenge (other fields omitted):
```json
{
"status_code": 0,
"payme_status": "success",
"status_error_code": 0,
"payme_sale_id": "SALE1655-3843870J-NTPYLJNW-SOWRLK9X",
"payme_sale_code": 20511311,
"sale_status": "completed",
"currency": "ILS",
"price": 1000,
"payme_transaction_auth_number": "1172408",
"buyer_card_mask": "490763******9022",
"sale_3ds": true
}
```
Declined (other fields omitted):
```json
{
"status_code": 1,
"payme_status": "success",
"status_error_code": 20004,
"status_error_details": "Refusal by credit company. Please try a different card",
"payme_sale_id": "SALE1655-3843870J-NTPYLJNW-SOWRLK9X",
"sale_status": "failed",
"currency": "ILS",
"price": 1000
}
```
**Before you fulfil**, confirm the payment with the callback or with [get-transactions](https://docs.payme.io/payments/query-apis/post-get-transactions). `sale_is_3ds` there tells you whether the payment was authenticated with 3D Secure.
## Test in the sandbox
The sandbox applies the same selection rules as production, so use a card and amount that trigger 3D Secure. See [3D Secure in the sandbox](https://docs.payme.io/payments/getting-started/test-cards-and-payment-methods#3d-secure-in-the-sandbox) for the test cards.
## Move to production
In production, call `PayMe.create(publicKey, { testMode: false })` with the production public key and `PayMe.clientData(false)`, and send the server calls to `https://live.payme.io/api`.
- [How 3D Secure works on PayMe](https://docs.payme.io/accepting-payments/3d-secure/how-3d-secure-works): PayMe runs 3D Secure 2 on a card payment when the seller has the 3D Secure service (PayMe enables it), the card brand is supported (not Discover, JCB or Isracard) and a rule selects it: a foreign card, 3+ installments, an amount at or above the account's threshold (minor units, no currency conversion), the account's own rules, or services 3DSecure active:true. active:false can't skip the system rules. Hosted Fields and the Direct API must send meta_data_jwt to pay-sale, or 3D Secure is skipped silently. A challenge returns status_code 5 and redirect_url. A failed check returns 21017.
## Prerequisites
- The 3D Secure service active on the seller's account (PayMe enables it)
## Related
- [Create a sale with 3D Secure](https://docs.payme.io/payments/generate-a-sale-with-3d-secure/post-generate-sale-generate-a-sale-with-3d-secure)
- [3DS with Hosted Fields](https://docs.payme.io/accepting-payments/3d-secure/3ds-with-hosted-fields)
- [3D Secure as a service](https://docs.payme.io/accepting-payments/3d-secure/3d-secure-as-a-service)
- [Standalone 3D Secure service](https://docs.payme.io/payments/standalone-3d-secure-service)
- [Pay a sale](https://docs.payme.io/payments/direct-api/post-pay-sale)
- [Accept Google Pay](https://docs.payme.io/accepting-payments/payment-methods/google-pay)
- [Test Cards and Payment Methods](https://docs.payme.io/payments/getting-started/test-cards-and-payment-methods)
- [Callbacks](https://docs.payme.io/payments/getting-started/callbacks)
- [Errors](https://docs.payme.io/payments/getting-started/errors)
- [Understand the sale lifecycle](https://docs.payme.io/payments/codes-statuses/sale-lifecycle)
# How 3D Secure works on PayMe
3D Secure (3DS) asks the card issuer to confirm that the buyer is the cardholder before the card is charged. PayMe runs 3D Secure 2 (version 2.2.0). The issuer either approves without asking the buyer anything (**frictionless**), or shows a **challenge**, such as a one-time code.
This page explains when PayMe runs 3D Secure, what each integration has to do, how to test it, and how to read the result. The step-by-step pages it links to have the full request and response fields.
## When 3D Secure runs
A card payment gets 3D Secure when all three conditions hold. Google Pay has its own rule, described [below](#google-pay).
1. **The seller's account has the 3D Secure service.** PayMe enables it. An account that has never had it gets no 3D Secure.
2. **The card brand is supported.** PayMe's 3D Secure provider doesn't support Discover, JCB or Isracard cards, so those cards are charged without 3D Secure.
3. **A rule selects the payment.** Any one of these is enough:
- **PayMe's system rules:** a card issued in a country other than the seller's registered country; 3 or more installments; or an amount of at least the account's 3D Secure threshold. The amount rule compares `sale_price` in minor units with the threshold, without converting currencies, so the same number applies to every currency.
- **Rules of your own**, which PayMe sets on the account. Ask your onboarding manager before you go live.
- **The per-sale setting** described below.
3D Secure applies to card payments: `credit-card`, a card the buyer chose on a `multi` page, and Google Pay cards saved in the buyer's Google account (see [Google Pay](#google-pay)). It runs on `authorize` sales as well as on ordinary sales.
These payments never go through 3D Secure:
- A charge on a saved card with `buyer_key` on `generate-sale` (see [Save a card with a token sale](https://docs.payme.io/accepting-payments/capture-and-saved-cards/save-a-card-and-charge-it-later#3-charge-the-saved-card)).
- Subscription charges.
- A token sale (`sale_type: token`), which saves the card without charging it.
### Turn it on or off for one sale
Send `services` with the `3DSecure` service when you create the sale with [Create a sale with 3D Secure](https://docs.payme.io/payments/generate-a-sale-with-3d-secure/post-generate-sale-generate-a-sale-with-3d-secure):
```json
{
"services": [{"name": "3DSecure", "settings": {"active": true}}]
}
```
- `"active": true` forces 3D Secure on this sale, while the account's 3D Secure service is turned on.
- `"active": false` turns off your account's own rules for this sale. PayMe's system rules still apply: a foreign card, 3 or more installments or an amount at or above the threshold still gets 3D Secure. You can't skip them for a single sale, for example a phone order. Only PayMe can switch the system rules off for the account.
- Turning the 3D Secure service off doesn't take the account out of 3D Secure: PayMe's system rules still apply, and the per-sale setting has no effect.
- Each entry needs `settings`: an entry without it returns error `1` after the sale has already been created. A setting for a service the account doesn't have is ignored, without an error.
## What each integration does
| Integration | Who collects the browser data | How the challenge reaches the buyer | Details |
|---|---|---|---|
| Hosted payment page (`sale_url`) | PayMe's page | PayMe's page shows it | [Below](#hosted-payment-page) |
| Hosted Fields | `PayMe.clientData()` in your page, sent as `meta_data_jwt` | `pay-sale` returns `status_code: 5` and `redirect_url` | [3DS with Hosted Fields](https://docs.payme.io/accepting-payments/3d-secure/3ds-with-hosted-fields) |
| Direct API (`pay-sale` with card fields) | You, sent as `meta_data_jwt` | `status_code: 5` and `redirect_url` | [Below](#direct-api-pay-sale) |
| Google Pay (`googleSale()`) | PayMe's library | `paymentCompleted` gets `status_code: 5` and `redirect_url` | [Accept Google Pay](https://docs.payme.io/accepting-payments/payment-methods/google-pay#step-5-handle-the-result) |
| Standalone 3D Secure | PayMe's JS library | `status_code: 5` and `redirect_url` | [Standalone 3D Secure](https://docs.payme.io/payments/standalone-3d-secure-service) |
### Hosted payment page
There's nothing extra to build. When a rule selects the payment, PayMe's page collects the browser data and shows the challenge. 3D Secure also works when you show `sale_url` in an iframe, but some issuing banks block their own challenge screen inside an iframe, so keep a fallback that opens the page in a full window. See [Hosted Payment Page options](https://docs.payme.io/accepting-payments/checkout-and-in-person/hosted-payment-page-options#showing-sale_url-in-an-iframe).
- **The buyer passes:** PayMe charges the card and sends `sale-complete` (or `sale-authorized` for an `authorize` sale) with `sale_3ds` set to `1`. The buyer lands on the sale's return URL.
- **The buyer fails the challenge:** the sale becomes `failed` and PayMe sends `sale-failure` with `status_error_code` `21017`. If the sale has a return URL (`sale_return_url`, or your partner's default), the buyer lands there with `payme_status=error` and `status_error_code=21017`. Without a return URL, the buyer goes to `cancel_url` if you sent one, and otherwise back to the payment page to try another card.
A failed attempt doesn't close the sale: `sale_url` stays payable until the sale is paid, or until `sale_expiry_seconds` passes if you set it. See [Understand the sale lifecycle](https://docs.payme.io/payments/codes-statuses/sale-lifecycle).
### Hosted Fields
Follow [3DS with Hosted Fields](https://docs.payme.io/accepting-payments/3d-secure/3ds-with-hosted-fields). In short:
1. Tokenize the card with Hosted Fields.
2. In the same page, call `PayMe.clientData(testMode)` and send the `hash` it returns to your server.
3. Create the sale with `generate-sale` **without** a `buyer_key`, and set `sale_callback_url` and `sale_return_url` there.
4. Call [`pay-sale`](https://docs.payme.io/payments/direct-api/post-pay-sale) with the `payme_sale_id`, the token as `buyer_key`, and the hash as `meta_data_jwt`.
5. Handle the result: `status_code` `5` means send the buyer's browser to `redirect_url`; `0` paid; `1` declined.
**Always send `meta_data_jwt`.** Without it, `pay-sale` charges the token without 3D Secure, and nothing in the response tells you so.
### Direct API (`pay-sale`)
The [Direct API](https://docs.payme.io/payments/direct-api) (PCI DSS Level 1 partners only) sends the card fields to [`pay-sale`](https://docs.payme.io/payments/direct-api/post-pay-sale). PayMe runs 3D Secure inside the same call when a rule selects the payment:
- Send the buyer's browser data as `meta_data_jwt`, collected in the buyer's browser with `PayMe.clientData()`. Without browser data, the card is charged without 3D Secure. The `meta_data` object takes the IP address and `Accept` header from the request itself, so use it only on a call made from the buyer's browser.
- `status_code` `5` with `redirect_url` means the issuer wants a challenge. Send the buyer's browser (the top window) to `redirect_url`; `status_message` is a message you can show meanwhile. The result arrives in the sale callback, and the buyer lands on `sale_return_url`.
- `status_code` `0` means paid, and `sale_3ds` tells you whether 3D Secure ran. `status_code` `1` is a decline, returned with HTTP 200.
- If you already ran 3D Secure with another provider, send its `xid`, `eci`, `cavv` and `3ds_version`. PayMe then doesn't run its own.
### Google Pay
Whether 3D Secure runs on a Google Pay payment depends on the card, not on the rules or the device:
- A card stored on the buyer's device (Google's `CRYPTOGRAM_3DS`) is charged directly, without PayMe's 3D Secure.
- A card saved in the buyer's Google account (`PAN_ONLY`) always goes through PayMe's 3D Secure, whatever the rules and the per-sale setting say. This needs the seller's 3D Secure service. Without it, or when 3D Secure can't run for the card, the payment fails with error `21017` "Verification failed, please try again".
With the `googleSale()` button, a payment that needs a challenge calls `paymentCompleted(null, sale)` with `sale.status_code` `5` and `sale.redirect_url`. The sale isn't paid yet: send the buyer to `redirect_url`. See [Accept Google Pay](https://docs.payme.io/accepting-payments/payment-methods/google-pay#step-5-handle-the-result).
### Standalone 3D Secure
Use it to authenticate a card without charging it: when another gateway processes the payment, or when you authenticate now and charge later. The flow is on [Standalone 3D Secure: process flow](https://docs.payme.io/payments/standalone-3d-secure-service), and the background on [3D Secure as a service](https://docs.payme.io/accepting-payments/3d-secure/3d-secure-as-a-service):
1. Collect the browser data with PayMe's JS library and create a card sale.
2. From the browser, call [Start 3D Secure authentication](https://docs.payme.io/payments/standalone-3d-secure-service/post-initialize-3dsecure-request). A frictionless approval returns `hash_3dsecure`; a challenge returns `status_code` `5` and `redirect_url`.
3. From your server, call [Resolve a 3D Secure hash](https://docs.payme.io/payments/standalone-3d-secure-service/get-sales-payme-sale-id-3ds-hash) to get `eci`, `cavv` and `xid` for your gateway. If authentication failed, the result has a non-null `status` and no `cavv`.
The seller needs the 3D Secure service (otherwise error `720`), and the call needs the browser data (otherwise error `670`).
## Test it in the sandbox
The sandbox applies the same rules as production, so a rule must select the sale. `4918914107195005` is issued abroad, so the foreign-card rule selects it at any amount. For the other two cards, make sure a rule selects the sale, for example by forcing 3D Secure with `services` (`"active": true`). All three cards use expiry `07/28` and CVV `123`.
| Card | What happens | What you see |
|---|---|---|
| `4918914107195005` | Challenge. Enter `555` to pass; any other code (for example `111`) fails. | Pass: `completed`, `sale_3ds` `1`. Fail: `failed`, error `21017` |
| `4907639999909022` | Frictionless approval, no challenge | `completed`, `sale_3ds` `1` |
| `5283901906612672` | Frictionless decline, no challenge | `failed`, error `21017` |
The full sandbox list is on [Test Cards and Payment Methods](https://docs.payme.io/payments/getting-started/test-cards-and-payment-methods#3d-secure-in-the-sandbox).
## Read the result
| Where | Field | Meaning |
|---|---|---|
| Sale callback | `sale_3ds` | `1` when the payment went through 3D Secure |
| `pay-sale` response | `sale_3ds` | `true` when the payment passed 3D Secure |
| [`get-sales`](https://docs.payme.io/payments/query-apis/post-get-sales) and [`get-transactions`](https://docs.payme.io/payments/query-apis/post-get-transactions) | `sale_is_3ds` | `true` if the payment used 3D Secure. Also a filter: `"sale_is_3ds": true` returns only those payments |
| Standalone: Resolve a 3D Secure hash | `eci`, `cavv`, `xid` | The values to send to your gateway |
Before you fulfil an order, confirm the sale with the callback or with `get-sales`, as described on [Callbacks](https://docs.payme.io/payments/getting-started/callbacks#confirm-the-sale-before-you-fulfil).
### Failures and error codes
| What happened | What you get |
|---|---|
| The buyer failed the challenge | The sale becomes `failed`. `sale-failure` with `status_error_code` `21017` ("Verification failed, please try again"). The return-URL redirect carries `payme_status=error` |
| The issuer declined without a challenge | `pay-sale` returns HTTP 200 with `status_code` `1` and `status_error_code` `21017`. The sale becomes `failed`, and PayMe sends `sale-failure` |
| The card or its issuer can't run 3D Secure | By default PayMe charges the card without 3D Secure, and `sale_3ds` is `0`. If PayMe has set your account to refuse such payments, or for a Google Pay `PAN_ONLY` card, the payment fails with `21017` |
| No browser data on `pay-sale` | No error: the card is charged without 3D Secure |
| 3D Secure is required, but no terminal on the account can run it | Error `420` with `3DS` in `status_additional_info`. Contact PayMe support |
| Standalone: the seller has no 3D Secure service | Error `720` |
| Standalone: the browser data is missing or unreadable | Error `670` |
A failed 3D Secure attempt is an ordinary failed attempt: the buyer can try again on the same sale. Error codes and the HTTP status of each are on [Errors](https://docs.payme.io/payments/getting-started/errors).
## After the Sale
- [Handle chargebacks](https://docs.payme.io/accepting-payments/after-the-sale/handle-chargebacks): A chargeback is a payment the buyer's issuer takes back; the issuer decides. PayMe sends sale-chargeback (sale_status chargeback or partial-chargeback; inquiry_number, inquiry_code, card_last_four_digits, vas_3ds_exists) and emails the seller. The amount is taken from the PayMe balance; a handling fee may apply under the agreement and isn't returned automatically. Respond as the email describes, within its deadline; there is no chargeback API. A reversal sends sale-chargeback-refund. refund-sale on a charged-back sale returns 305. get-transactions lists chargeback rows.
## Prerequisites
- Sales created with a sale_callback_url that handles sale-chargeback and sale-chargeback-refund
## Related
- [Callback types reference](https://docs.payme.io/payments/getting-started/callback-types)
- [Understand the sale lifecycle](https://docs.payme.io/payments/codes-statuses/sale-lifecycle)
- [Sale Statuses](https://docs.payme.io/payments/codes-statuses/sale-statuses)
- [Refund a sale](https://docs.payme.io/payments/post-sale-actions/post-refund-sale)
- [List transactions](https://docs.payme.io/payments/query-apis/post-get-transactions)
- [Reconcile sales and withdrawals](https://docs.payme.io/accepting-payments/reporting/reconcile-sales-and-withdrawals)
- [How 3D Secure works on PayMe](https://docs.payme.io/accepting-payments/3d-secure/how-3d-secure-works)
- [Accept PayPal payments](https://docs.payme.io/accepting-payments/payment-methods/paypal)
# Handle chargebacks
A chargeback is a payment that the buyer's card issuer (or bank) takes back after the buyer disputes it. The issuer decides the case. PayMe and the acquirer pass the dispute, your evidence and the decision between the issuer and the seller.
This page explains how you learn about a chargeback, what happens to the money, how to respond, and how the case ends.
## How you learn about a chargeback
**Callback.** PayMe sends a `sale-chargeback` callback to the sale's `sale_callback_url`, and to your partner's sale callback URL if PayMe has set one. The sale's status changes:
| `sale_status` | Meaning |
|---|---|
| `chargeback` | The whole payment was charged back. |
| `partial-chargeback` | Part of the payment was charged back. |
On top of the usual [sale callback fields](https://docs.payme.io/payments/getting-started/callbacks#sale-callback-payload), the callback carries:
| Field | Description |
|---|---|
| `inquiry_number`, `inquiry_code` | The references of the chargeback case. Quote them when you contact PayMe about it. |
| `card_last_four_digits` | The last four digits of the card that was charged back. |
| `vas_3ds_exists` | `1` when the seller's account has the 3D Secure service. It doesn't say whether this payment went through 3D Secure: for that, see `sale_3ds` in the same callback. |
`payme_transaction_id` and `payme_transaction_total` in this callback describe the original payment, not the chargeback. Read the charged-back amount from `get-transactions`; see [What happens to the money](#what-happens-to-the-money). As with any callback, confirm the sale with [`get-sales`](https://docs.payme.io/payments/query-apis/post-get-sales) before you act on it.
**Email.** PayMe also emails the seller about the chargeback, with the details of the sale and how to respond.
There's no API call to respond to a chargeback. To find charged-back sales, call `get-sales` with `"sale_status": ["chargeback", "partial-chargeback"]`.
## What happens to the money
For a seller whose sales are paid out from the PayMe balance:
- PayMe takes the charged-back amount from the seller's PayMe balance.
- A chargeback handling fee may also apply under the seller's agreement. PayMe charges it from the balance separately, and partners get a [`charge-complete` callback](https://docs.payme.io/payments/getting-started/callback-types#seller-balance) for it. If the chargeback is later reversed, the fee isn't returned automatically.
- If the chargeback is reversed in the seller's favor, PayMe adds the amount back to the balance.
For a seller paid directly by the card companies, the chargeback amount isn't taken from a PayMe balance: it is settled between the seller and the card company. PayMe still sends the callbacks.
Each chargeback, and each reversal, is its own row in [`get-transactions`](https://docs.payme.io/payments/query-apis/post-get-transactions). To list them for a period:
`POST https://sandbox.payme.io/api/get-transactions` (production: `https://live.payme.io/api/get-transactions`)
```json
{
"seller_payme_id": "MPLDEMO-MPLDEMO-MPLDEMO-1234567",
"transaction_status": ["chargeback", "partial-chargeback", "chargeback-refund", "partial-chargeback-refund"],
"transaction_created_min": "2026-10-01 00:00:00",
"transaction_created_max": "2026-10-31 23:59:59",
"page": 1,
"page_size": 500
}
```
A chargeback row in the response (other fields omitted):
```json
{
"sale_payme_id": "SALEDEMO-XXXXXXXX-XXXXXXXX-XXXXXXXX",
"transaction_id": "order-1001",
"transaction_created_at": "2026-10-14 09:12:40",
"sale_status": "chargeback",
"transaction_status": "chargeback",
"transaction_action": "Chargeback",
"sale_currency": "ILS",
"transaction_price": 9000,
"sale_is_3ds": false
}
```
| Row | `transaction_status` | `transaction_action` | Effect on the balance |
|---|---|---|---|
| Chargeback | `chargeback`, `partial-chargeback` | `Chargeback`, `Partial Chargeback` | Subtract `transaction_price` |
| Reversal | `chargeback-refund`, `partial-chargeback-refund` | `Chargeback Refund`, `Partial Chargeback Refund` | Add `transaction_price` |
`transaction_price` is positive on every row, so apply the sign yourself. `transaction_comment` holds the chargeback reason. To match chargebacks against withdrawals, see [Reconcile sales and withdrawals](https://docs.payme.io/accepting-payments/reporting/reconcile-sales-and-withdrawals).
## Respond to a chargeback
The card issuer decides from the evidence it receives. To contest a chargeback:
1. Reply the way the email from PayMe describes, within the deadline stated in the email. PayMe passes what you send to the card company.
2. Send what shows that the buyer ordered and received what they paid for: for example the invoice or receipt, the order details, proof of delivery, and your messages with the buyer.
You can also contact the buyer. If the buyer withdraws the dispute with their card issuer, the chargeback can be reversed.
## How the case ends
- **In the seller's favor.** PayMe sends a `sale-chargeback-refund` callback and adds a `chargeback-refund` or `partial-chargeback-refund` row in `get-transactions`. The callback carries the standard sale fields only. Read the sale's `sale_status` from the callback, or with `get-sales`, rather than assuming a value.
- **In the buyer's favor.** PayMe sends no further callback. The sale stays `chargeback` or `partial-chargeback`, and the money stays with the buyer.
## You can't refund a charged-back sale
[`refund-sale`](https://docs.payme.io/payments/post-sale-actions/post-refund-sale) works only on `completed` and `partial-refund` sales. On a sale in `chargeback` or `partial-chargeback` it fails with HTTP 500 and error `305`, with the sale's status in `status_additional_info`:
```json
{
"status_code": 1,
"status_error_details": "Cannot perform action due to an incorrect status",
"status_additional_info": "chargeback",
"status_error_code": 305,
"session": "Ab12Cd34"
}
```
The chargeback already returns the money to the buyer, so don't refund them in another way as well.
## Reduce chargebacks
- **Use 3D Secure.** It confirms that the buyer is the cardholder. It doesn't stop a buyer from disputing for other reasons, such as an order that never arrived. Charges on a saved card (`buyer_key`) and subscription charges run without it. See [How 3D Secure works](https://docs.payme.io/accepting-payments/3d-secure/how-3d-secure-works).
- **Refund when a buyer asks.** Once a chargeback opens, you can no longer refund the sale.
- **Keep your evidence.** Store order details, receipts, delivery confirmations and messages with the buyer, so you can respond in time.
## Test your chargeback handling
[Test Cards and Payment Methods](https://docs.payme.io/payments/getting-started/test-cards-and-payment-methods) lists a SEPA test account, `DE35370400440532013002`, whose sale completes and then moves to `chargeback`. You can use it if SEPA is active on your sandbox account (SEPA sales are in `EUR`). Otherwise, ask PayMe how to test chargebacks.
PayPal disputes don't go through PayMe; see [Accept PayPal payments](https://docs.payme.io/accepting-payments/payment-methods/paypal#disputes).
- [Issue invoices and receipts for your sales](https://docs.payme.io/accepting-payments/after-the-sale/issue-invoices-and-receipts): Automatic documents: with invoicing set up, a paid or captured sale issues a document and each refund a credit document. sale_invoice_url is in sale-complete and refund; the number comes later in get-sales sale_invoices. Skip one sale with services [{name: invoice, settings: {active: false}}]. Documents API (deprecated, contact partners@payme.io first): needs its own activation (703); POST /documents with doc_type, buyer_name, items; asynchronous, so GET /documents/{doc_id} returns 1005 until ready; authority_redirect_url means Tax Authority approval first.
## Prerequisites
- The seller's seller_payme_id (MPL)
- Invoicing set up on the seller's account by PayMe, for automatic documents
- For the Documents API: its own activation on the seller's account
## Related
- [Create a document](https://docs.payme.io/payments/invoices/post-create-invoice)
- [Get a document](https://docs.payme.io/payments/invoices/show-generated-document-by-id)
- [List documents](https://docs.payme.io/payments/invoices/get-documents)
- [Document types](https://docs.payme.io/payments/codes-statuses/document-types)
- [Callback types reference](https://docs.payme.io/payments/getting-started/callback-types)
- [Refund a sale](https://docs.payme.io/payments/post-sale-actions/post-refund-sale)
- [List sales](https://docs.payme.io/payments/query-apis/post-get-sales)
- [Create a sale (hosted payment page)](https://docs.payme.io/payments/hosted-payment-page/post-generate-sale)
- [Get API access and go live: from sandbox to production](https://docs.payme.io/payments/getting-started/go-live)
# Issue invoices and receipts for your sales
PayMe can issue tax documents for a seller, such as invoices, receipts and credit documents, in two ways: automatically for each sale and refund, or one at a time through the Documents API. This guide explains both, and how to get each document once it is ready.
**The Documents API is deprecated.** Contact PayMe Partners () before building on it.
## Choose how to issue documents
| | Automatic documents | Documents API (deprecated) |
|---|---|---|
| What you get | A document for each paid sale, and a credit document for each refund | Any supported document type, with the lines and payments you send |
| What you call | Nothing new: the sale and refund calls you already make | `POST /documents`, then `GET /documents/{doc_id}` |
| Setup | Invoicing set up on the seller's account by PayMe | A separate activation. Until then, every call returns error `703` |
Use automatic documents when each document matches a PayMe sale. The Documents API is for documents with no PayMe sale behind them, for example a payment the seller received in cash or by bank transfer. To have either set up for a seller, ask PayMe Partners with the seller's MPL; see [Enable payment methods and services for your sellers](https://docs.payme.io/marketplaces-and-platforms/seller-onboarding/enable-services).
## Automatic documents for each sale
When invoicing is set up on the seller's account:
- **Paid sale.** When a sale is paid, or an authorization is captured, PayMe issues a document of the type set in the seller's invoicing settings, for example a receipt or an invoice receipt. A sale that only saves a card (`sale_type: token`) gets no document.
- **Refund.** Each refund, full or partial, issues a credit document for the refunded amount. The original document stays as it is.
- **Lines.** If the sale has `items`, the document lists them. Otherwise it has one line with the sale's `product_name` and amount.
- **Language.** Documents are in Hebrew. If the seller's settings ask for English documents for foreign sales, a sale in a currency other than ILS, or one paid with a foreign card, gets an English document.
### Get the document
PayMe creates the document in the background, just after the sale or refund.
- The `sale-complete` callback carries `sale_invoice_url`. For a refund, the [`refund-sale`](https://docs.payme.io/payments/post-sale-actions/post-refund-sale) response and the `refund` callback carry it for the credit document.
- `sale_invoice_url` is a PayMe link that opens the document once it has been created. Right after the sale, it can still show a "not found" page.
- The document number may not be known yet when the callback is sent, so `sale_invoice_number` can be `null`. Read the number later with [`get-sales`](https://docs.payme.io/payments/query-apis/post-get-sales): `sale_invoices` lists each document of the sale with its `invoice_doc_number` and `invoice_url`.
### Skip the document for one sale
Send `services` with the `invoice` service turned off on [`generate-sale`](https://docs.payme.io/payments/hosted-payment-page/post-generate-sale):
```json
{
"seller_payme_id": "MPLDEMO-MPLDEMO-MPLDEMO-1234567",
"sale_price": 1000,
"currency": "ILS",
"product_name": "Order 1234",
"transaction_id": "order-1001",
"sale_callback_url": "https://your-server.example.com/payme/callback",
"services": [
{
"name": "invoice",
"settings": {
"active": false
}
}
]
}
```
## Create documents with the Documents API
**Deprecated.** The Documents API is no longer recommended for new integrations. Contact PayMe Partners () before building on it.
### Activate it for the seller
The Documents API needs its own activation on the seller's account. Until it is active, every documents call fails with error `703` and `status_additional_info` "Invoicing Service was not properly activated. Operation not permitted". Automatic documents don't activate it. Ask PayMe Partners to activate it.
### Authenticate
- `POST /documents`: send the seller's MPL as `seller_payme_id` in the body, or in the `PayMe-Merchant-Key` header.
- `GET /documents` and `GET /documents/{doc_id}`: send the MPL in the `PayMe-Merchant-Key` header. A GET has no body, so without the header the call fails with error `1`.
- Partners may add `payme_client_key` (or the `PayMe-Partner-Key` header). The seller must then belong to you, or the call fails with error `20`.
### Create a document
Call [Create a document](https://docs.payme.io/payments/invoices/post-create-invoice):
```bash
curl -X POST https://sandbox.payme.io/api/documents \
-H 'Content-Type: application/json' \
-d '{
"seller_payme_id": "MPLDEMO-MPLDEMO-MPLDEMO-1234567",
"doc_type": 400,
"buyer_name": "Israel Israeli",
"doc_date": "2026-11-09",
"currency": "ILS",
"language": "he",
"doc_title": "Receipt for order 1001",
"total_paid": 140,
"items": [
{
"description": "Monthly plan",
"quantity": 1,
"unit_price": 140,
"vat_exempt": false,
"currency": "ILS"
}
],
"cash": {
"sum": 40
},
"credit_card": {
"sum": 100,
"installments": 1,
"type": "Visa",
"buyer_name": "Israel Israeli",
"auth_number": "0123456"
}
}'
```
- **`doc_type`** is required. Use one of the 9 codes on [Document types](https://docs.payme.io/payments/codes-statuses/document-types), for example `305` tax invoice, `320` invoice receipt, `330` credit invoice or `400` receipt.
- **`buyer_name`** and **`items`** are required. Send at least one line, and give each line a `description` of at least 3 characters.
- **Payments** (`cash`, `cheques`, `bank_transfer`, `paypal`, `credit_card`) are optional. Send only payments that were actually received; each one needs a `sum`.
- **`language`** is `he` (the default) or `en`.
- **Amounts.** PayMe passes amounts, totals and `vat_rate` to the invoicing service as you send them. Each field is described on [Create a document](https://docs.payme.io/payments/invoices/post-create-invoice).
A request that fails validation returns error `20` (HTTP 400), with the messages for each field in `status_additional_info`.
The response returns the document's job ID in `doc_id`, its link in `doc_url`, and the fields you sent. Keep `doc_id`.
```json
{
"status_code": 0,
"doc_id": "fa397fce-aee6-4c6d-ae9c-273ae1e3a317",
"doc_type": 400,
"buyer_name": "Israel Israeli",
"doc_date": "2026-11-09",
"currency": "ILS",
"language": "he",
"total_paid": 140,
"doc_url": "https://invoicing.example.com/documents/fa397fce-aee6-4c6d-ae9c-273ae1e3a317"
}
```
**Israel Tax Authority approval.** If the seller still has to approve the connection to the Israel Tax Authority, the response holds only `authority_redirect_url`, and no document is created. Send the seller to that URL to approve, then create the document again.
### Wait for the document to be ready
Documents are created asynchronously: the create call returns before the document exists. Read it with [Get a document](https://docs.payme.io/payments/invoices/show-generated-document-by-id), passing the `doc_id`:
```bash
curl https://sandbox.payme.io/api/documents/fa397fce-aee6-4c6d-ae9c-273ae1e3a317 \
-H 'PayMe-Merchant-Key: MPLDEMO-MPLDEMO-MPLDEMO-1234567'
```
| Response | Meaning | What to do |
|---|---|---|
| HTTP 400, error `1005`, `status_additional_info` such as `status:waiting` or `status:active` | The document is still being created | Wait a few seconds and call again. |
| HTTP 200 with the document, `doc_num`, `doc_status` and `doc_url` | The document is ready | Use `doc_url` and `doc_num`. |
| Error `1003` | The document failed to generate | Check the data you sent, then create the document again. |
| HTTP 200 with `status_code` `0` and no document fields | The invoicing service reported an unknown job status | Call again later. |
A not-ready answer looks like this:
```json
{
"status_code": 1,
"status_error_details": "Document you're requested not ready yet",
"status_additional_info": "status:waiting",
"status_error_code": 1005,
"session": "FhT3aXe7"
}
```
### List documents
[List documents](https://docs.payme.io/payments/invoices/get-documents) returns the seller's documents a page at a time:
```bash
curl 'https://sandbox.payme.io/api/documents?limit=5&field=createdAt&sort=desc' \
-H 'PayMe-Merchant-Key: MPLDEMO-MPLDEMO-MPLDEMO-1234567'
```
`page` picks the page, `limit` the page size, `field` and `sort` (`asc` or `desc`) the order, and `from` and `to` filter by date. Each item has the fields of a document, including `doc_id`, but not `doc_url`: call Get a document for the link.
### Errors
| Code | HTTP | Meaning |
|---|---|---|
| `703` | 403, or 400 when the activation is incomplete | The Documents API isn't active for the seller. |
| `20` | 400 | Validation failed, or the seller doesn't belong to your partner account. |
| `1` | 400 or 500 | A credential is missing: no seller with a partner key (400), or no key at all (500). |
| `251` | 500 | The seller key is unknown. |
| `1004` | 500 | The invoicing service didn't create the document. |
| `1005` | 400 | The document isn't ready yet. |
| `1003` | 500 | The document failed to generate. |
| `1001` | 500 or 503 | The invoicing service returned an error (500) or didn't answer in time (503). |
The full tables are on each endpoint page.
## Test documents
The invoicing service doesn't run in the sandbox. As [Get API access and go live](https://docs.payme.io/payments/getting-started/go-live) explains, check documents on a small live sale that you refund straight away.
## Related
- [Create a document](https://docs.payme.io/payments/invoices/post-create-invoice), [Get a document](https://docs.payme.io/payments/invoices/show-generated-document-by-id), [List documents](https://docs.payme.io/payments/invoices/get-documents)
- [Document types](https://docs.payme.io/payments/codes-statuses/document-types)
- [Callback types](https://docs.payme.io/payments/getting-started/callback-types)
- [Refund a sale](https://docs.payme.io/payments/post-sale-actions/post-refund-sale)
## Reporting
- [Find the right data](https://docs.payme.io/accepting-payments/reporting/find-the-right-data): Lookup table from business questions to the PayMe query API, filters and response fields that answer them (get-transactions for volume, refunds and chargebacks; get-sales for order status and release dates; get-subscriptions; get-sellers for balances; get-withdrawals and get-future-withdrawals for payouts), with paging (500 per page by default), Asia/Jerusalem time, rate limits and who can query what.
## Related
- [Reporting across your sellers](https://docs.payme.io/marketplaces-and-platforms/reporting/reporting-across-your-sellers)
- [Reconcile sales and withdrawals](https://docs.payme.io/accepting-payments/reporting/reconcile-sales-and-withdrawals)
# Find the right data
## Choose a query
Each row names the call to make, the filters to send and the field that holds the answer. All calls are `POST` with a JSON body. A seller sends its own `seller_payme_id` on every request. A partner adds `seller_payme_id` to narrow a query to some of its sellers.
| Question | Query API | Filters | Read from each item |
| --- | --- | --- | --- |
| What volume did a seller process on a given day? | [get-transactions](https://docs.payme.io/payments/query-apis/post-get-transactions) | `transaction_status`: `validated`, `sale_currency`, `transaction_created_min`, `transaction_created_max` | Sum of `transaction_price` |
| How many payments were there, and what was the average? | [get-transactions](https://docs.payme.io/payments/query-apis/post-get-transactions) | `transaction_status`: `validated`, `sale_currency`, `transaction_created_min`, `transaction_created_max` | Count the items, then divide the sum of `transaction_price` by the count |
| Which refunds happened in a period? | [get-transactions](https://docs.payme.io/payments/query-apis/post-get-transactions) | `transaction_status`: `["refunded", "p-refund"]`, `transaction_created_min`, `transaction_created_max` | `transaction_price`, `sale_payme_id`, `transaction_action` |
| Which chargebacks happened in a period? | [get-transactions](https://docs.payme.io/payments/query-apis/post-get-transactions) | `transaction_status`: `["chargeback", "partial-chargeback"]`, `transaction_created_min`, `transaction_created_max` | `transaction_price`, `sale_payme_id`, `transaction_action` |
| What method did the buyer pay with? | [get-transactions](https://docs.payme.io/payments/query-apis/post-get-transactions) | `sale_payme_id` | `transaction_payment_method`, and for cards `sale_buyer_details.buyer_card_brand` |
| What is the status of an order? | [get-sales](https://docs.payme.io/payments/query-apis/post-get-sales) | `transaction_id` (your order ID; can match several sales) or `sale_payme_id` | `sale_status`, `sale_paid_date` |
| When will a sale's funds be available? | [get-sales](https://docs.payme.io/payments/query-apis/post-get-sales) | `sale_payme_id` | `sale_release_date` |
| Which subscriptions are active? | [get-subscriptions](https://docs.payme.io/payments/query-apis/post-get-subscriptions) | `sub_status`: `2` | `sub_price`, `sub_currency`, `sub_next_date` |
| Which subscriptions are failing? | [get-subscriptions](https://docs.payme.io/payments/query-apis/post-get-subscriptions) | `sub_status`: `[4, 7]` | `sub_error_text`, `sub_next_date` |
| What is the balance available to withdraw? | [get-sellers](https://docs.payme.io/payments/query-apis/post-get-sellers) | `seller_payme_id` (don't send `api_mode` `slim`, which leaves out `seller_wallets`) | `seller_wallets..wallet_releasable` |
| What payouts were made? | [get-withdrawals](https://docs.payme.io/payments/query-apis/post-get-withdrawals) | `withdrawal_created_min`, `withdrawal_created_max`, `withdrawal_currency` | `withdrawal_total`, `withdrawal_created` |
| What payouts are coming up? | [get-future-withdrawals](https://docs.payme.io/payments/query-apis/get-future-withdrawals) | `seller_payme_id`, `currency` (both required) | `created_at` (expected date), `total`. An item with `end_time` `-1` is a summary and has no expected date |
Status values are listed on [Sale Statuses](https://docs.payme.io/payments/codes-statuses/sale-statuses), [Transaction Statuses](https://docs.payme.io/payments/codes-statuses/transaction-statuses) and [Subscription Statuses](https://docs.payme.io/payments/codes-statuses/subscription-statuses). To filter on a partially refunded transaction, send the value `p-refund`.
## Sale or transaction
A sale is one order; a transaction is one movement of money on it, such as the payment, a refund or a chargeback.
Use `get-sales` to see where an order stands. Use `get-transactions` for amounts in a period, because a refund or chargeback is its own row with its own date. Refund and chargeback rows hold a positive `transaction_price`, so subtract them yourself.
## Example: a seller's volume for one day
Send a request to `https://sandbox.payme.io/api/get-transactions` (production: `https://live.payme.io/api/get-transactions`):
```json
{
"seller_payme_id": "MPLDEMO-MPLDEMO-MPLDEMO-1234567",
"transaction_status": "validated",
"sale_currency": "ILS",
"transaction_created_min": "2026-11-03 00:00:00",
"transaction_created_max": "2026-11-03 23:59:59",
"page_size": 500,
"page": 1
}
```
Add up `transaction_price` across every page. Amounts are in minor units, so `10000` means 100.00. Query one currency at a time, since `transaction_price` is in the sale's currency.
## Dates and pages
- **Timezone:** timestamps and the `*_min` / `*_max` filters are [Asia/Jerusalem local time](https://docs.payme.io/payments/query-apis#timezone), not UTC. Send them as `yyyy-mm-dd hh:mm:ss`.
- **Pages:** `page_size` goes up to 500, which is also the default, and `page` starts at 1 and goes up to 1000. Without them, you get only the first 500 items. For larger results, narrow the dates. `items_count` counts the items on the current page, not the full result, so keep requesting pages until `items_count` is lower than `page_size`. `get-future-withdrawals` does not page.
- **Rate limits:** `get-transactions` and `get-future-withdrawals` are rate limited. On HTTP 429 with code `998`, wait and retry; see [Query APIs](https://docs.payme.io/payments/query-apis#rate-limits).
## Who can call what
Credentials are explained on [Authentication](https://docs.payme.io/payments/getting-started/authentication).
| Query API | As a seller (`seller_payme_id`) | As a partner (`payme_client_key`) |
| --- | --- | --- |
| `get-sales`, `get-transactions`, `get-subscriptions`, `get-sellers`, `get-withdrawals` | That seller's data | All the partner's sellers, or the sellers named in `seller_payme_id` |
| `get-future-withdrawals` | That seller's data | One seller per request; `seller_payme_id` is required |
A seller sends its own MPL as `seller_payme_id` in the JSON body, as a single value, or in the `PayMe-Merchant-Key` header. The results cover that seller only. A partner sends `payme_client_key` in the body or the `PayMe-Partner-Key` header, and can send `seller_payme_id` as an array of up to 100 MPLs of its own sellers. Every item carries its `seller_payme_id`, so a partner can group the results by seller.
- [Reconcile sales and withdrawals](https://docs.payme.io/accepting-payments/reporting/reconcile-sales-and-withdrawals): Step-by-step reconciliation of a seller's withdrawals (get-withdrawals, with withdrawal_source and withdrawal_card_brand) against money movements (get-transactions grouped by transaction_release_date, net of fees via transaction_price_after_fees), how to catch missed callbacks with get-sales, the fee fields in sale_fees, and why the totals can differ.
## Related
- [Find the right data](https://docs.payme.io/accepting-payments/reporting/find-the-right-data)
- [Withdrawals](https://docs.payme.io/marketplaces-and-platforms/fees-and-payouts/withdrawals)
# Reconcile sales and withdrawals
## What the API can match
The public API has no field that links a withdrawal to the sales inside it. [get-withdrawals](https://docs.payme.io/payments/query-apis/post-get-withdrawals) returns totals, and [get-transactions](https://docs.payme.io/payments/query-apis/post-get-transactions) has no withdrawal code. You can estimate which transactions a withdrawal covers from their release dates, but the result is an estimate.
There is one exception. When a partial withdrawal is requested with `transaction_ids` on [withdraw-balance](https://docs.payme.io/payments/merchants-management/post-withdraw-balance), the response lists the transactions involved. Store that list if you need a direct link.
If the card companies pay a seller directly, also compare against those companies' statements.
## Before you start: catch missed callbacks
Compare against PayMe's records, not only your own database. A [callback](https://docs.payme.io/payments/getting-started/callbacks) is dropped after three failed delivery attempts, so an order your system shows as unpaid may be paid.
On a schedule, call [get-sales](https://docs.payme.io/payments/query-apis/post-get-sales) for the sales you still treat as open and apply the `sale_status` it returns. `get-sales` leaves out `initial` sales unless you ask for them, so include that status when you need them:
```json
{
"seller_payme_id": "MPLDEMO-MPLDEMO-MPLDEMO-1234567",
"sale_status": ["initial", "authorized"],
"sale_created_min": "2026-11-03 00:00:00",
"page_size": 500,
"page": 1
}
```
## Step 1: List the withdrawals
Call `get-withdrawals` for the period and keep `withdrawal_payme_code`, `withdrawal_created`, `withdrawal_currency` and `withdrawal_total`. Also keep `withdrawal_source` and `withdrawal_card_brand`, which tell apart split withdrawals on the same date. Sort by date with `items_order_by_column`.
```json
{
"seller_payme_id": "MPLDEMO-MPLDEMO-MPLDEMO-1234567",
"withdrawal_currency": "ILS",
"withdrawal_created_min": "2026-10-01 00:00:00",
"withdrawal_created_max": "2026-10-31 23:59:59",
"items_order_by_column": "withdrawal_created",
"items_order_by_direction": "asc",
"page_size": 500,
"page": 1
}
```
`withdrawal_payme_code` is the same number as `withdrawal_id` in the withdraw-balance response and `tran_payme_code` in the `withdrawal-complete` callback.
## Step 2: List the money movements
Call `get-transactions` for the same seller and currency. It filters on the creation date only, so start well before the first withdrawal you are checking: a transaction can be released long after it was created.
```json
{
"seller_payme_id": "MPLDEMO-MPLDEMO-MPLDEMO-1234567",
"sale_currency": "ILS",
"transaction_status": ["validated", "refunded", "p-refund", "chargeback", "partial-chargeback", "chargeback-refund", "partial-chargeback-refund"],
"transaction_created_min": "2026-07-01 00:00:00",
"transaction_created_max": "2026-10-31 23:59:59",
"page_size": 500,
"page": 1
}
```
Keep requesting pages until `items_count` is lower than `page_size`.
## Step 3: Group by release date
For each withdrawal, take the transactions whose `transaction_release_date` falls after the previous withdrawal's `withdrawal_created` and no later than this one's. Then add them up, using `transaction_price_after_fees` on `validated` rows and `transaction_price` on the others, with the sign from this table:
| `transaction_status` | Effect on the seller's balance |
| --- | --- |
| `validated` | Add |
| `refunded`, `p-refund` | Subtract |
| `chargeback`, `partial-chargeback` | Subtract |
| `chargeback-refund`, `partial-chargeback-refund` | Add |
Amounts on these rows are positive, so apply the sign yourself. All amounts are in minor units, and timestamps are [Asia/Jerusalem local time](https://docs.payme.io/payments/query-apis#timezone).
## Step 4: Expect some differences
The sum can differ from `withdrawal_total` for these reasons:
- **Installments:** a sale paid in installments can be released in parts, while `transaction_release_date` is a single date.
- **Other charges:** a withdrawal also reflects charges that are not transaction fees and do not appear in `get-transactions`.
- **Split withdrawals:** one seller can have several withdrawals on the same date, split by source and card brand (`withdrawal_source` and `withdrawal_card_brand` on get-withdrawals).
- **Partial withdrawals:** these take specific transactions out of the date order.
- **Returned fees:** a refund's effect also depends on the fees returned to the seller.
- **Settlement timing:** `transaction_price_after_fees` holds its final value once the transaction is settled. Until then it can equal `transaction_price`.
If a difference remains, contact PayMe with the `withdrawal_payme_code`.
## Fees
On `validated` rows, use `transaction_price_after_fees` as the net amount. The fee detail in `sale_fees` explains the charge, but adding up its `*_total` values won't reproduce the net amount, because `sale_processing_fee_total`, `sale_discount_fee_total` and `sale_rapid_settlement_fee_total` exclude VAT.
| Field in `sale_fees` | Meaning |
| --- | --- |
| `sale_processing_fee`, `sale_processing_fee_total` | Processing rate, and its total in minor units |
| `sale_processing_charge` | Fixed processing charge, in major units |
| `sale_discount_fee`, `sale_discount_fee_total` | Discount rate, and its total |
| `sale_rapid_settlement_fee`, `sale_rapid_settlement_fee_total` | Rapid settlement rate, and its total |
| `sale_annual_interest_rate` | Annual interest rate (percent) behind the discount and rapid settlement fees |
| `sale_market_fee`, `sale_market_fee_fixed`, `sale_market_fee_total` | Platform fee percent, fixed platform fee in major units, and the total in minor units. On get-transactions, the total covers the percent part plus the fixed part, worked out on the row's `transaction_price`. See [Platform fees](https://docs.payme.io/marketplaces-and-platforms/fees-and-payouts/platform-fees) |
## Refunds and chargebacks
- **Sale status:** `get-sales` keeps one row per order and shows `refunded`, `partial-refund`, `chargeback` or `partial-chargeback` in `sale_status`. Use `get-transactions` for the amount and date of each event.
- **Refunds in parts:** each partial refund is its own transaction row with its own `payme_transaction_id`. A sale refunded in parts stays `partial-refund`, even after the whole amount is returned, so add up the refund rows to know the refunded total.
- **Notifications:** the `sale-chargeback` and `sale-chargeback-refund` [callbacks](https://docs.payme.io/payments/getting-started/callbacks) tell you when a chargeback arrives or is reverted.