Take in-person payments with a POS device
Prerequisites
- Partner credentials (payme_client_key) from PayMe Partners, for ordering and pairing devices
- The seller's seller_payme_id (MPL)
- The POS service active on the seller's account
- A callback URL on your partner account, for the pairing callbacks
Related
- Point of Sale (POS)
- Order POS devices
- Create a POS payment
- Refund a POS sale
- Callback types reference
- Enable payment methods and services for your sellers
- Understand the sale lifecycle
- Errors
- List sales
A PayMe POS device takes card-present payments for a seller. Your system sends each payment to the device through the Payments API, the buyer pays on the device, and the result comes back in the same response. This guide covers the whole flow: ordering devices, pairing them, taking and refunding payments, and transmitting the day's transactions.
Endpoint details are in the POS module overview and its endpoint pages.
How it works
- Order the devices. A partner orders devices for its seller with
vas-enable. PayMe prepares the devices, pairs them and ships them. - Pair and authenticate. A device takes payments only after it is paired and then authenticated. PayMe does both for new devices. You can also do it yourself with
pos/pairandpos/authenticate. Each step sends you a callback. - Take a payment. Call
POST /saleswithpayment.method: posand the device'spos_id. PayMe pushes the payment to the device and waits for the buyer. - Refund on the device. Call
PUT /sales/{payme_sale_id}withpayment.action: refund. - Transmit.
pos/transmitsends the device's transactions for deposit and returns the transmission report.
Before you start
| You need | For |
|---|---|
Your partner key (payme_client_key) |
Ordering devices, and the pos/pair, pos/authenticate and pos/transmit calls. These calls are for partners only. |
The seller's seller_payme_id (MPL) |
Every call. On its own, it authenticates payments and refunds. |
| The POS service active on the seller's account | Without it, POS calls return error 720. |
| A callback URL on your partner account | The point-of-sale-action-* callbacks. If your partner account has none, they aren't sent. |
Base URLs: https://sandbox.payme.io/api (sandbox) and https://live.payme.io/api (production). Send JSON with Content-Type: application/json. On the pos/* calls, every field goes in the JSON body, including payme_client_key.
Step 1: Order the devices
Order devices for the seller with Order POS devices: one vas-enable call turns on the POS payment method, and a second one sends the device list in vas_data. The general vas-enable flow, including how to check the result, is in Enable payment methods and services for your sellers.
- Adding devices later. Send only the new devices, with
vas_data.extend_items: true. Without it, the list you send replaces the devices already ordered. - It takes time. The order is handled by hand: PayMe requests a new terminal, which can take up to 5 business days, then prepares, pairs and ships the devices.
- Keep each
pos_id. It names the device in every later call. Send it exactly as it appears in the order and in the pair callback.
Step 2: Pair and authenticate a device
A device can take payments only after two steps: pos/pair registers the device for the seller, and pos/authenticate completes the pairing with a 6-digit verification code. PayMe runs both steps for new devices before they ship, and you receive the two callbacks. To pair a device from your own system, use the calls below.
Pair
curl -X POST https://sandbox.payme.io/api/pos/pair \
  -H 'Content-Type: application/json' \
  -d '{
    "payme_client_key": "payme_partner_key",
    "seller_payme_id": "MPLDEMO-MPLDEMO-MPLDEMO-1234567",
    "pos_id": "001",
    "terminal_id": "YOUR_TERMINAL_ID",
    "name": "Front counter"
  }'
| Field | Required | Description |
|---|---|---|
payme_client_key |
Yes | Your partner key. |
seller_payme_id |
Yes | The seller's MPL. |
pos_id |
Yes | The device's ID from the seller's device order. A device that isn't in the order returns 26014. |
terminal_id |
Yes | The device's payment terminal ID. |
name |
No | A name for the device. Default: the seller's business name. The callbacks return it as pos_name. |
On success, the response is status_code 0, PayMe records the device as paired but not yet active, and it sends point-of-sale-action-pair-update.
{
  "status_code": 0,
  "session": "FhT3aXe7"
}
Pairing a device again starts over: the device stops taking payments until you authenticate it again.
Authenticate
curl -X POST https://sandbox.payme.io/api/pos/authenticate \
  -H 'Content-Type: application/json' \
  -d '{
    "payme_client_key": "payme_partner_key",
    "seller_payme_id": "MPLDEMO-MPLDEMO-MPLDEMO-1234567",
    "pos_id": "001",
    "terminal_id": "YOUR_TERMINAL_ID",
    "verification_code": "482913"
  }'
verification_code is the 6-digit verification code for this pairing. Send it as a string, so that a leading zero is kept. A code that isn't a number returns error 10, and one that isn't exactly 6 digits returns 999. Authenticating a device that was never paired returns 26017.
On success, the response is status_code 0, the device becomes active, and PayMe sends point-of-sale-action-authenticate-update. The device can now take payments.
If you don't have a device's terminal ID or its verification code, ask PayMe Partners (partners@payme.io).
The pairing callbacks
PayMe sends both callbacks to your partner callback URL. They carry the seller fields of the seller callbacks, plus:
notify_type |
When | Device fields |
|---|---|---|
point-of-sale-action-pair-update |
pos/pair succeeded |
pos_id, pos_name |
point-of-sale-action-authenticate-update |
pos/authenticate succeeded, and the device is active |
pos_id, pos_name |
They aren't signed. The seller fields and the delivery rules are on Callback types.
When the device service refuses
pos/pair, pos/authenticate and pos/transmit pass your request to the service that runs the devices. If that service refuses the request or can't be reached, the call returns HTTP 200 with status_code 1, status_error_code 20002, and the service's message in status_error_details:
{
  "status_code": 1,
  "session": "FhT3aXe7",
  "status_error_code": 20002,
  "status_error_details": "Message from the device service"
}
Always check status_code, not the HTTP status. A refused call changes nothing for the device and sends no callback.
Step 3: Take a payment
Send the payment to the device with Create a POS payment:
curl -X POST https://sandbox.payme.io/api/sales \
  -H 'Content-Type: application/json' \
  -d '{
    "seller_payme_id": "MPLDEMO-MPLDEMO-MPLDEMO-1234567",
    "sale_price": 10000,
    "currency": "ILS",
    "product_name": "Coffee beans 1kg",
    "transaction_id": "order-1001",
    "sale_callback_url": "https://your-server.example.com/payme/callback",
    "payment": {
      "method": "pos",
      "pos_id": "001"
    },
    "language": "en"
  }'
currency is required, and sale_price is in minor units (10000 = 100.00). PayMe pushes the payment to the device and waits while the buyer pays, so the call stays open until the device answers. Give your HTTP client a long timeout.
A paid sale returns, shortened:
{
  "status_code": 0,
  "payme_status": "success",
  "status_error_code": 0,
  "payme_sale_id": "SALE1700-000000AA-EXAMPLE1-SALE0001",
  "payme_sale_code": 12346578,
  "payme_sale_status": "completed",
  "sale_status": "completed",
  "currency": "ILS",
  "transaction_id": "order-1001",
  "price": 10000,
  "payme_transaction_id": "TRAN1688-034834SZ-OYNALKNE-DWOXFEUZ",
  "payme_transaction_auth_number": "12345678",
  "installments": 1
}
Keep payme_sale_id: you need it to refund.
| Outcome | Response | What to do |
|---|---|---|
| Paid | HTTP 200, status_code 0, payme_sale_status completed |
Done. |
| Declined or canceled on the device | HTTP 200, status_code 1, with status_error_code and status_error_details |
Show the reason. To try again, send a new payment. |
| The device didn't answer in time | HTTP 400, status_error_code 26020 ("The payment is being verified") |
Don't send the payment again. PayMe keeps checking it for up to 5 minutes, then completes or fails the sale. Wait for the sale callback, or read the sale with get-sales. |
| The device can't take payments | HTTP 400 with 720, 26014, 26017 or 26018 |
See Errors. |
A paid sale sends sale-complete and a failed one sends sale-failure, to sale_callback_url. See Callback types.
More options:
sale_type: authorizeonly authorizes the card.installmentsand the othergenerate-salesale fields work here too.- You can also create the sale first with
generate-saleandsale_payment_method: pos, then push it to the device withPUT /sales/{payme_sale_id}. The POS module overview shows this two-step flow. - Which payment methods a device accepts depends on the device. Ask PayMe Partners (partners@payme.io) for the current list.
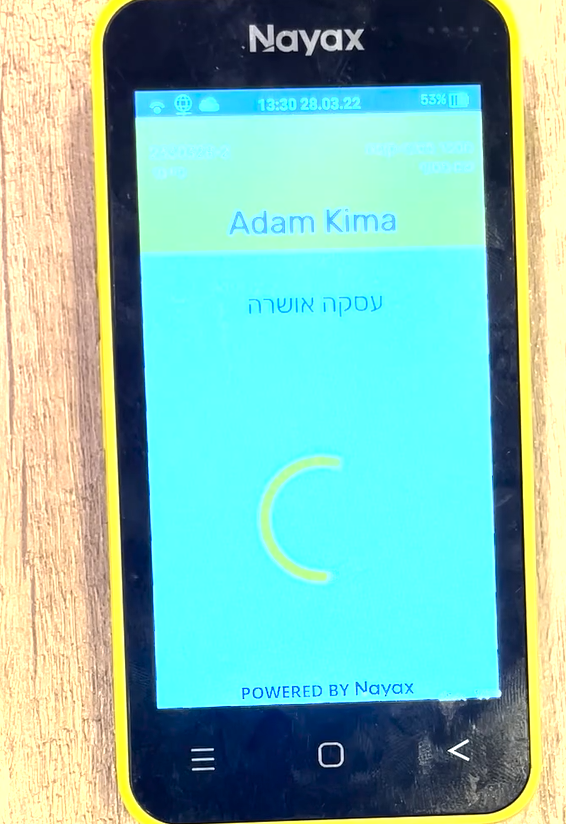
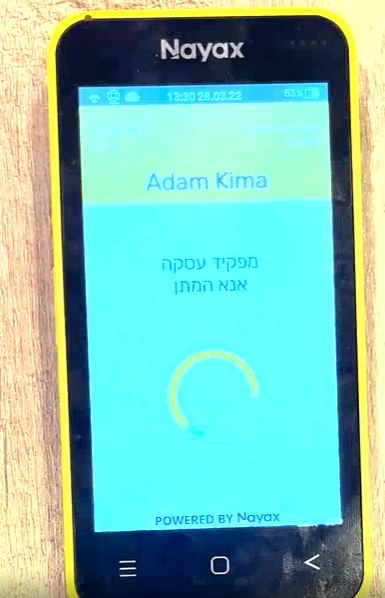
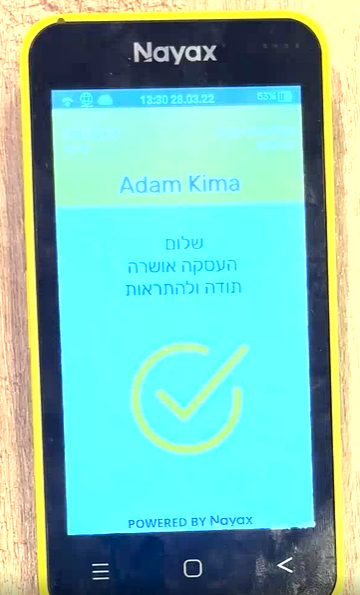
What the buyer sees on the device
- The payment is sent to the device.
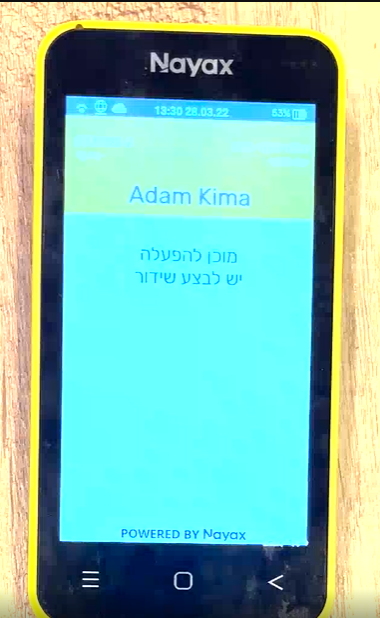
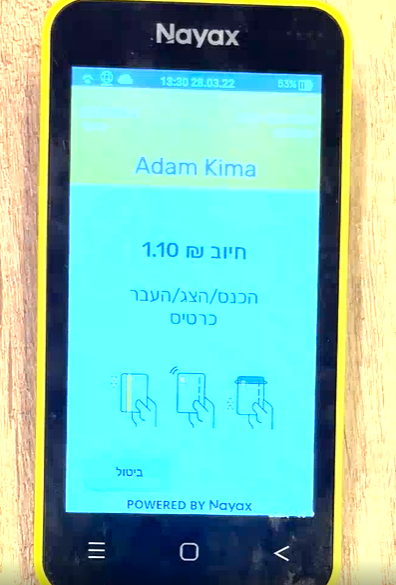
- The buyer pays.
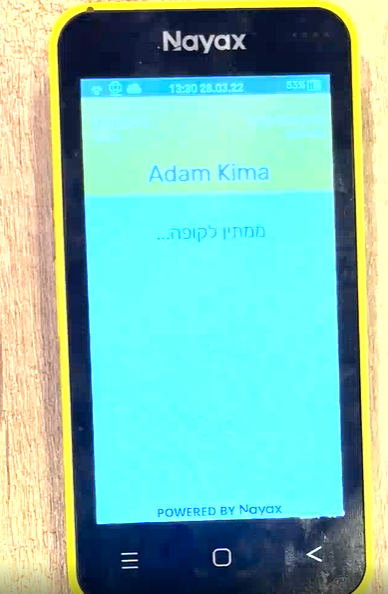
- Pending approval from the card company.
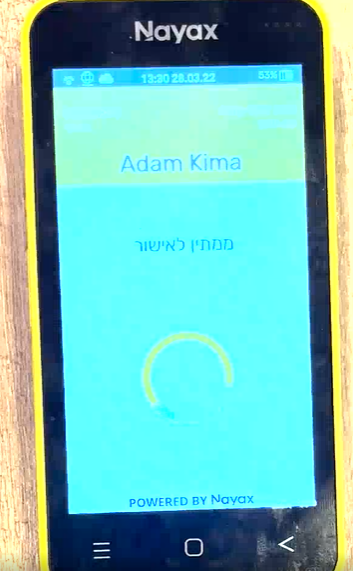
- Payment confirmed.
- Payment deposited.
- Final confirmation.
Step 4: Refund on the device
Refund with Refund a POS sale. The refund runs on the device in payment.pos_id:
curl -X PUT https://sandbox.payme.io/api/sales/SALE1700-000000AA-EXAMPLE1-SALE0001 \
  -H 'Content-Type: application/json' \
  -d '{
    "seller_payme_id": "MPLDEMO-MPLDEMO-MPLDEMO-1234567",
    "payment": {
      "method": "pos",
      "action": "refund",
      "pos_id": "001"
    },
    "language": "en"
  }'
- Always send
payment.action: refund. Without it, this call pays the sale instead of refunding it. - Leave out
payment.amountto refund everything that can still be refunded, or send a smaller amount, in minor units, for a partial refund. - The result comes back in the same response:
payme_sale_statusisrefunded, orpartial-refund. PayMe also sends arefundcallback.
Step 5: Transmit the day's transactions
The device's transactions are deposited when they are transmitted. pos/transmit runs this transmission now, for example at the end of the business day, and returns its report. Ask PayMe Partners whether the seller's devices also transmit on their own.
curl -X POST https://sandbox.payme.io/api/pos/transmit \
  -H 'Content-Type: application/json' \
  -d '{
    "payme_client_key": "payme_partner_key",
    "seller_payme_id": "MPLDEMO-MPLDEMO-MPLDEMO-1234567",
    "pos_id": "001",
    "terminal_id": "YOUR_TERMINAL_ID"
  }'
{
  "status_code": 0,
  "session": "FhT3aXe7",
  "acknowledge_number": "000123",
  "report": "Transmission report text"
}
| Field | Type | Description |
|---|---|---|
acknowledge_number |
string | The acknowledgment number of the transmission. Empty if the device service returned none. |
report |
string | The transmission report (Z report), as text from the device service. Empty if it returned none. |
Call it only for a paired device. A refused transmission returns status_code 1 with 20002, as in Step 2.
Errors
| Code | HTTP | Calls | Meaning | What to do |
|---|---|---|---|---|
1 |
500 | All | A required field is missing. status_additional_info names it. |
Add the field. |
720 |
400 | All | The POS service isn't active for the seller. | Order the devices (Step 1). |
26014 |
400 | All | pos_id is missing, or no device in the seller's order has it. |
Send the pos_id from the order. |
26017 |
400 | Authenticate, payment, refund | The device hasn't been paired. | Pair it. |
26018 |
400 | Payment, refund | The device is paired but not authenticated, for example after it was paired again. | Authenticate it. |
26020 |
400 | Payment | The device didn't answer in time. PayMe is still checking the payment. | Wait for the sale callback. Don't send the payment again. |
20002 |
200, status_code 1 |
Pair, authenticate, transmit | The device service refused the request or couldn't be reached. | Check the IDs and the code, then try again. |
10 |
500 | Authenticate | verification_code isn't a number. |
Send 6 digits. |
999 |
500 | Authenticate | verification_code isn't exactly 6 digits. |
Send 6 digits, as a string. |
| A decline code | 200, status_code 1 |
Payment | The payment was declined or canceled on the device. | Show the reason; send a new payment to try again. |
Credential errors, such as 200 (unknown partner key) and 251 (unknown seller key), are on Errors.